You are viewing an old version of this page. View the current version.
Compare with Current
View Page History
« Previous
Version 14
Next »
This is a step-by-step procedure to use the Nordson Robot in B33 to deposit SE4445 in the star pattern. This page supersedes the content at Building 33 - Setting up for gluing in the lab.
Step-by-step guide
Turn dry-air valve counterclockwise ¼ turn.
There should be a hissing noise from the air flow.
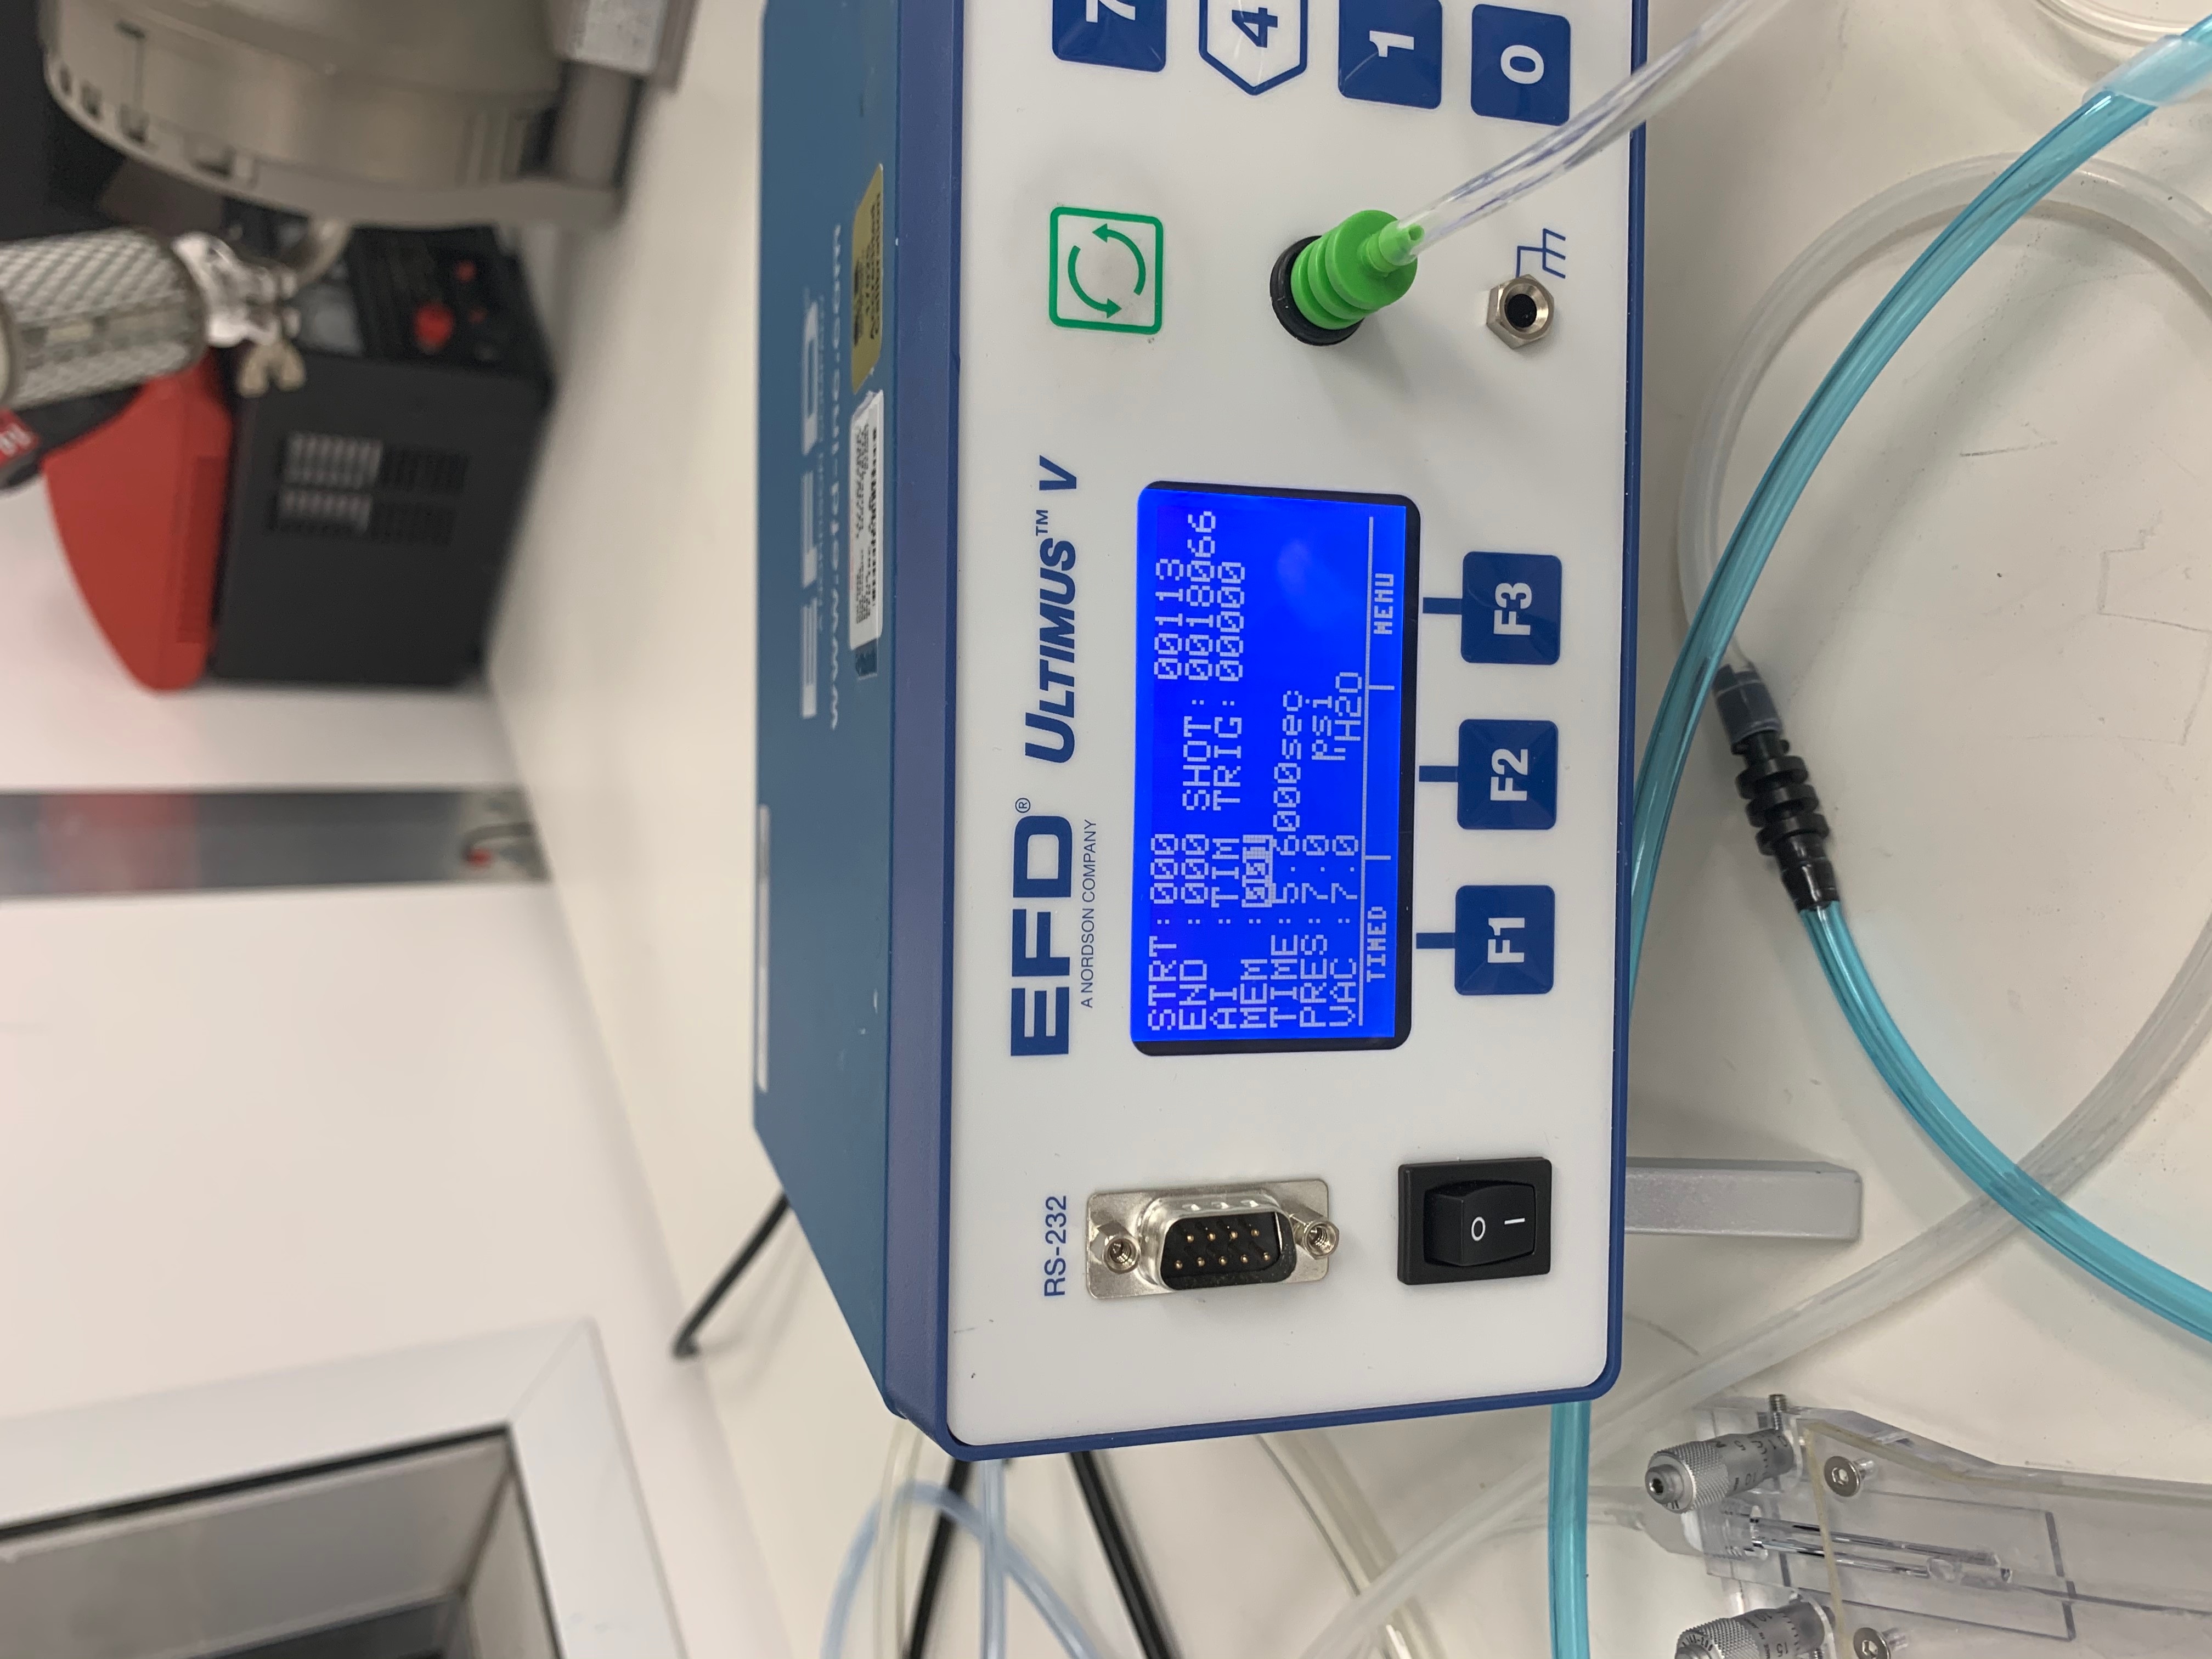
Turn EFD on
The screen will display a default menu.
The settings for SE4445 are preset 001 and make sure it is set on "steady".
- Turn on glue robot.
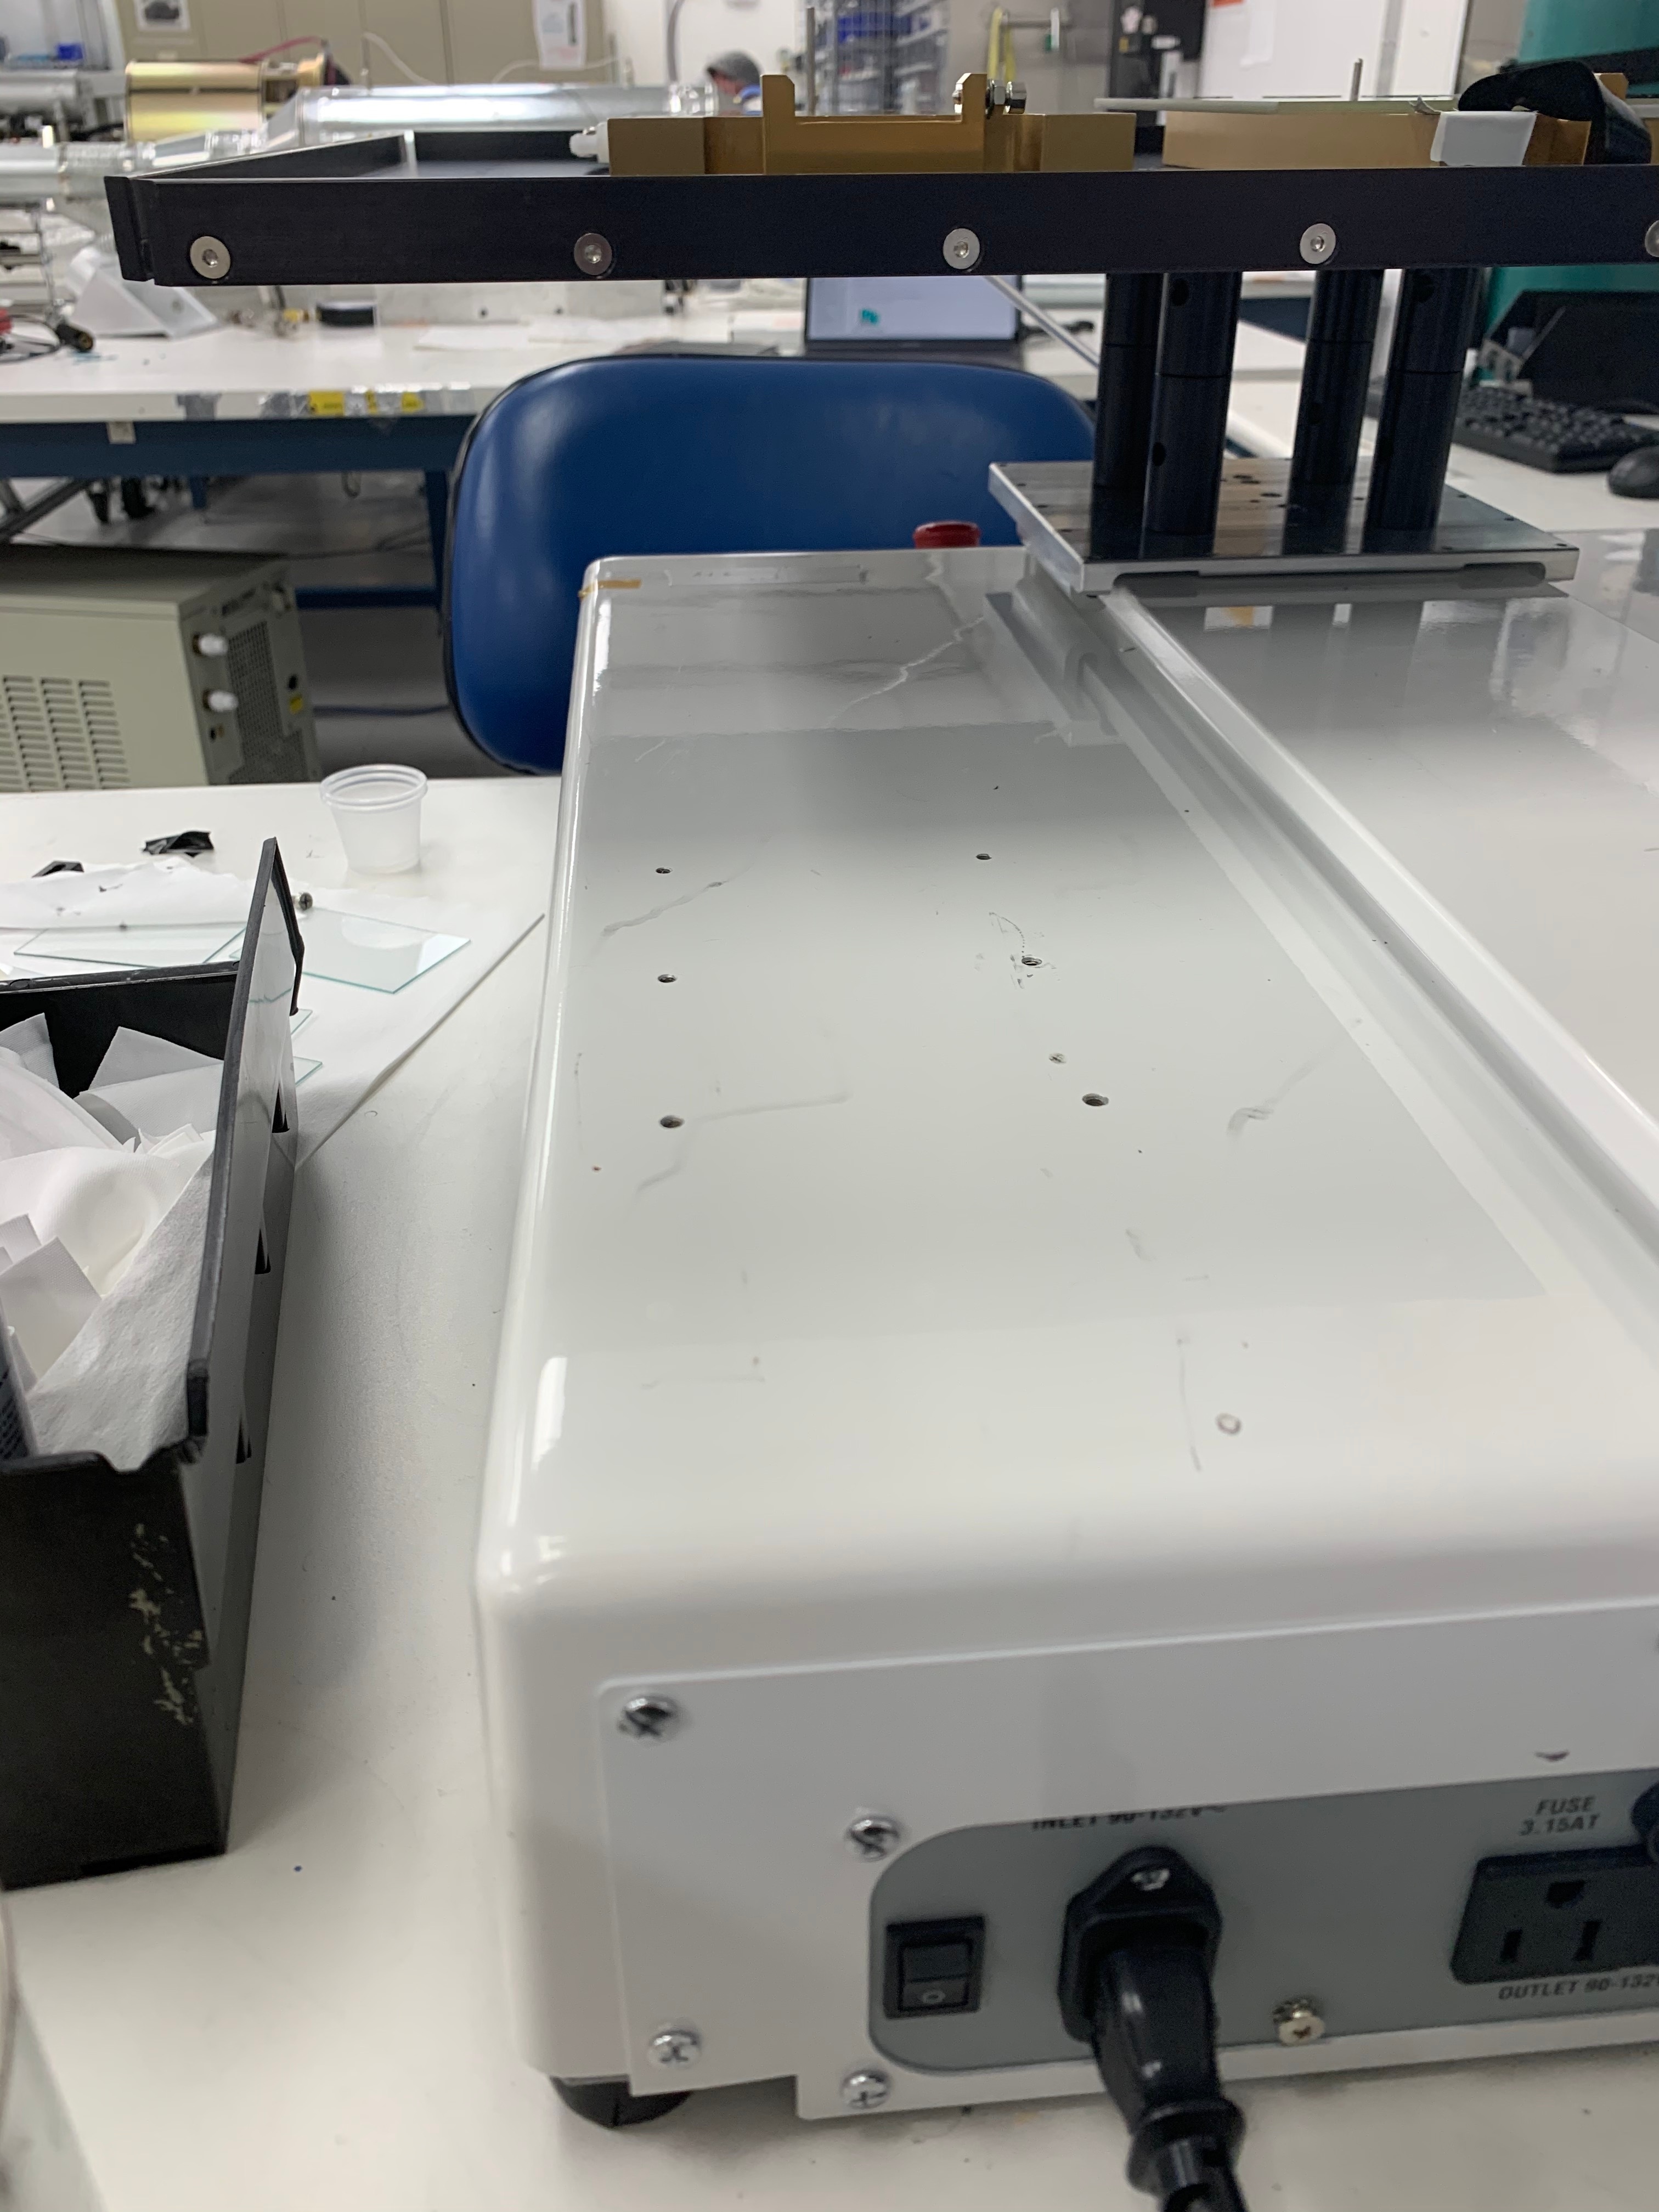
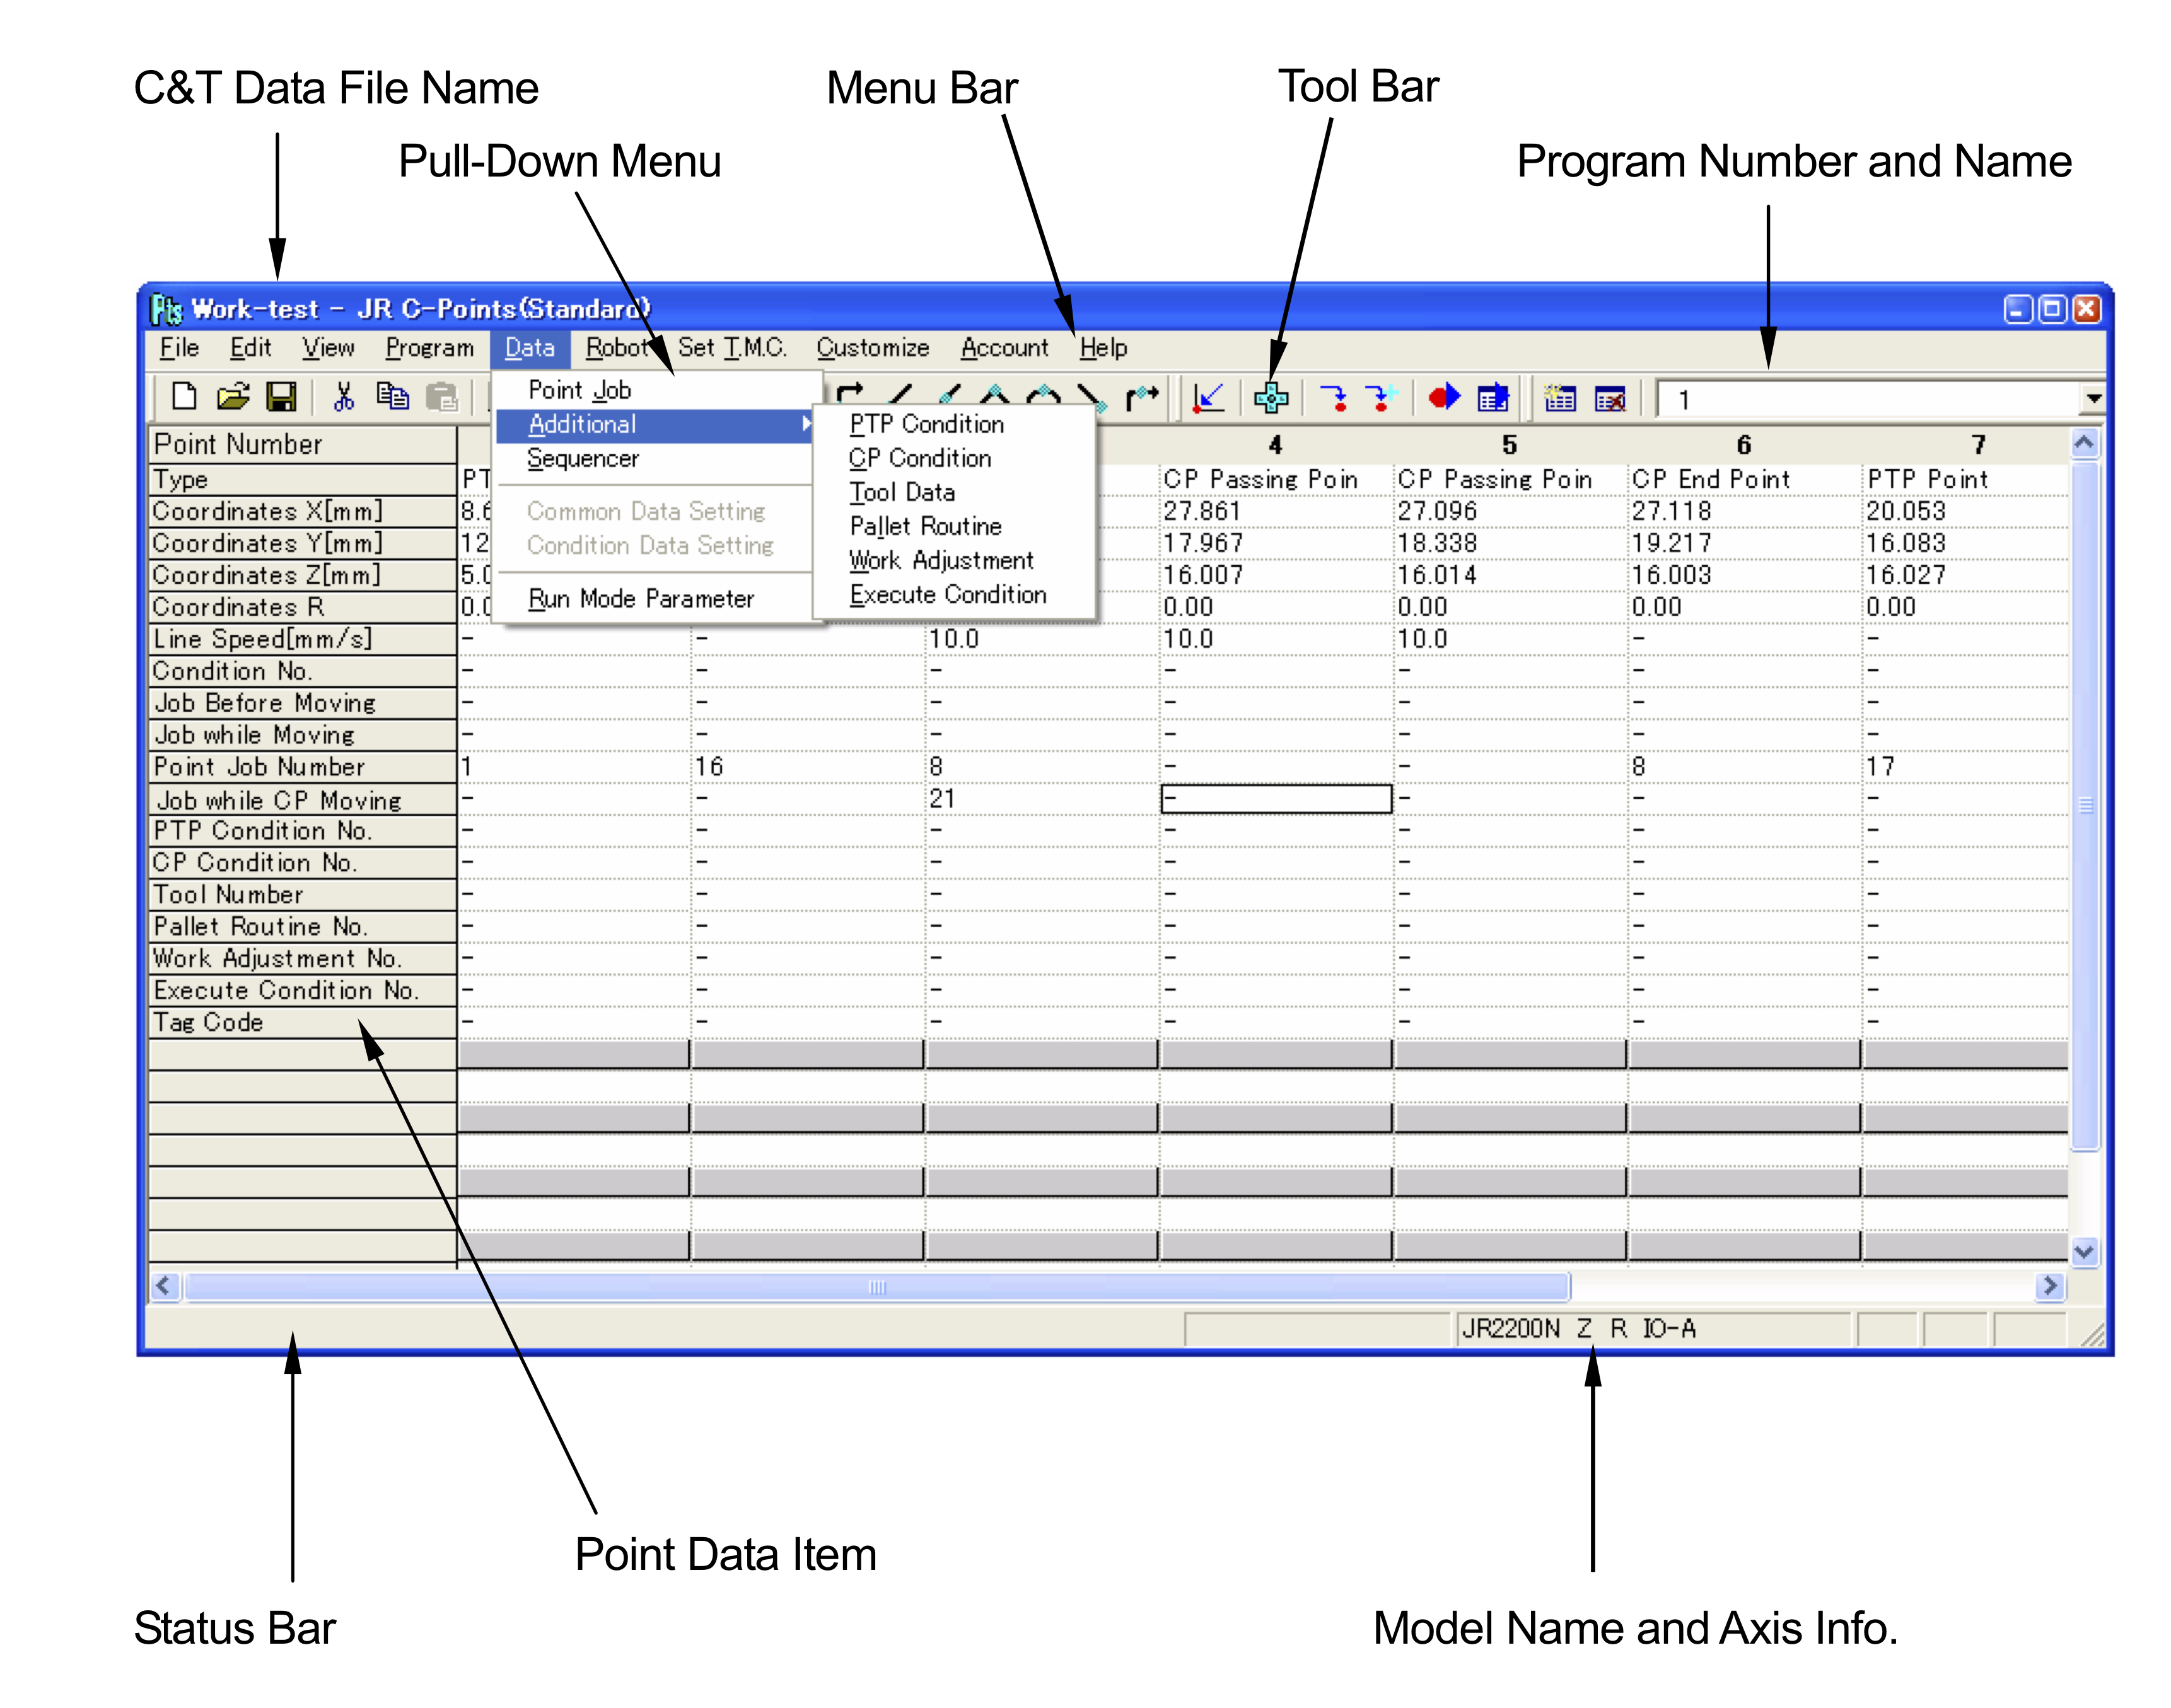
The Itk account on the PC has the Janome Points software installed to control the robot.
- Click on the desktop icon JR C-Points to start the program

- If a window is shown - please select the following options to initialize the program :
- JR2500-N bullet
- z-axis control
- R-axis control (not ticked!)
- IO-A (not ticked)
Open the file Neha_2020Feb3_InnerRingx3.cpd it should be the most recent file select the program #
Initialize the robot with Meca Initialize:
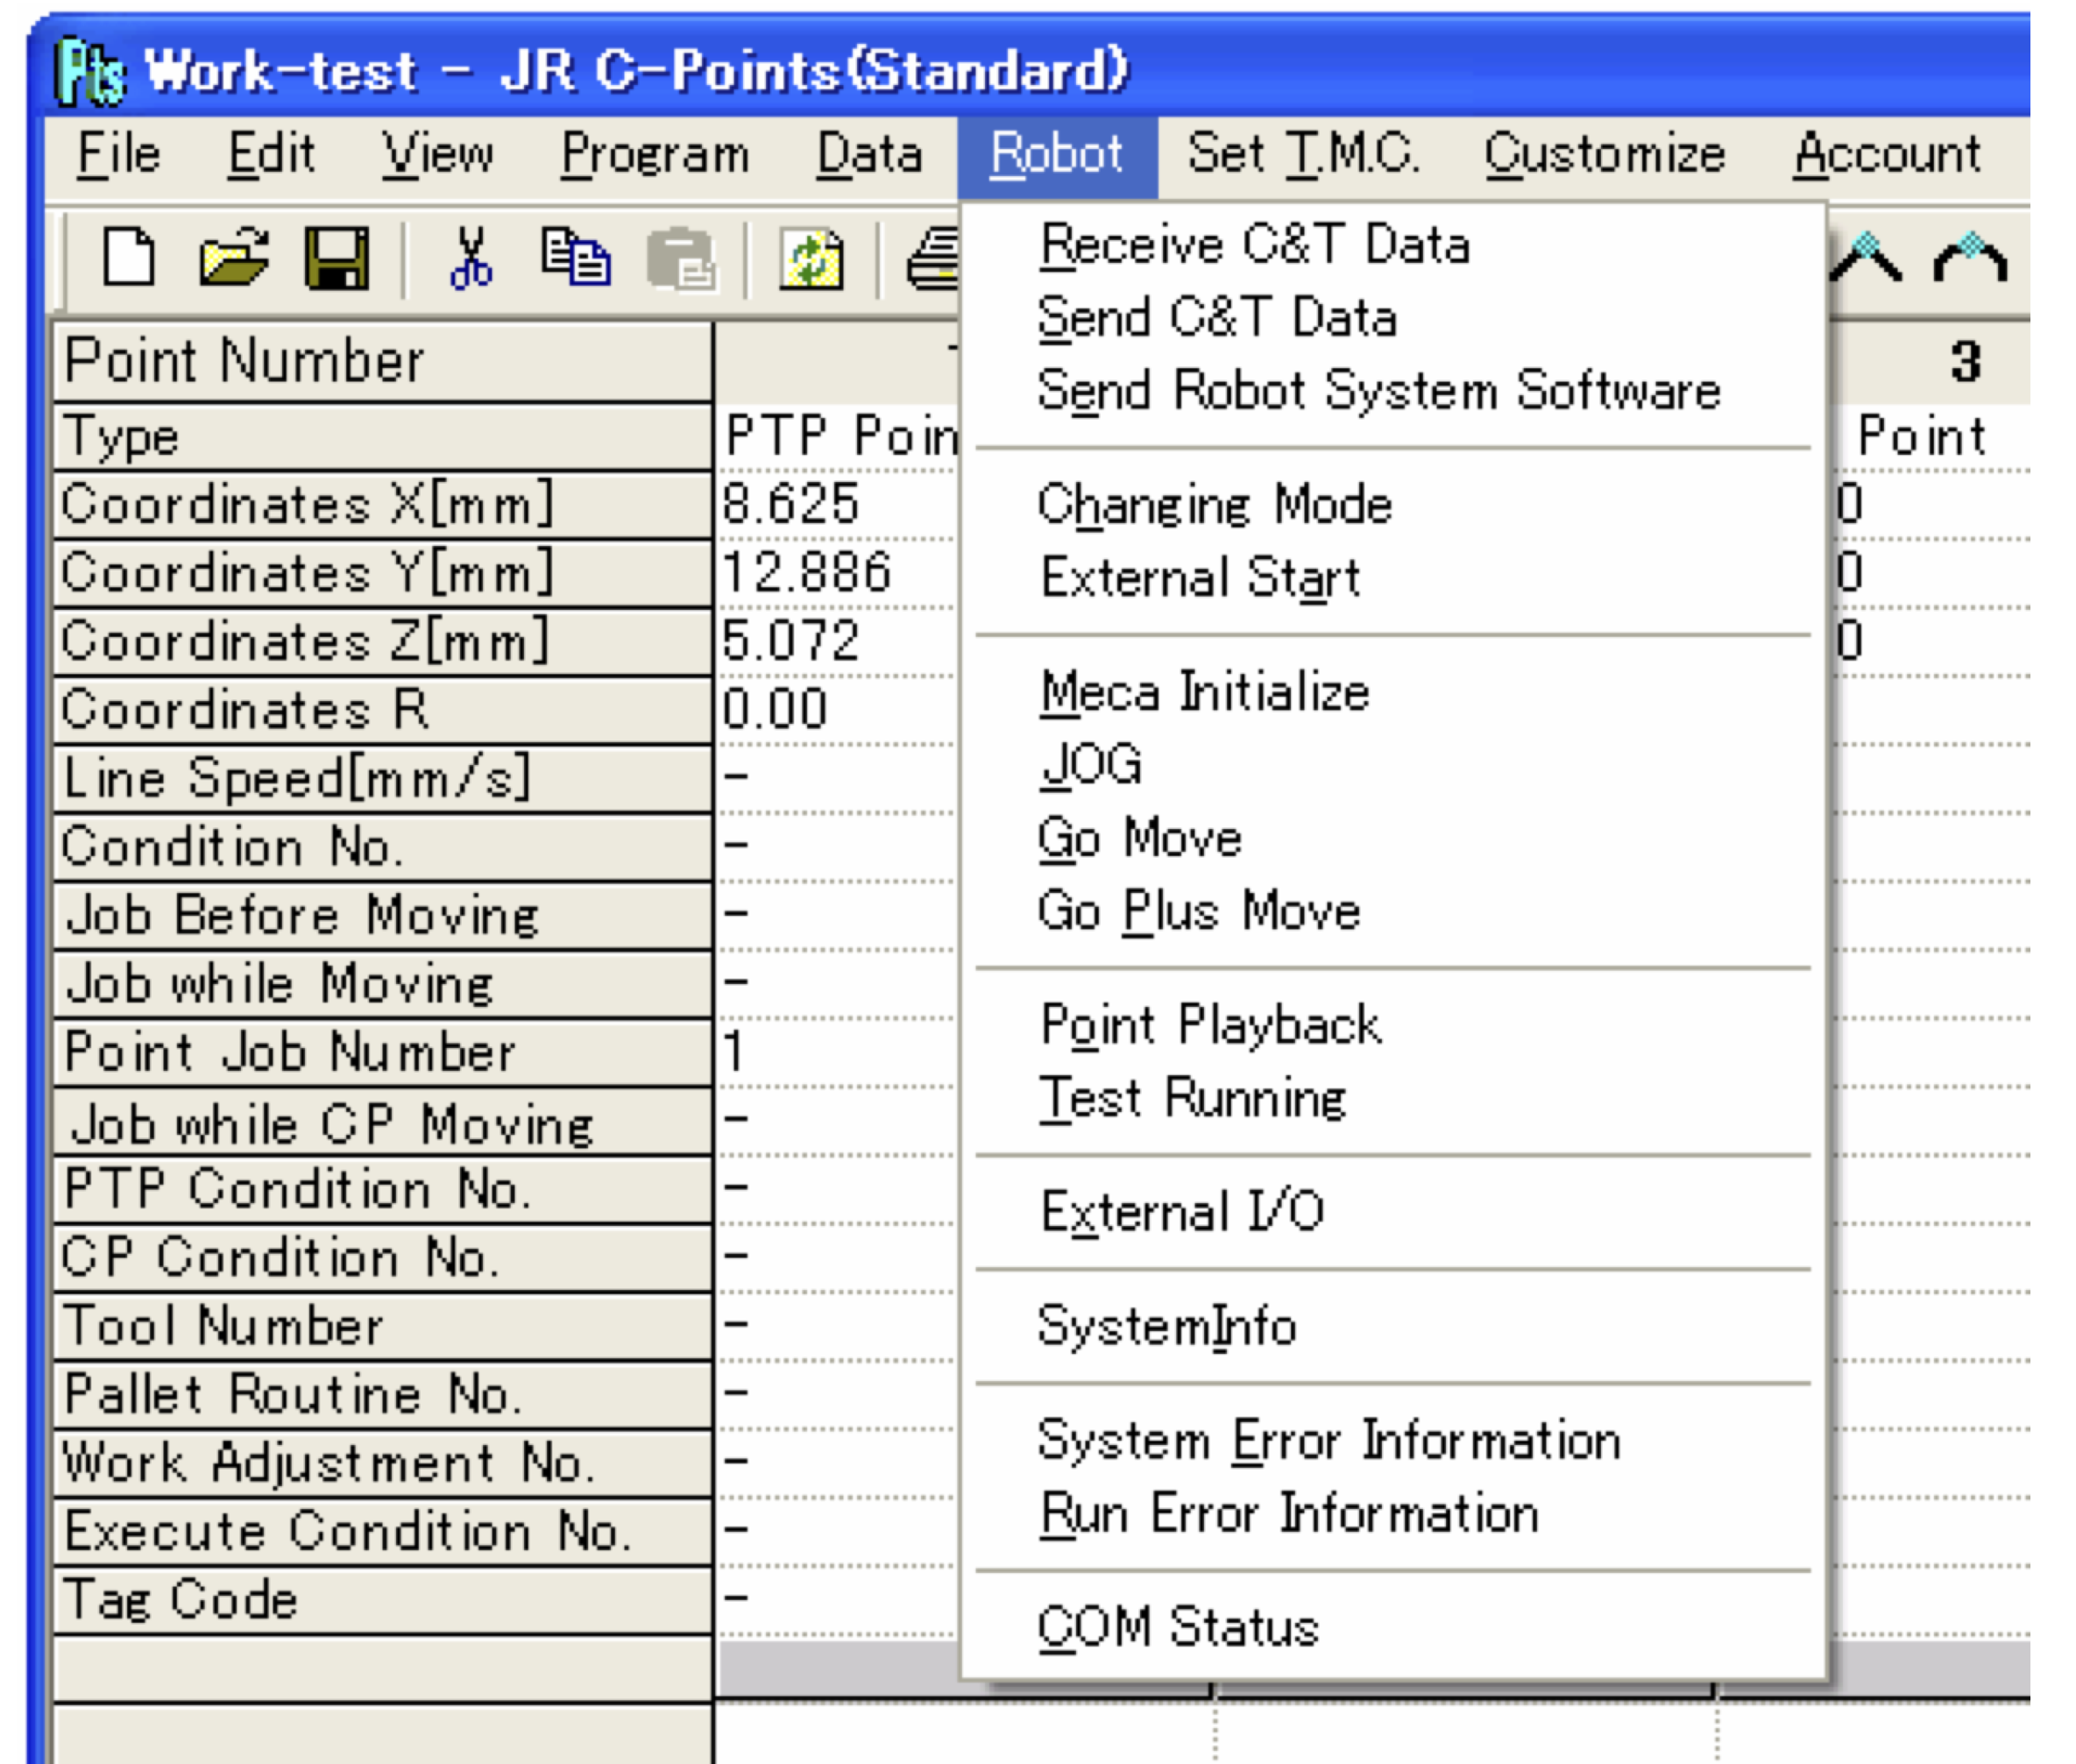
To execute the program hit Send C&T data from the Robot menu.
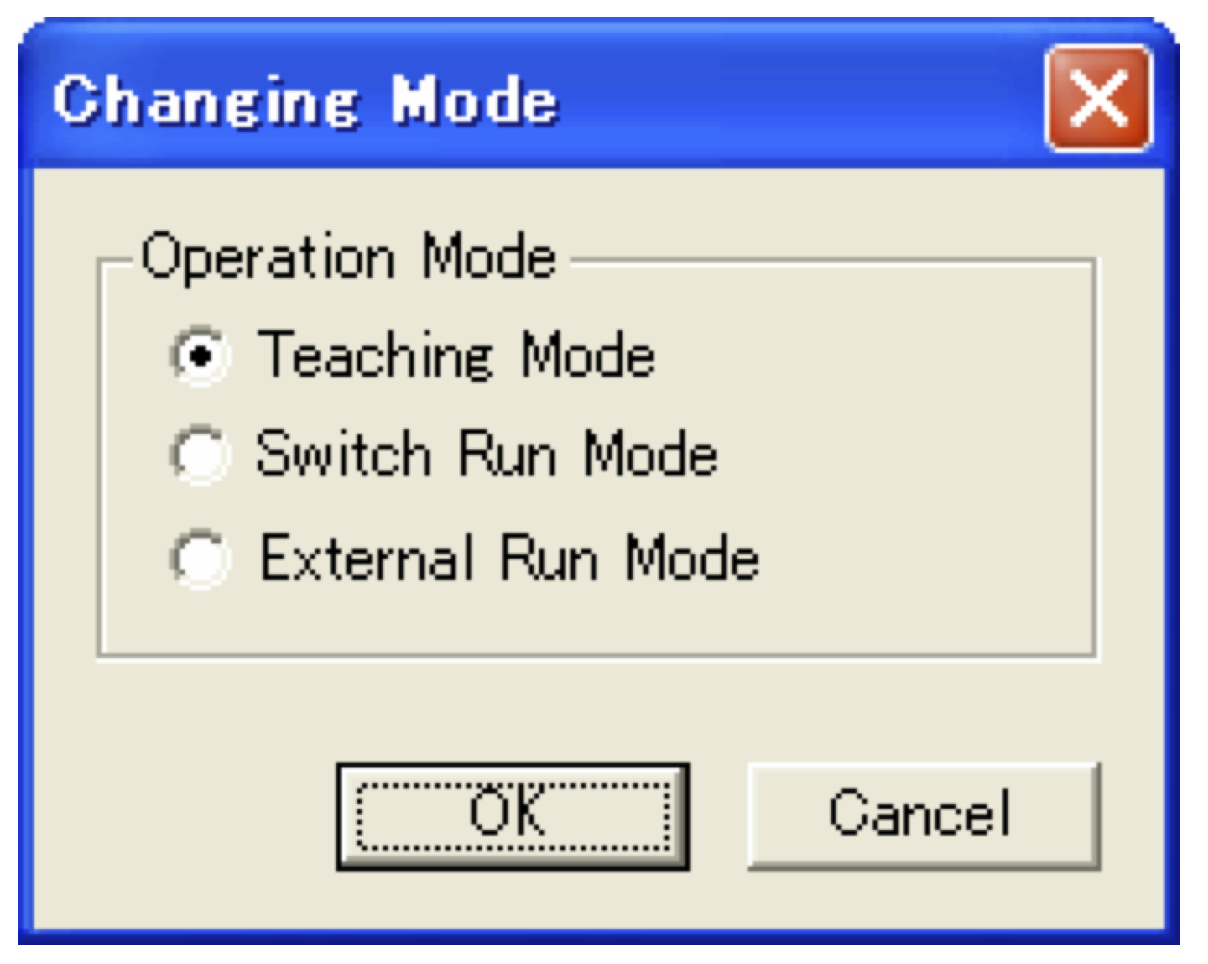
Select Switch Run Mode in the Changing Mode window from the Robot menu.
Select the program # to execute from the Robot command buttons. It will be displayed on the LED.
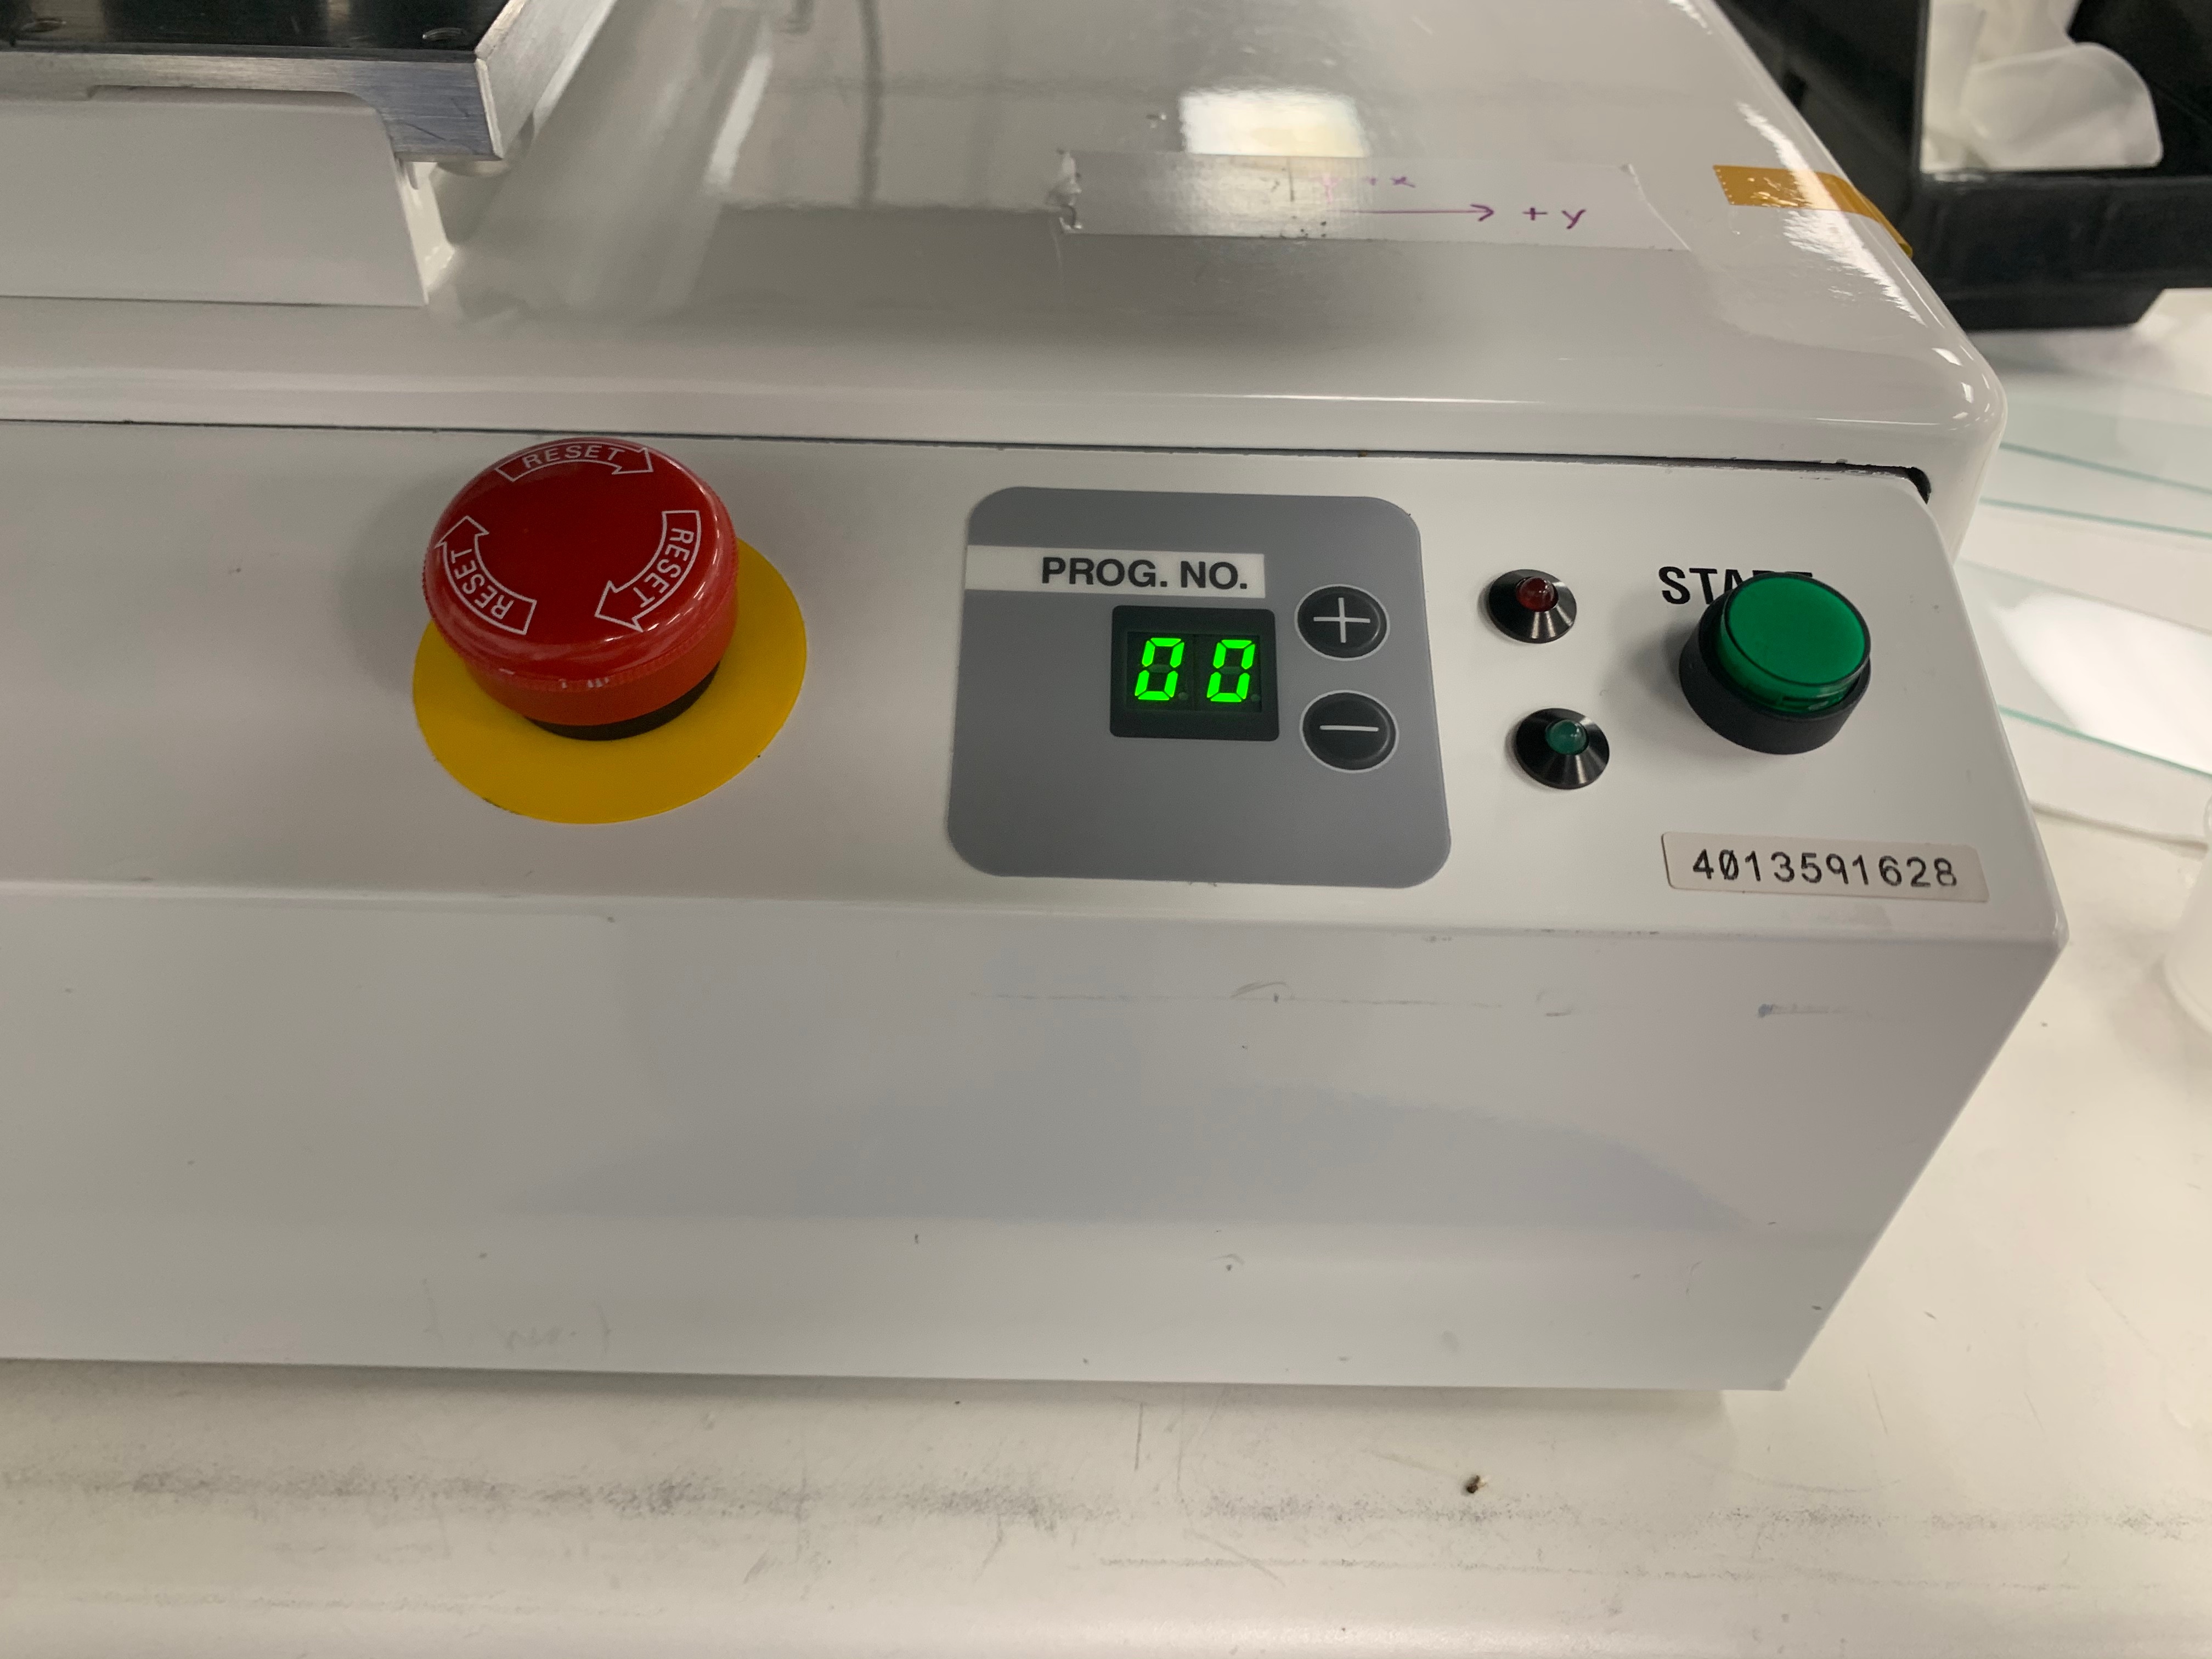
Push the green start button.
- To repeat :
- switch to
Teaching mode in the Changing Mode window from the Robot menu. - made the proper changes to the program
- restart from #9
- To terminate - before you leave the station:
- Bring the robot back in the original position with
Meca Initialize - Shut down the robot
- Shut down the EFT
- Turn off the valve
- Terminate the program
- Shut down the screen only of the PC
Related articles
Glue deposition procedure
Program file name: Rachel_Hannah_StarAtArbAngle_CarbonFiberEdition
A single JRC program file may contain many programs. A complete glue deposition program contains program data and a point data array specifying where to take actions. The actions themselves are encoded in point jobs. The confluence page Building 33: Programming and using the glue robot breaks down some key concepts. Further information is in the JR-C manuals, linked for download at {gotta upload them}
Program list & purposes
Program #1: Height touchdown calibration
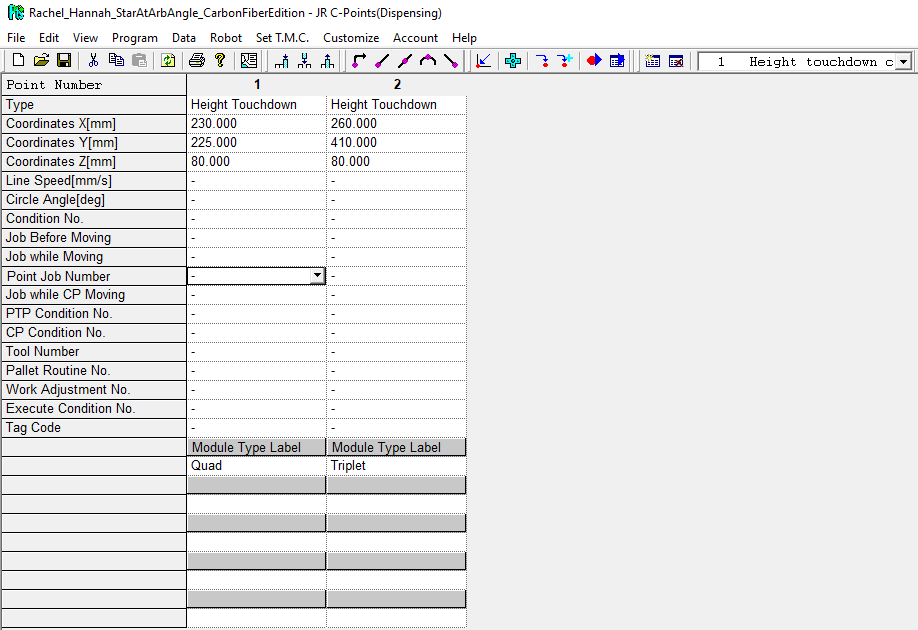
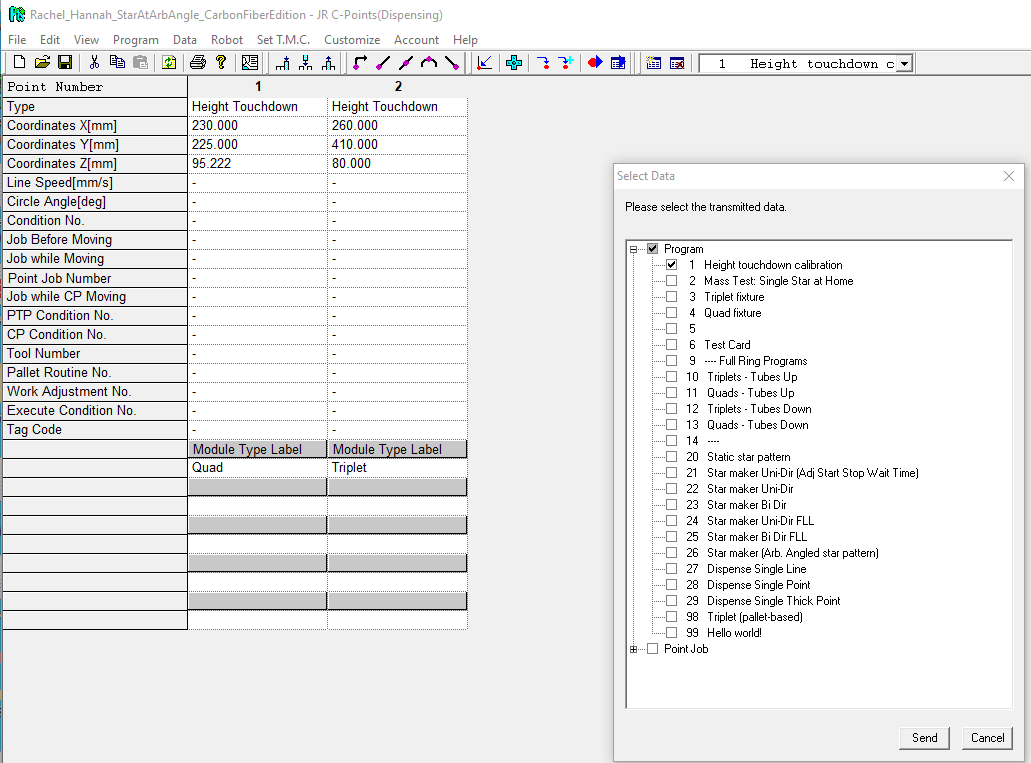
| View when opening program - The point data array has two "Height touchdown" point type entries.
- Height touchdown is a custom point type, allowing us to set additional variables at the point data array level.
- Custom point types can also have base point jobs associated with them. Always check the custom point type information to learn how they work.
- Height touchdown carries a single additional variable, "Module Tybe Label." The type label signifies whether the touchdown point is for the quads or triplets baseplate.
- This particular program is kind of special – we intend to use it only in the Jog Panel.
- You must be in Teaching Mode.
- Our objective is to store the Z coordinate when the syringe tip is in contact with the mounting baseplate.
- We calculate the dispensing height based on this touchdown height.
- For the dispensing height calculation, see the Before Job ("BJob") for custom point type "DispensingStars" and Point Job #2, "Use Touchdown Z."
- DispensingStars is the custom point type definition also known as "Call Star Patterns"
|
|---|
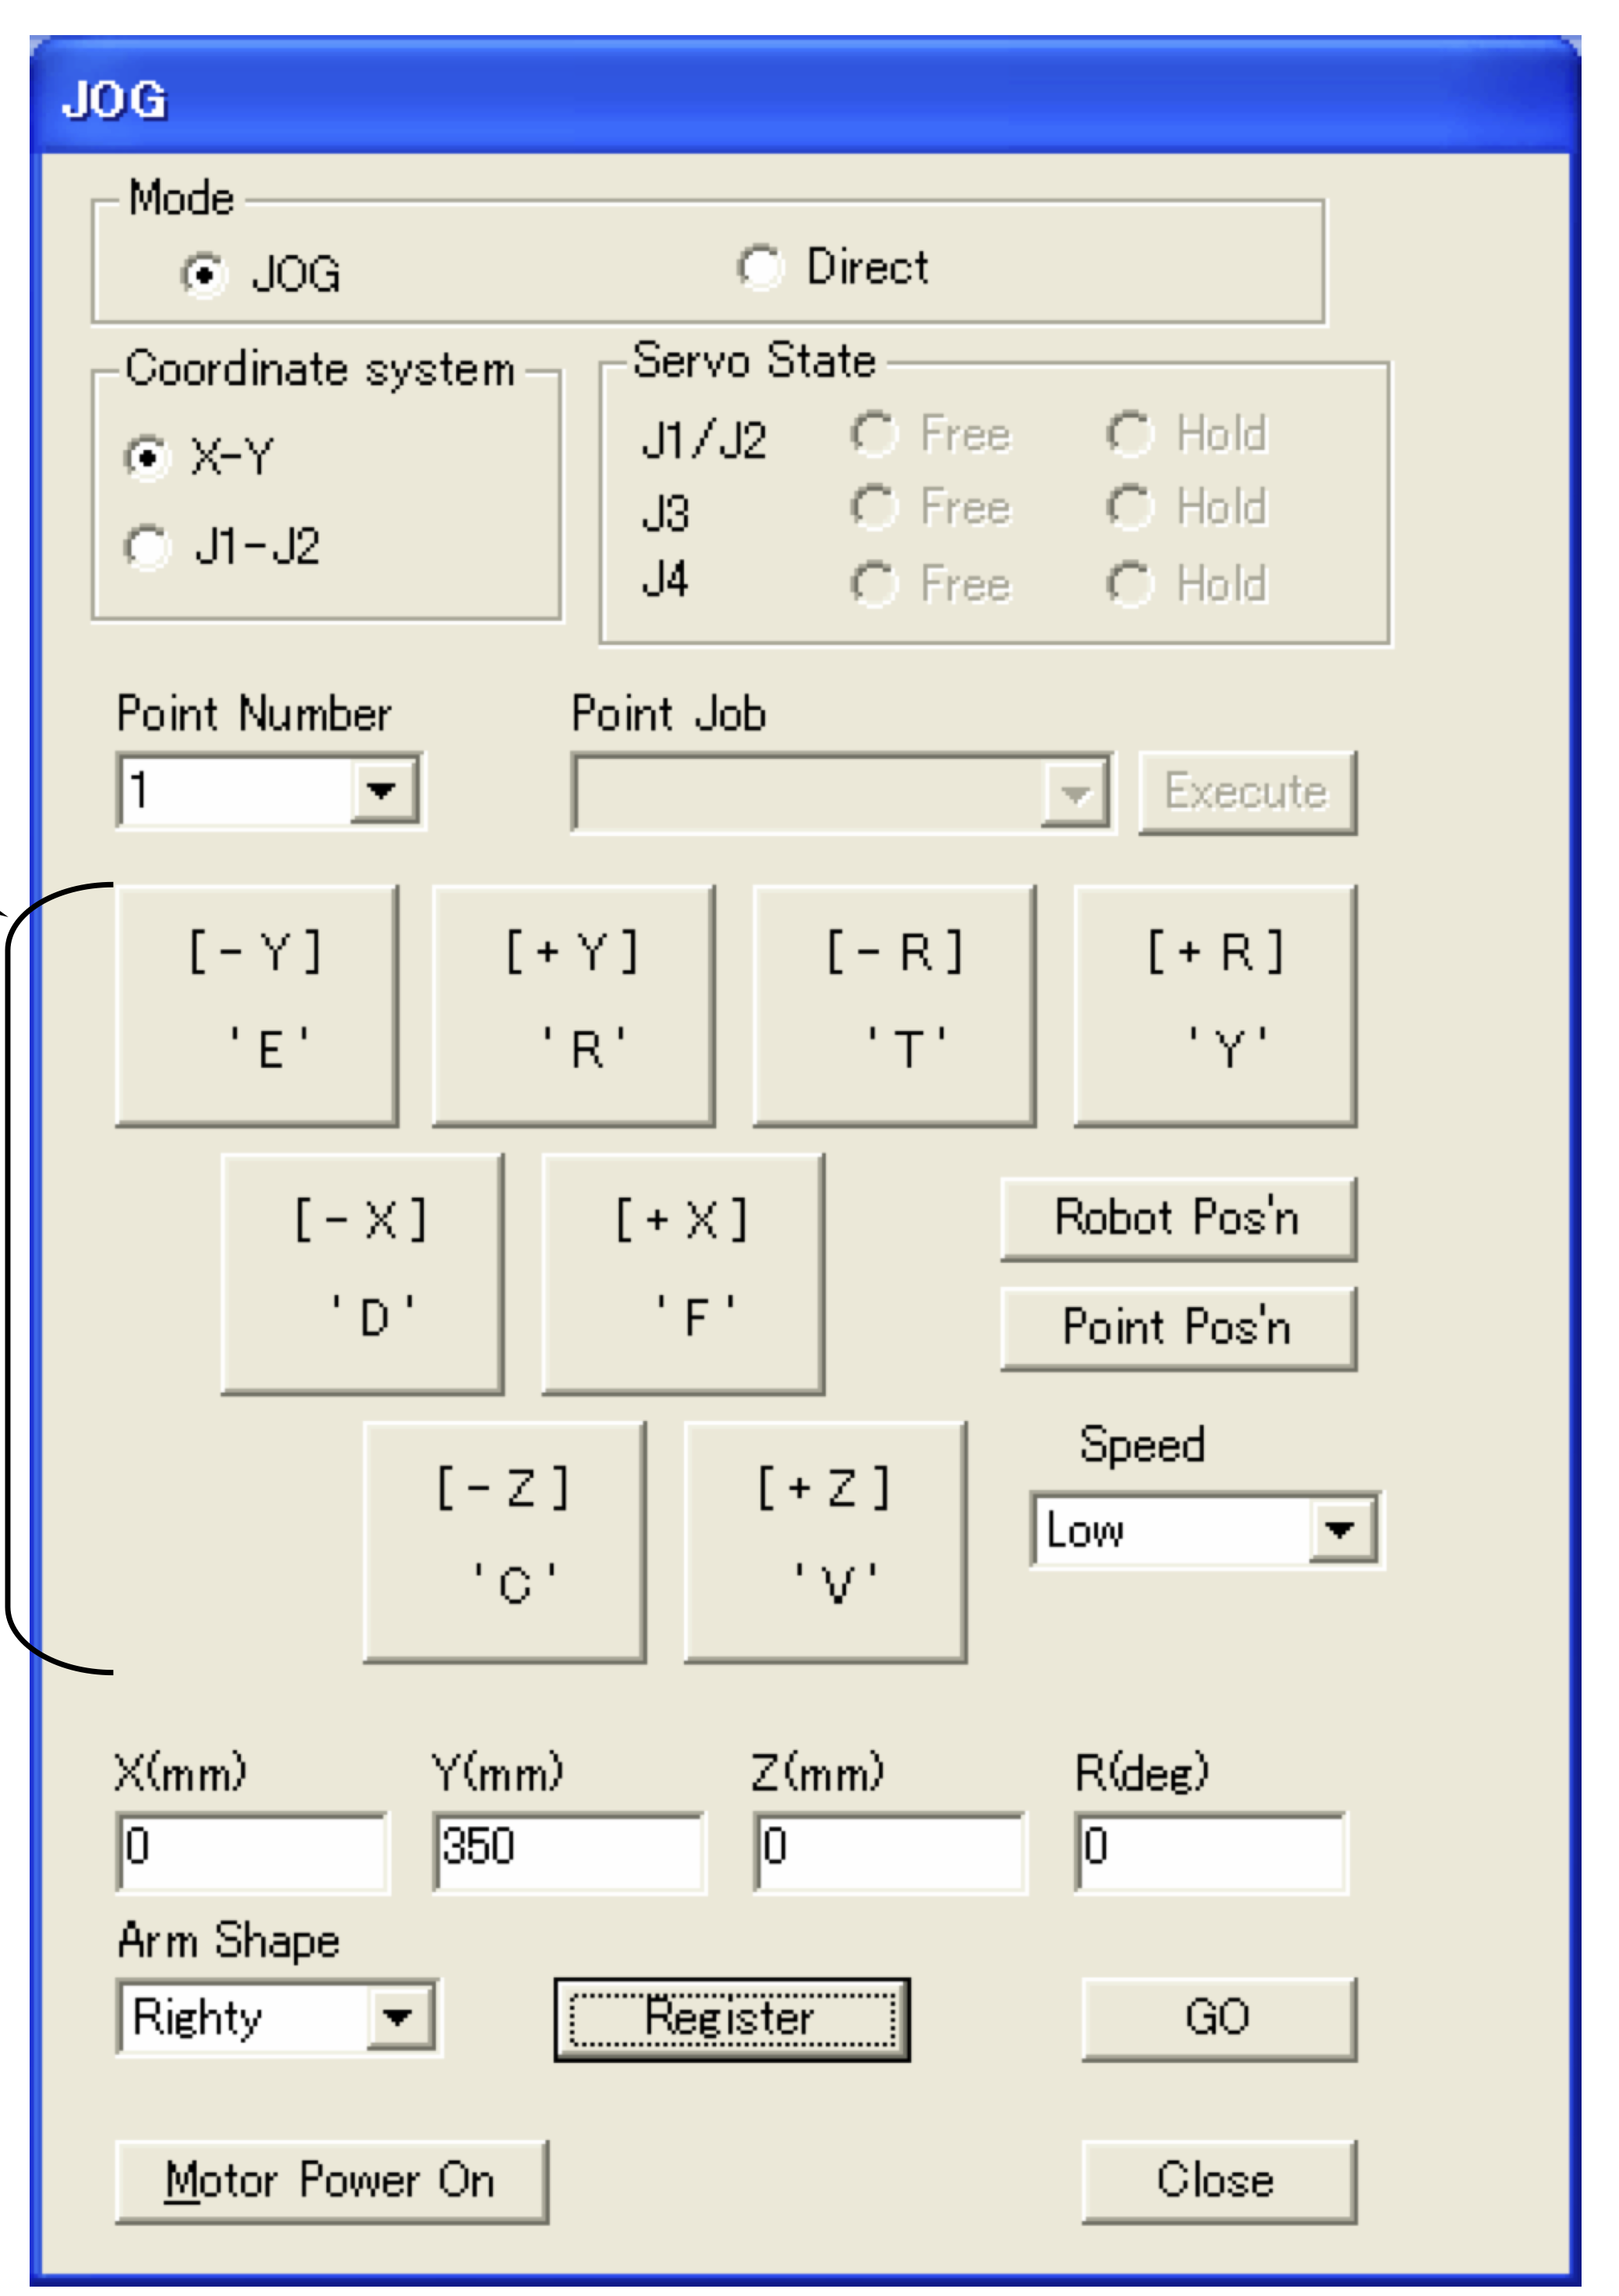
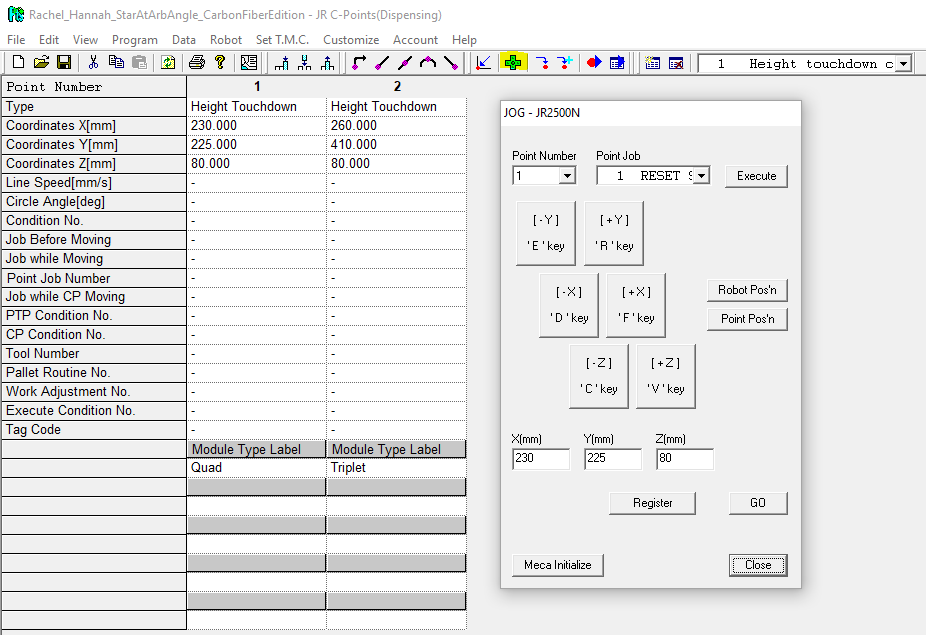 | Use the Jog Panel to descend in Z (Jog panel icon on menu bar highlighted in yellow) - Select the relevant point number from the drop down menu in the Jog Panel.
- You actually only need to the height touchdown for the quad. We extracted the height difference between the quad and triplet temporary baseplates using a height gauge mounted on the XYZ robot arm. We account for this 14 mil difference in the dispensing height calculation.
- Hit "Go" to send the robot directly to the XYZ coordinates entered in the point number of Program #1's point data array.
- Note that if you start with a higher Z value in the point data array entry, you will be closer to the baseplate surface at the end of this step. Be mindful that you do not collide with the surface.
- Use the (-Z) and (+Z) buttons to approach the touchdown point carefully.
- You can use C and V on the keyboard if you prefer, as noted in the Jog Panel.
- Touchdown: The syringe tip makes contact with the surface of the loading baseplate. At this point, secure/tighten the syringe in its holder. The syringe is ready!
|
|---|
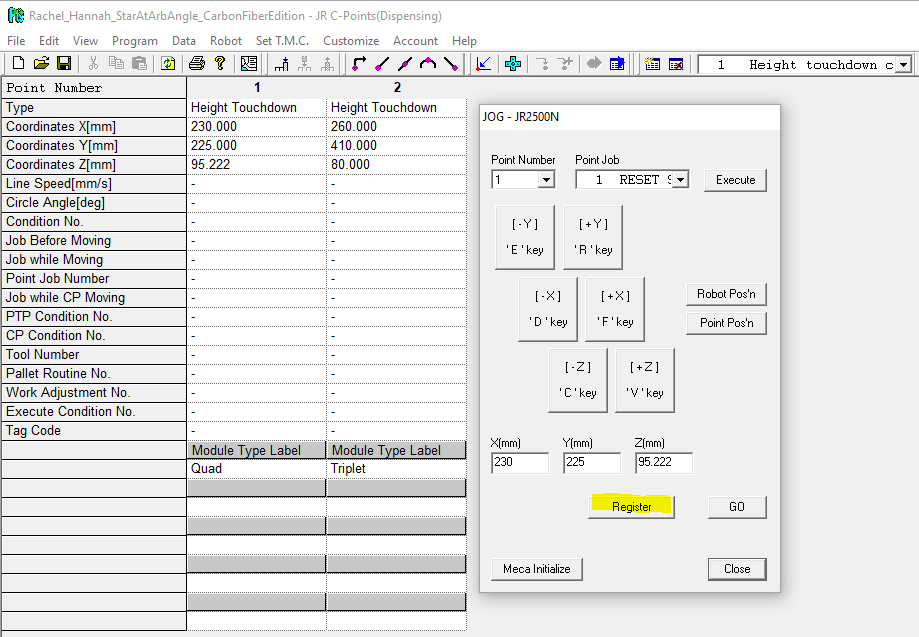 | When touched-down at desired Z and the syringe is secure, "register" your coordinates to Point Number 1 (Quad position). - "Register" is highlighted in yellow.
- Once you've updated your coordinates using "register," exit the Jog Panel with "close."
- Program #1 now holds the height at which your syringe contacts the baseplate surface!
|
|---|
| Segment-send Program #1 Height touchdown calibration to teach the calibrated Z coordinate to the robot - You must be in Teaching Mode.
- Robot > Send C&T data > Segment send
- Brings up the "Select data" menu.
- Checkmark Program #1.
- Hit "Send."
- "Call Star Pattern"-based programs will automatically calculate their dispensing height based on the Z coordinate in Program #1, Point Data Array Entry #1 (aka, the Quads module type label entry).
- You can bypass this at any time by selecting "No" for the "Use Touchdown Z calibration?" option on "Call Star Patterns" point data array data points.
|
|---|
Program #2 Mass Test: Single Star at Home
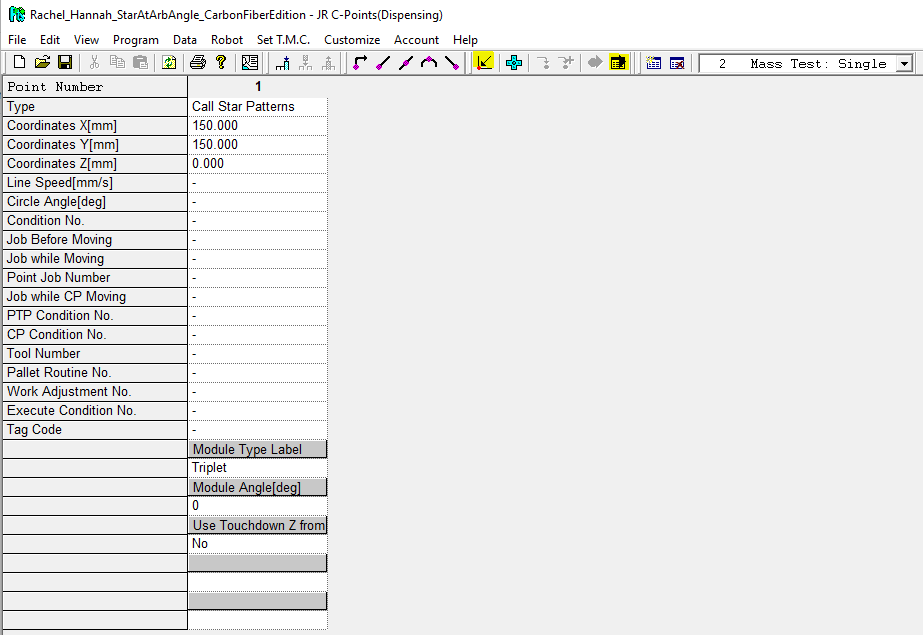
| Program #2 contains a single entry in its point data array, with custom point type "Call Star Patterns." The purpose of this program is to dispense the star pattern's glue into a test cup so we can weigh it and estimate how much glue is dispensed while mounting modules. - The X and Y coordinates must each be greater than 7.5 mm, or the robot will attempt to travel to a position outside its operational range.
- When "Module Type Label" is set to "Triplet," this program will dispense a single star pattern at the XYZ position specified in the point data array.
- The user may exchange "triplet" for "quad." Doing so will dispense four star patterns. Please ensure that the X and Y coordinates exceed 20 mm each to keep the robot in range.
- Module angle can be any value - it is irrelevant here.
- "Use Touchdown Z from Program 1?" should be marked "No" so that we have plenty of space for the test cup under the syringe tip.
You can always meca-initialize ("home") the robot and run the program using the yellow-highlighted menu bar buttons. |
|---|
Program #3: Test card
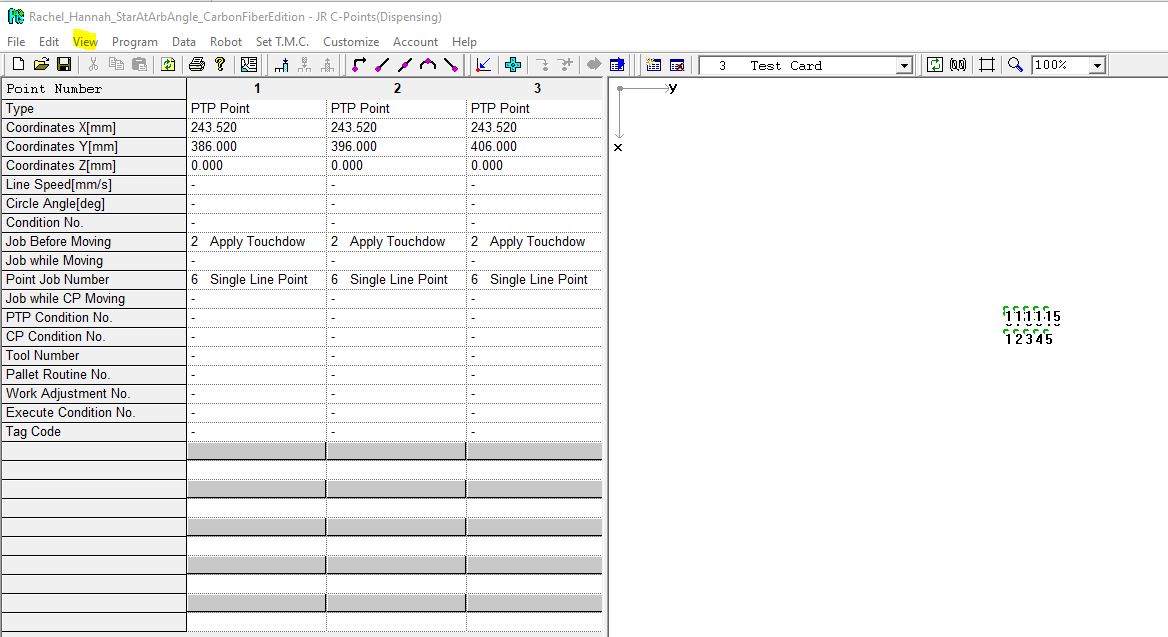
| Program #3: Test card dispenses a set of standardized lines and dots at the triplets temporary baseplate. The purpose of this program is to produce comparable test cards for every syringe we use, so that we can track our "Call Star Patterns" and "Star maker" parameter performance over time. You can access the visual representation of the point data array coordinates at any time using View (highlighted in yellow) > Visual display. |
|---|


