--Explain how we make height gauge measurements --
Table of Contents
Introduction
Height gauge measurements blah blah blah This page blah blah blah
Making height gauge measurements
Apparatus
lsdfk;jsadfk;fj
| |
|---|---|
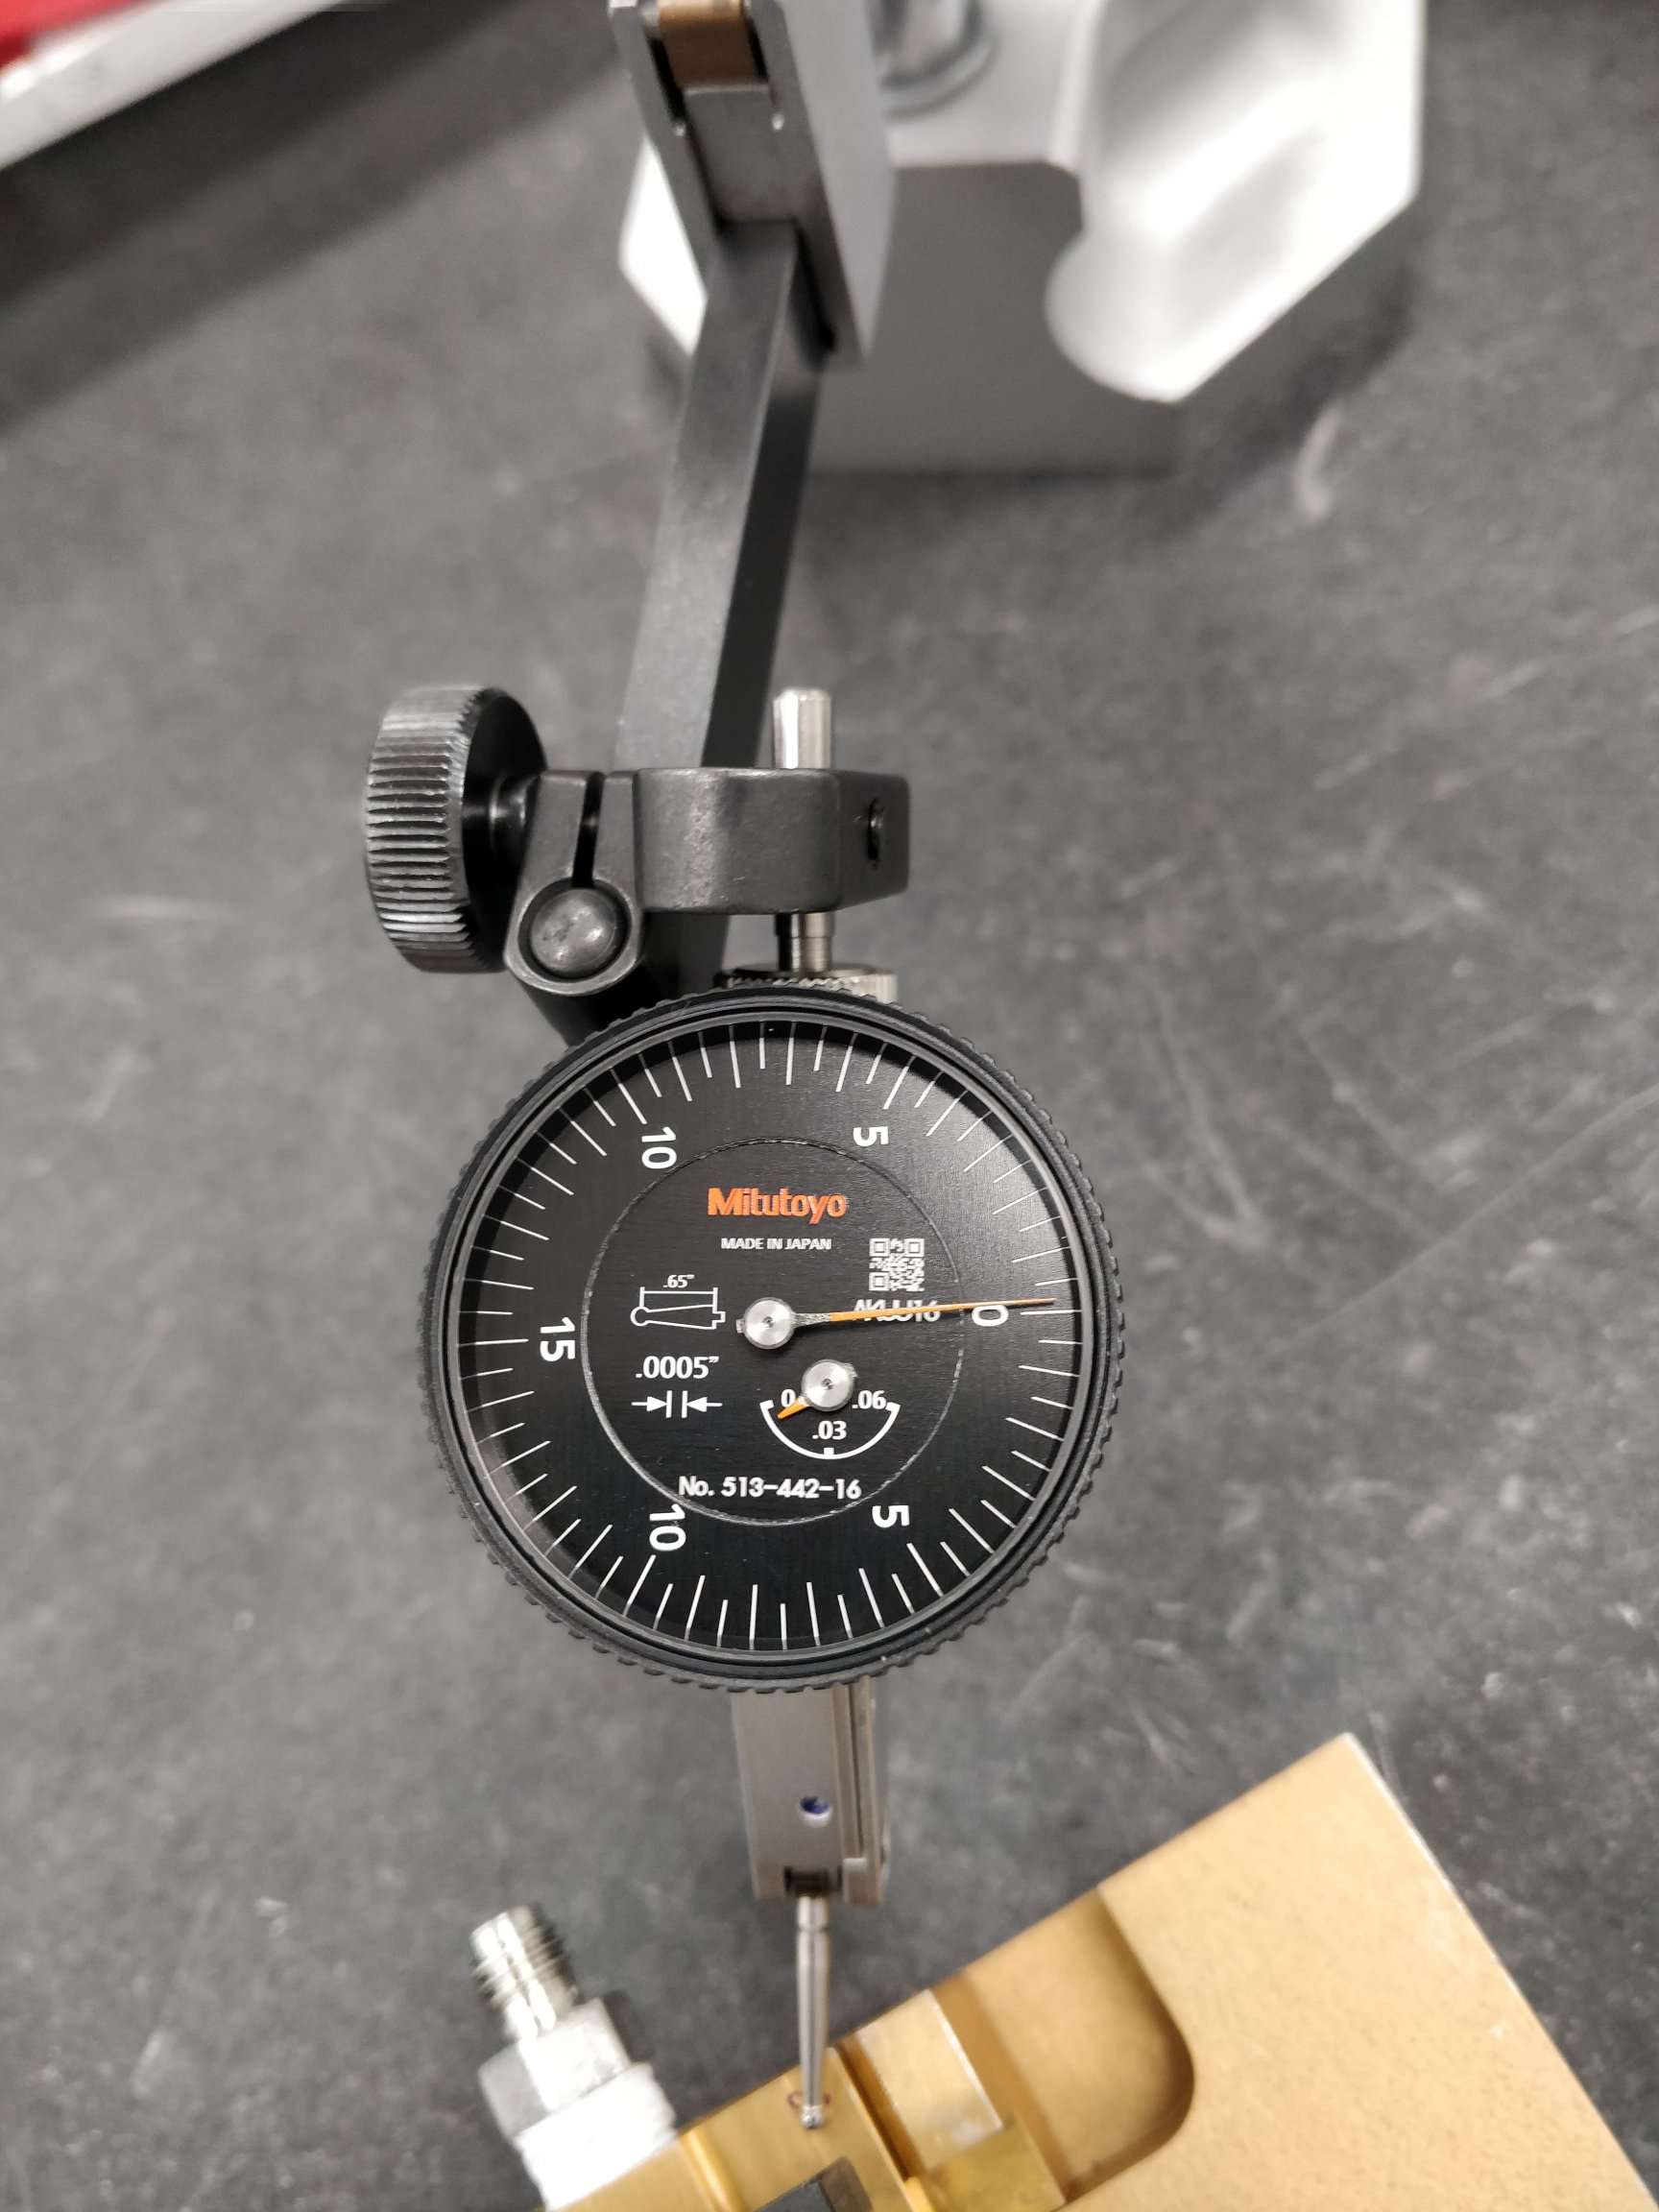
Dial gauge: Mitutoyo, No. 513-442-16 Range: 0-0.06 inches • Uncertainty: 0.0005 inches (0.5 mil) Remove the dial gauge from the height gauge arm when not in use. Pack it up carefully in its box and store it in the ATLAS cabinet in B33 large clean room. | Height gauge: Mitutoyo, Code No. 192-630 Range: 0-12 inches or 0-300 mm • Uncertainty: 0.005" This device uses a CR2032 battery. Remove the battery when not in use and store it with the dial gauge. |
| https://www.mitutoyo.com/wp-content/uploads/2017/01/Dial-Test-Indicators-web.pdf | https://www.msi-viking.com/Mitutoyo-192-630-10-Height-Gage-0-12300mm-Range_p_794.html |
Technique
Working with the height gauge has several critical ground rules:
- Always lift or shift the height gauge using its base;
- The work surface needs to be clean and flat:
- We're going to use it as a reference. The dial gauge is extremely sensitive, with a precision of 0.5 mils. Tilting the base of the height gauge will mess up the measurement, since the gauge assumes it is flat with respect to the thing it's measuring.
- The height gauge column also needs to be clean.
- Dust both gums up the height gauge, making the mechanical wheel of the digital gauge feel "crunchy" and hard to move, and disrupts the working surface's flatness.
- Keep cleaning regularly while taking measurements since dust accumulates over time.
- Try not to work in the first 6-12 inches of the granite table:
- This part of the table suffers most of the wear and tear.
- Do try to work in the same area of the table for all measurements.
- The dial gauge should be more horizontal than vertical with respect to the table surface.
- This particular kind of dial test gauge is meant to be used horizontally, so putting it in the horizontal will give you a much more reliable reading. Otherwise, the Cosine Effect will mess up the reading. Mitutoyo has a good description of this. The image also shows a good orientation for the dial gauge.
- The height gauge is considered "zeroed" when both the dial gauge and the digital gauge read 0.
- Remember to check the zero position regularly.
- Clean frequently!
|
|---|
| A good orientation for the dial gauge, showing how to mitigate the Cosine Effect |

Mitytoyo provides guidance on using height gauges and other measuring devices here.
- For height gauges, see pages 22 and following. Our stand is a "digimatic height gauge" according to their nomenclature with a test indicator attachment. Page 24 warns about the consequences of using the height gauge without a flat, clean surface. Keep cleaning!
- Page 32 describes the impact of the Cosine Effect on dial test indicators. The page includes comics illustrating why it's important to minimize the angle between the dial test indicator and its direction of use.
Procedure
- Zero the height gauge to the granite table surface.
- Measure the height of the screen protector surface.
- Zero the dial gauge; read the value on the digital gauge.
- Note that the screen protector edge is rounded, so collect the height measurement at least 0.3 mm away from the edge.
- Zero the height gauge again, so that the screen protector surface is the baseline for the measurement.
- Repeat the measurement of the screen protector surface: It should be zero this time.
- Measure points A-O (A-J) on the triplet (quad), following the markings in the images under the "Measurement positions" heading.