Table of Contents
Introduction
Height gauge measurements allow us to mechanically determine the height of an object with respect to a flat reference surface. Please contact Matt McCulloch to get trained for using the height gauge. This page serves as a reference.
Making height gauge measurements
Apparatus
|
|
|---|---|
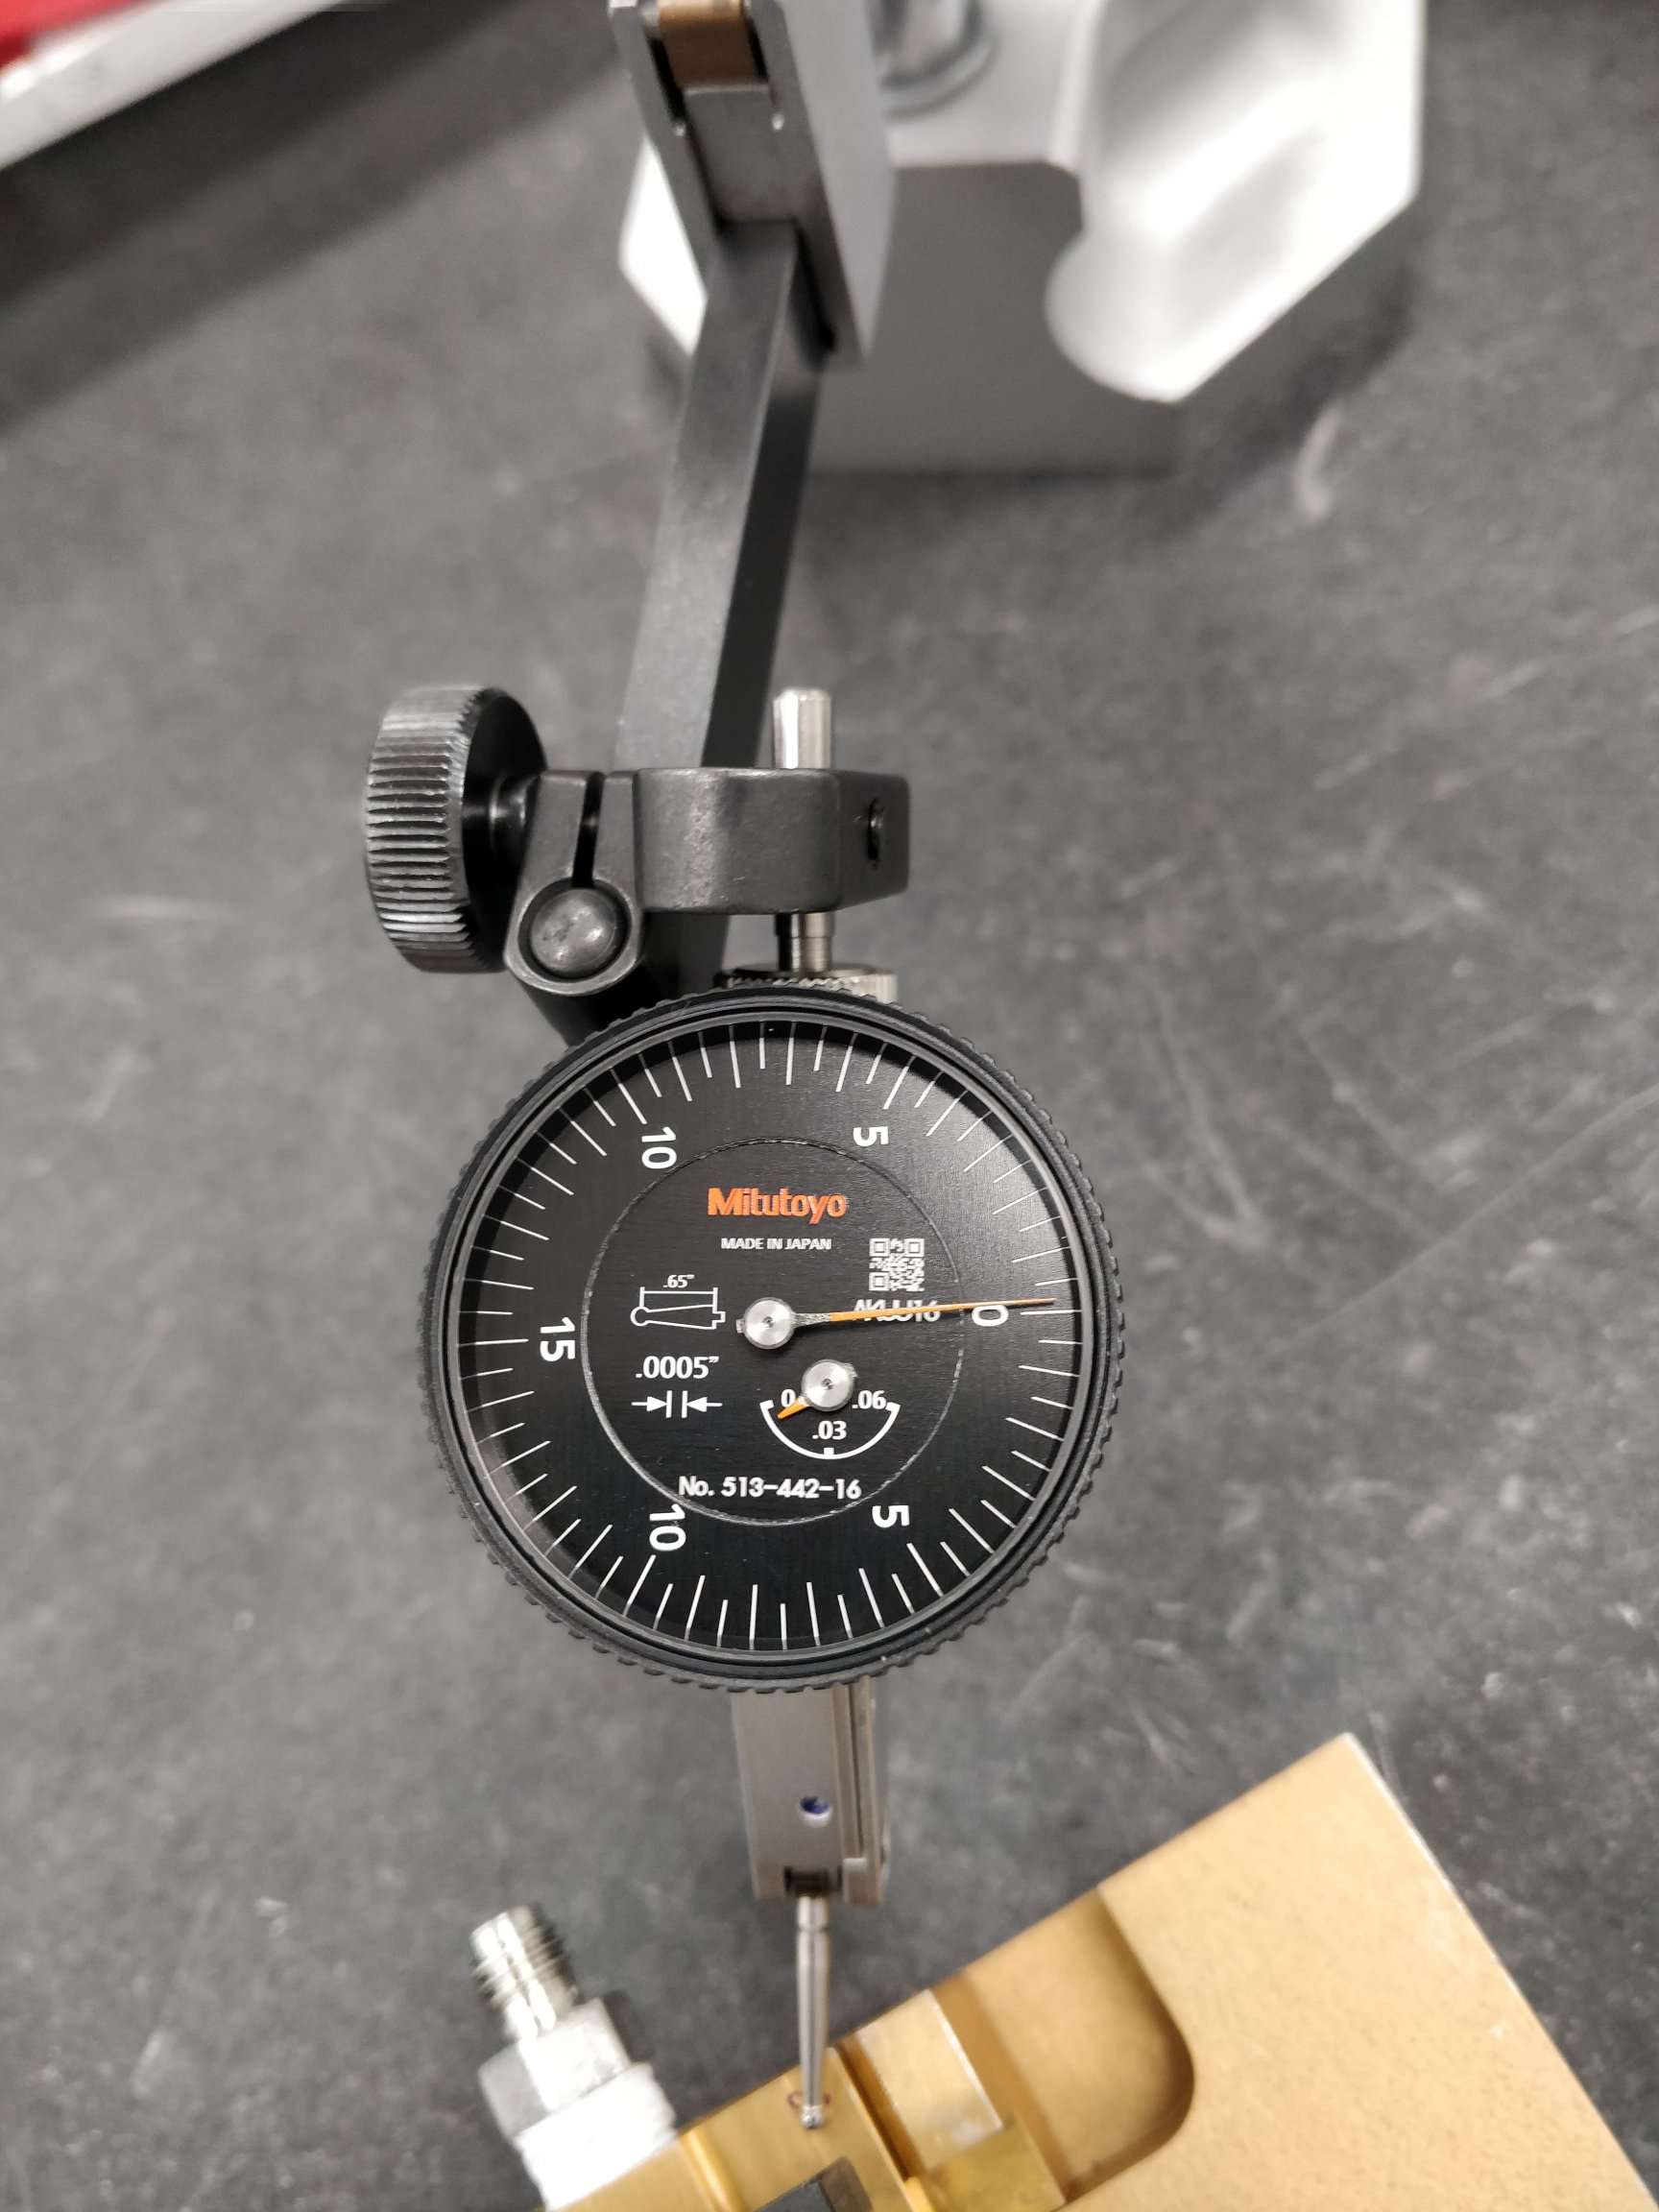
Dial gauge: Mitutoyo, No. 513-442-16 Range: 0-0.06 inches • Uncertainty: 0.0005 inches (0.5 mil) Remove the dial gauge from the height gauge arm when not in use. Pack it up carefully in its box and store it in the ATLAS cabinet in B33 large clean room. | Height gauge: Mitutoyo, Code No. 192-630 Range: 0-12 inches or 0-300 mm • Uncertainty: 0.005" This device uses a CR2032 battery. Remove the battery when not in use and store it with the dial gauge. |
| https://www.mitutoyo.com/wp-content/uploads/2017/01/Dial-Test-Indicators-web.pdf | https://www.msi-viking.com/Mitutoyo-192-630-10-Height-Gage-0-12300mm-Range_p_794.html |


Technique
|
|---|
A good orientation for the dial gauge, showing how to mitigate the Cosine Effect |

Mitytoyo provides guidance on using height gauges and other measuring devices here.
For height gauges, see pages 22 and following. Our stand is a "digimatic height gauge" according to their nomenclature with a test indicator attachment. Page 24 warns about the consequences of using the height gauge without a flat, clean surface. Keep cleaning!
Page 32 describes the impact of the Cosine Effect on dial test indicators. The page includes comics illustrating why it's important to minimize the angle between the dial test indicator and its direction of use.
Working with the height gauge has several critical ground rules:
- Always lift or shift the height gauge using its base;
- The work surface needs to be clean and flat:
- We're going to use it as a reference. The dial gauge is extremely sensitive, with a precision of 0.5 mils. Tilting the base of the height gauge will mess up the measurement, since the gauge assumes it is flat with respect to the thing it's measuring.
- The height gauge column also needs to be clean.
- Dust both gums up the height gauge, making the mechanical wheel of the digital gauge feel "crunchy" and hard to move, and disrupts the working surface's flatness.
- Keep cleaning regularly while taking measurements since dust accumulates over time.
- Try not to work in the first 6-12 inches of the granite table:
- This part of the table suffers most of the wear and tear.
- Do try to work in the same area of the table for all measurements.
- The dial gauge should be more horizontal than vertical with respect to the table surface.
- This particular kind of dial test gauge is meant to be used horizontally, so putting it in the horizontal will give you a much more reliable reading. Otherwise, the Cosine Effect will mess up the reading. Mitutoyo has a good description of this. The image also shows a good orientation for the dial gauge.
- The height gauge is considered "zeroed" when both the dial gauge and the digital gauge read 0.
- Remember to check the zero position regularly.
- Clean frequently!
Procedure
Zero the height gauge to the granite table surface.
Measure the height of the screen protector surface.
Zero the dial gauge; read the value on the digital gauge.
Note that the screen protector edge is rounded, so collect the height measurement at least 0.3 mm away from the edge.
Zero the height gauge again, so that the screen protector surface is the baseline for the measurement.
Repeat the measurement of the screen protector surface: It should be zero this time.
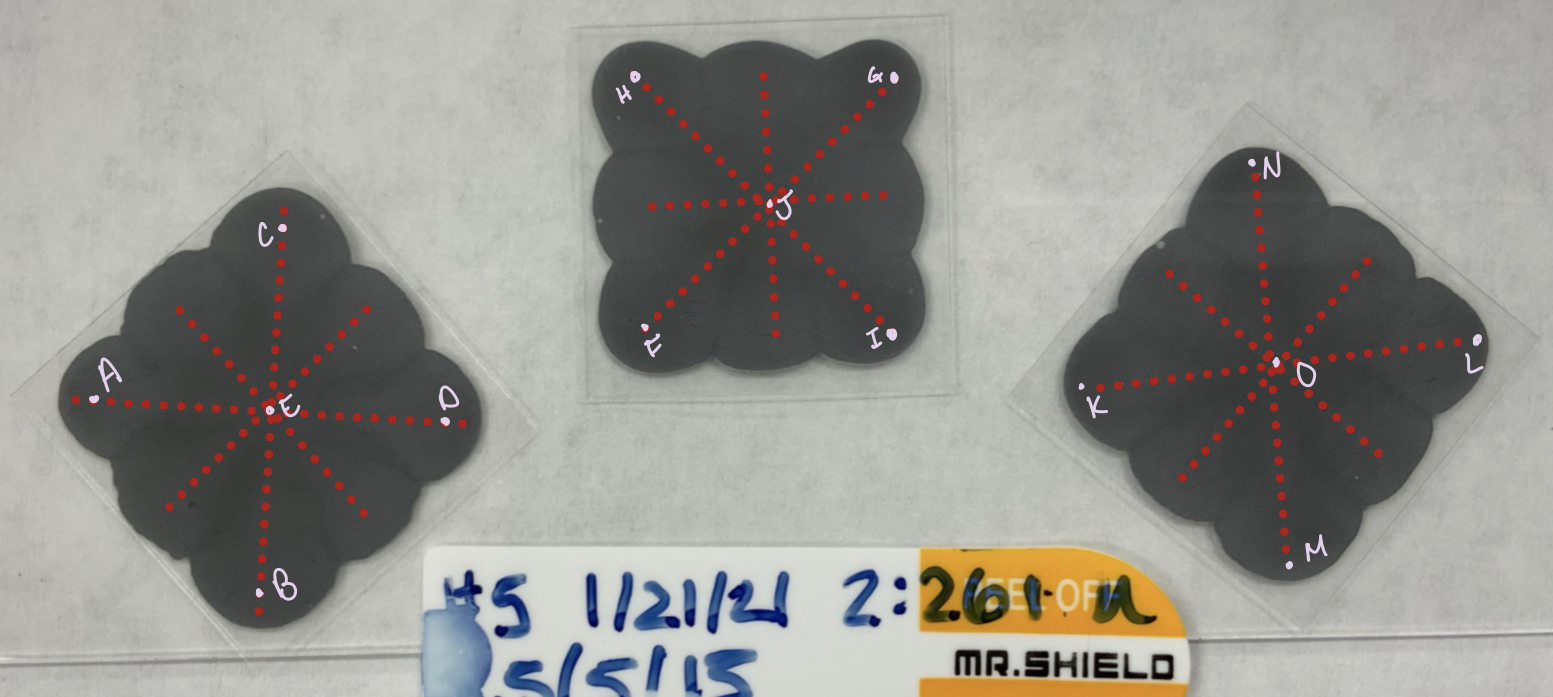
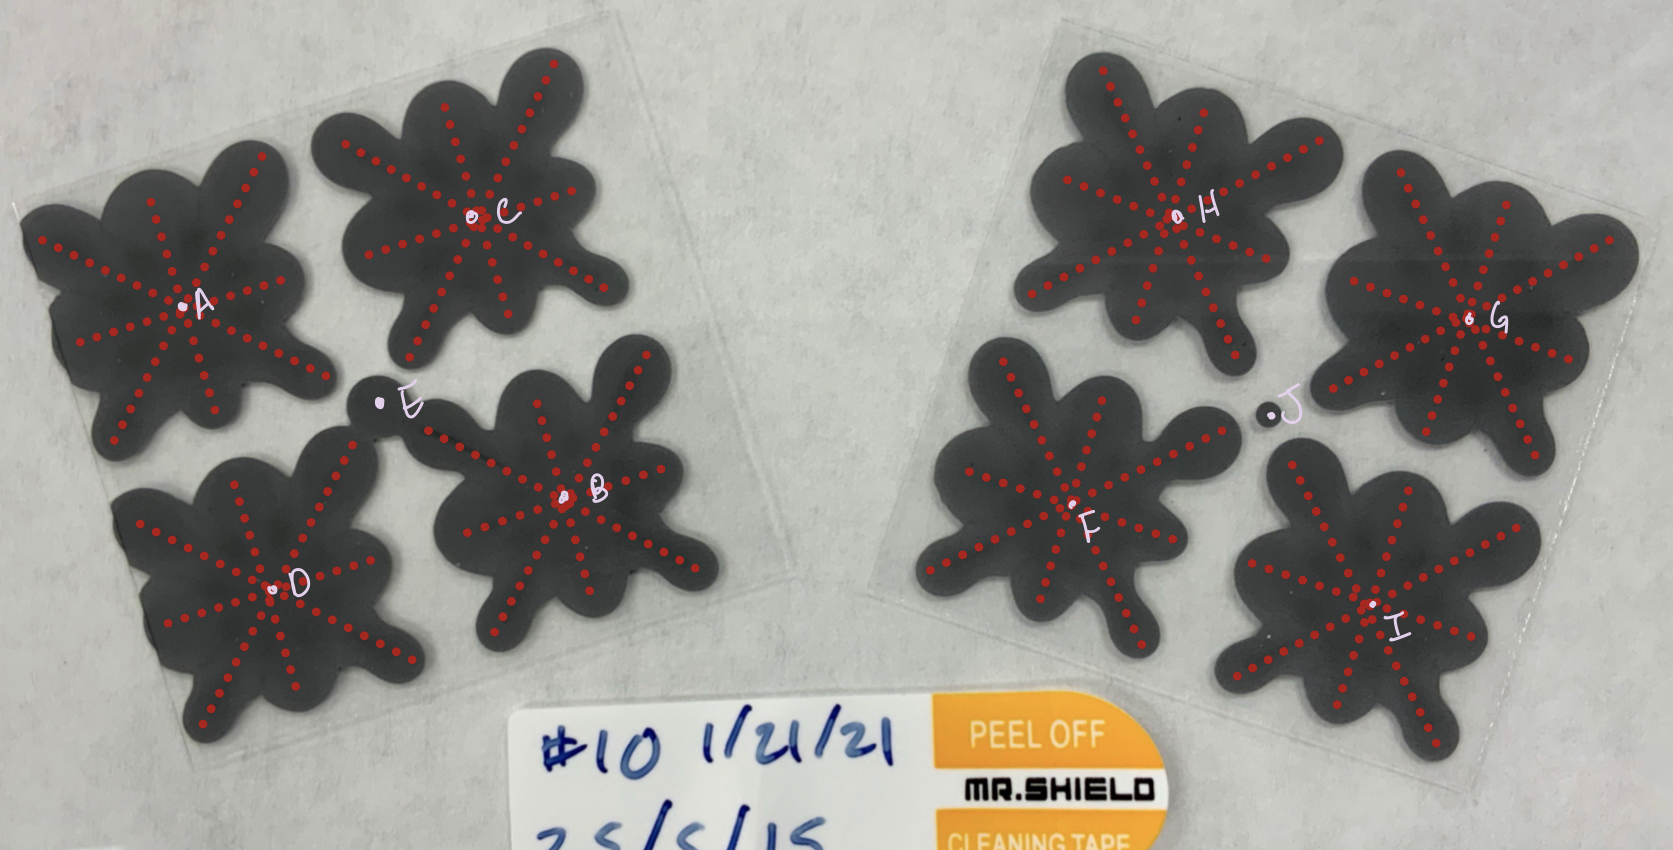
Measure points A-O (A-J) on the triplet (quad), following the markings in the images under the "Measurement positions" heading.
Check the zero, taken in steps 2-3, and record its value.
This value reflects whether the zero-point drifted during the measurement. Normal values are +0.0005, 0.0000 (often written down as "5 zeroes"), and -0.0005. The units are inches.
If step 6 reports an unusual value (> +0.0005 or < -0.0005), please repeat the measurement.
- Re-zeroing with respect to the granite table surface, measure the thickness of a triplet (quad) coverslip from the batch used in mounting this set of samples.
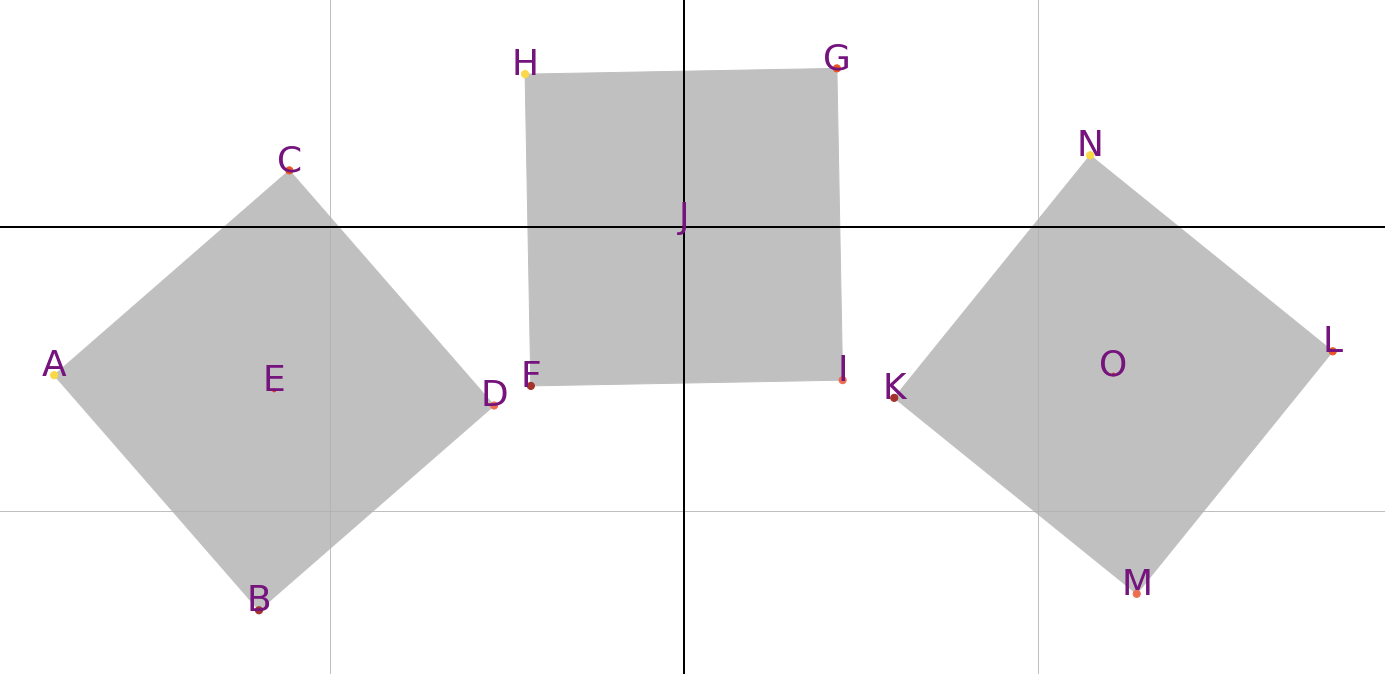
Measurement positions
The labels and their order do not inscribe any special meaning. They do match how the height gauge measurement processing scripts handle the measurements, so please follow the order. It's important to collect height gauge measurements on top of the glue layer. The coverslips are thin so measuring at their edges without the glue underneath causes them to flex, producing inaccurate measurements.
| Triplets | Quads |
|---|---|
|
Notice that we use the center of the module and the centers of each star for quads. The label order also changes! |
Analyzing measurements
Hannah and Rachel prepared some Python scripts to interpret CSV files of the height gauge measurements. The scripts are available at: https://gitlab.cern.ch/hherde/slacpixelsanalysis. The scripts produce "maps" of the samples, displaying the extracted glue layer height mapped to its approximate measurement position on the physical sample. The code marks each measurement point with an up or down arrow, indicating whether that particular point is above or below average compared to the rest of that module. The code also colors points outside the ATLAS thickness specification red.

Selected results
The "sample map" plots are always uploaded to the gPhotos album associated with that sample collection run. You can access a complete list of datasets here.