Overview
These are instructions for installing Netbeans, Maven and Maven support within Netbeans.
Java 1.5 Required
You must use a Java 1.5.0 JDK, because org.lcsim requires it.
I will also briefly describe how to import and build a Maven-based project within Netbeans.
Warning
These linux specific instructions are not up-to-date. You should just follow the generic instructions.
Downloads
Java
Java 1.5.0 can be downloaded at http://java.sun.com/j2se/1.5.0/download.jsp.
JAVA_HOME
Set the JAVA_HOME variable to your JDK root area. Otherwise, Maven may not pick up the correct Java compiler.
At SLAC, you can setup the shared Java 1.5.0 JDK on Linux by executing this command.
export JAVAVER=1.5
Netbeans Installer
Get the install files for Netbeans from http://www.netbeans.org/index.html.
Click on the "4.1 beta" graphic.
Select your platform and download the installer.
Maven Installer
Download the maven installer from http://maven.apache.org/start/download.html.
Get the latest version as of 3/23/05 (update as appropriate).
wget http://www.apache.org/dyn/closer.cgi/maven/binaries/maven-1.0.2.tar.gz
Maven NBM
Mevenide provides Maven support in the Netbeans IDE. You need to get the "nbm" files from the Mevenide Downloads Area .
download
wget http://mevenide.codehaus.org/download/mevenide-netbeans-autoupdate-1.0.nbm
wget http://mevenide.codehaus.org/download/mevenide-netbeans-grammar-0.6.1.nbm
Grammar NBM Might be Optional
As of now, if you want to install the most recent Netbeans, 4.1beta, you will need the special NBM file for XML grammar listed above. If, instead, you choose to use 4.0, you may not need to install the grammar pack separately. Thus, the instructions throughout this guide about this special setup should be ignored if you are using Netbeans 4.0 and not 4.1beta.
Summary
You should now have the following files for the installation.
mevenide-netbeans-autoupdate-1.0.nbm
mevenide-netbeans-grammar-0.6.1.nbm
netbeans-4_1-beta-linux.bin
maven-1.0.2.tar.gz
Maven Mispelled
"maven" has been mispelled as "meven" throughout the Maven IDE installation kit.
Obviously, the exact versions will change as Netbeans and Maven are updated.
Installation
Installing Maven
Unpack the Maven tarball.
tar zxvf maven-1.0.2.tar.gz
cd maven-1.0.2
Follow the installation instructions at http://maven.apache.org/start/install.html.
After installation, assuming you are still in the base directory, set the MAVEN_HOME environment variable.
export MAVEN_HOME=`pwd`
MAVEN_HOME Required
This variable must be set in the Netbeans startup environment for the Maven support to work properly.
Installing Netbeans
Run the installer that you downloaded.
./netbeans-4_1-beta-linux.bin
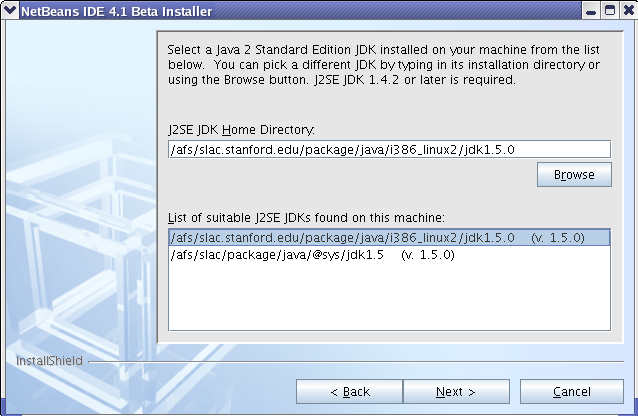
Step through the wizard, selecting a location where you won't go over disk quota.
Make sure to select a Java 1.5.0 JDK.
For instance, this shows the shared install used at SLAC.
When finished, startup Netbeans.
netbeans-4.1beta/bin/netbeans
Installing the Maven Grammar Support
Careful when Installing Modules
I noticed that if the module installation steps were performed incorrectly, Netbeans would complain once at restart about missing dependencies and then not allow reinstallation of the modules using the Update Manager, at least not in an obvious way. So try to do it correctly the first time, or Netbeans may need to be reinstalled. (Probably, there is a way to have it rescan for module updates, but I have not found it.)
Now you need to install Maven grammar support. The one you downloaded is especially for Netbeans 4.1beta.
In Netbeans, go to Tools -> Update Center.
Select Install Manually Downloaded Files and click Next.
Click Add and select the file mevenide-netbeans-grammar-0.6.1.nbm. Click Okay. You should see this file under Modules to Install.
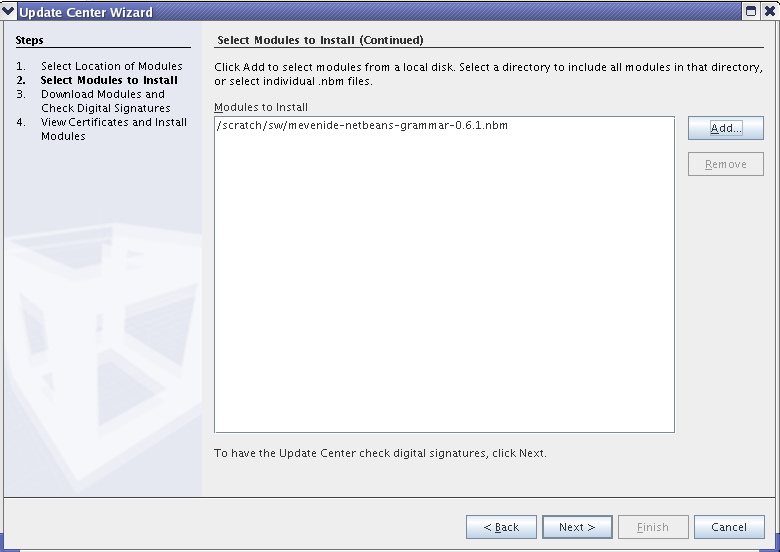
Click Next.
You should see Meven IDE XML Grammar under Include in Install on the lefthand side.
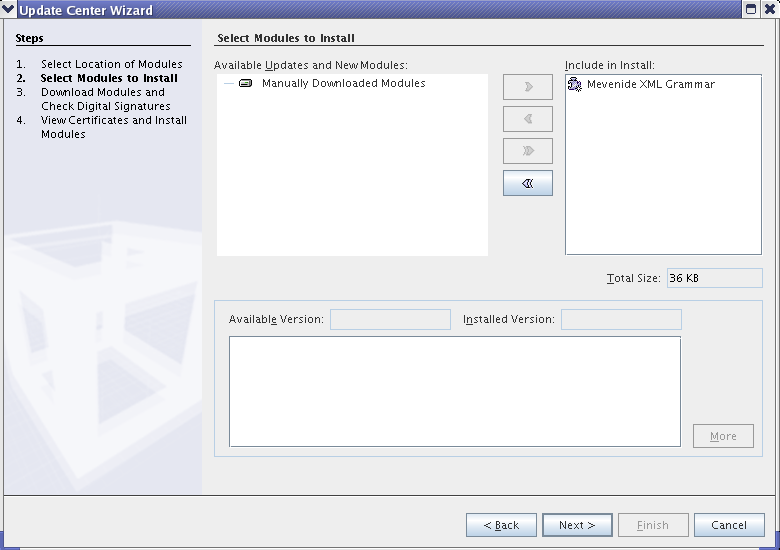
Click Next.
Now select the boxes under Include and Global for Meven IDE XML Grammar. Click Accept or Yes to get past the boilerplate warnings.
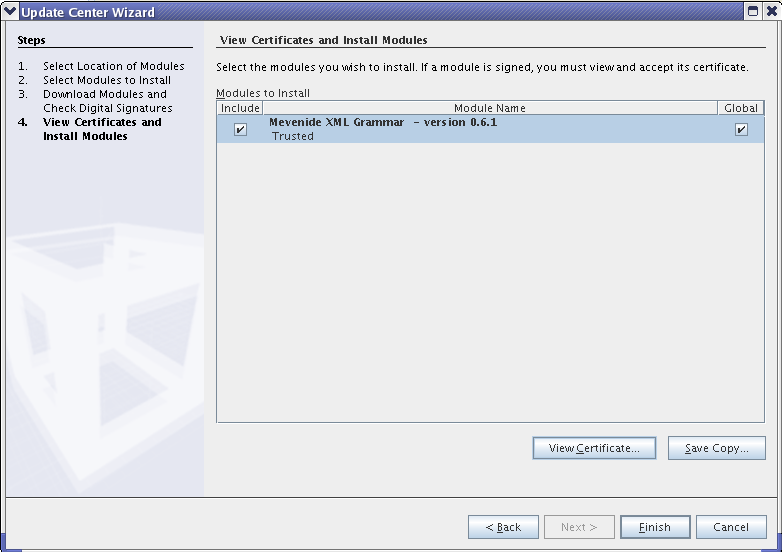
Click Next.
Global Install
It is my preference to put the Maven IDE support in the Netbeans install area, i.e. Global, but it is not necessary for the install to work.
The IDE should ask to be restarted. Click Yes and then Okay to get past the Warning box about missing dependencies. These will be installed next.
Installing Maven IDE AutoUpdate
In a manner quite similar to the previous section, install the Maven Auto Updater from mevenide-netbeans-autoupdate-1.0.nbm.
The IDE will not be restarted for this step.
Installing Maven IDE Support
Go back to Tools -> Update Center and select Check the Web .... Deselect Development Update Center and make sure that Mevenide Update Center is selected.
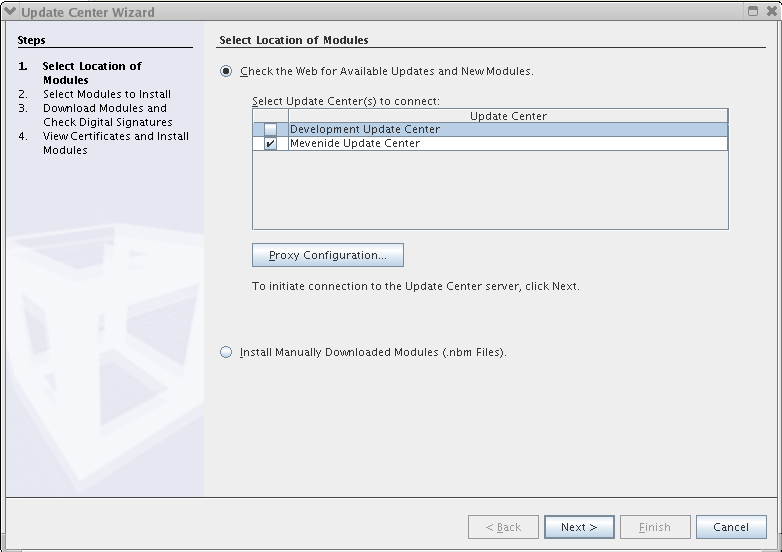
Click Next.
Under Available Updates and New Modules, you should see a number of modules under Mevenide Update Center. Click the Double Arrow to put these all into Include in Install. Now use the Single Arrow to deselect the installation of Mevenide-Grammar, as you installed this previously.
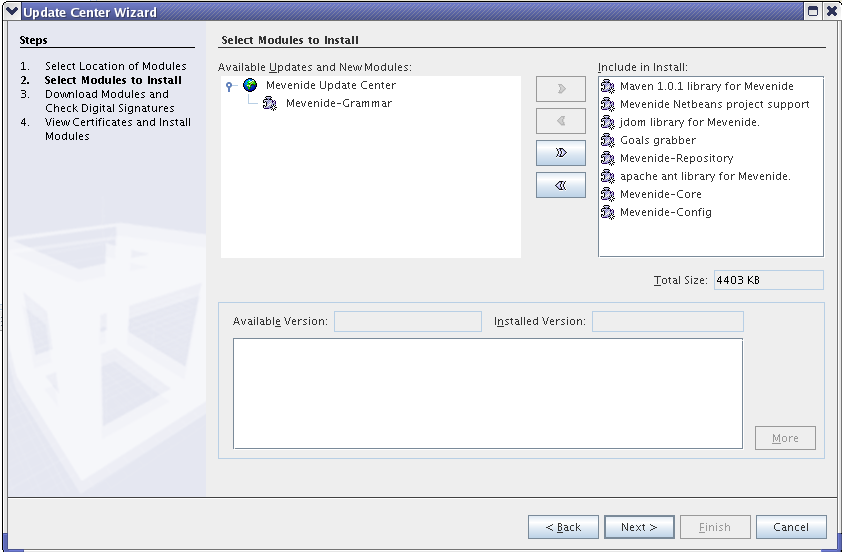
Click Next and finish the installation exactly as before, making sure to select Include for all modules in the Modules to Install box.
After installing these modules, the IDE should be restarted.
If successful, you will no longer see any warnings when Netbeans starts.
To check that Maven support was successfully installed, check in File -> New Project. Under Categories, you should see a folder called Maven.
Using Maven in Netbeans
Opening an Existing Maven Project
You can open an existing Maven project using File -> Open Project. Valid folders will have a yellow box in the lower right of the folder icon. For instance, I could choose the GeomConverter or lcsim folders below.
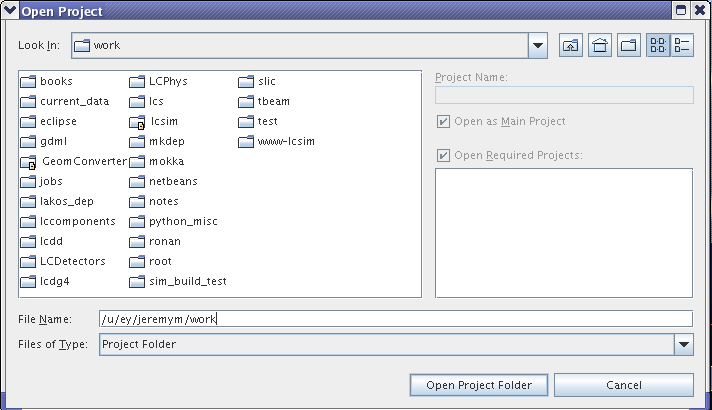
Select a valid folder in the chooser window and click Open Project Folder.
Netbeans will scan the project for classes and the like, which takes awhile. Once it is finished, you should see the project in the lefthand window.
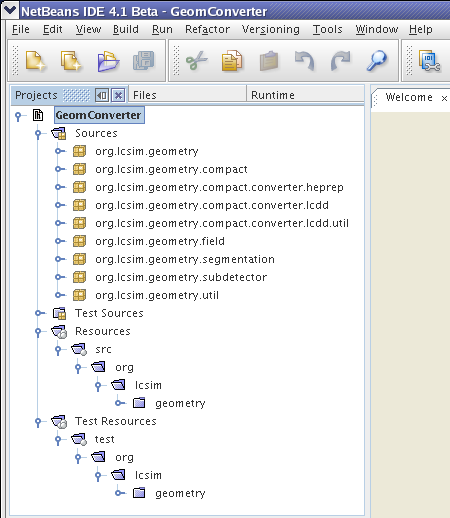
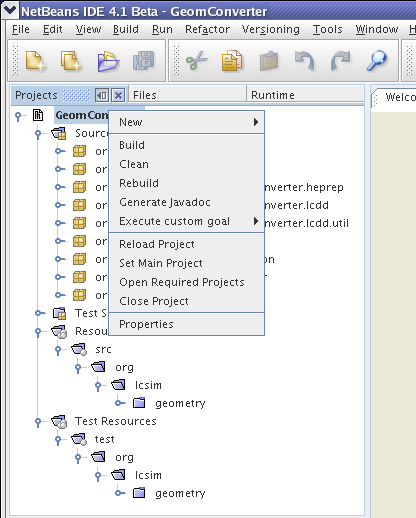
Here is the GeomConverter project with some expanded folders.
Building the Project
To build the project using Maven, simply right click on the project in the lefthand pane and click Build.
Alternately, you can select the menu item Build -> Build Main Project or press F11.
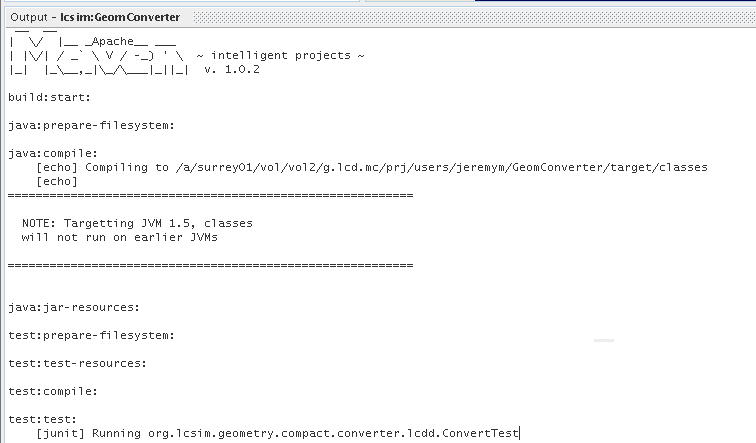
You should see the Maven splash screen in the console and scrolling messages as the project is built.
Congratulations, you now have Maven support in Netbeans.