Step 1: Open RSLINX
Open RSLINX and configure driver to communicate with the PLC.
Refer to How-to Download PLC Ladder Logic if you need help.
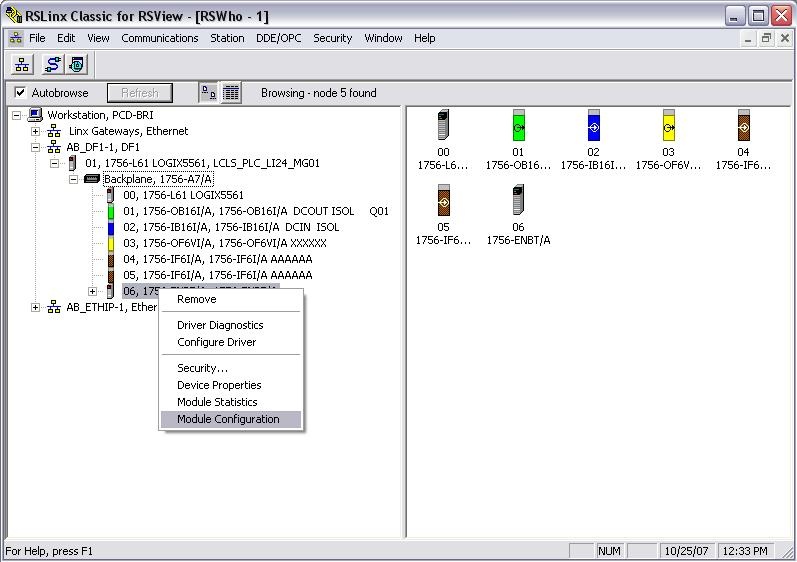
Step 2: Open Properties Window
Expand the device tree and right-click on the Ethernet module. Then click on the Module Configuration.
Step 3: Configure the Ethernet Port
Click on the Port Configuration tab and enter the necessary information and click OK.

Step 1: Open RSLogix5000
Open RSLogix5000 and the applicable ladder logic file. Then go online with the PLC.
Refer to How-to Download PLC Ladder Logic if you need help.
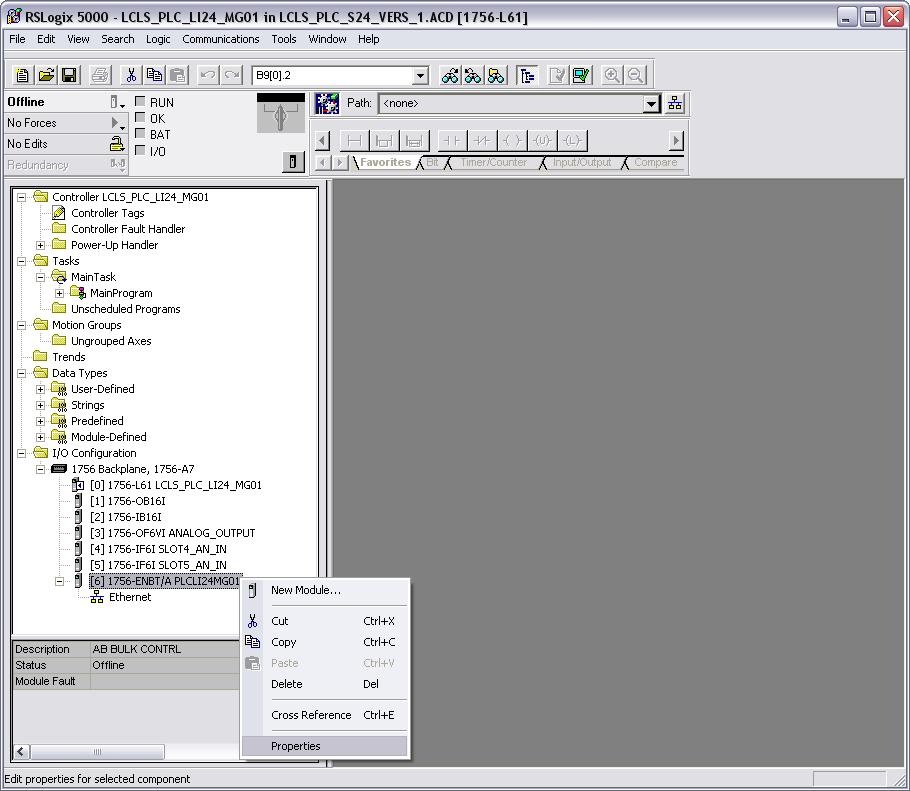
Step 2: Open the Properties Window
Right-click on the Ethernet module and click on Properties.
Step 3: Configure the Ethernet Port
Click on the Port Configuration tab and enter the necessary information. Click Ok.

Configuring the IP address for a touch panel is done directly on unit.
Step 1: Configuration Screen
Navigate to the Configuration screen. If the application is running, look for a button that says TCHPNL CONFIG.
Step 2: Navigate to Settings
- Push Terminal Settings
- Push and highlight Network and Communications. Push Return button.
- Push and highlight Network Connections. Push Return button.
There are two directions you can go: Network Adapters and Device Name
Step 3: Device Name
- Push and highlight Device Name. Push return button.
- Push Device Name and enter the name.
Step 4: Network Adapters
From Step 2:
- Push and highlight Network Adapters. Push Return button.
- Built-in Ethernet Controller should be highlighted.
There are two items here to set: Name Servers and IP Address.
Step 5: Name Servers
- Push Name Servers
- Under Name Servers, push buttons to set the DNS and WINS.
Step 6: IP Address
From Step 4:
- Push IP Address.
- Push the buttons to set the IP, Subnet and Gateway.
Step 6: Reboot
- Push the OK button when you are done with each step
- The touch panel will prompt you to do a reset. Push OK.
- Push Close until you get back to the main screen in Step 1 and push Reset.