Using the WIRED4 Event Display
WIRED4 is an interactive event display, which is able to graphically represent data from an LCIO file and the associated detector from the simulation job.
WIRED4 Manual
The WIRED4 Manual gives detailed instructions on how to use this application.
This tutorial will focus on basic operations to view LCIO event data using the WIRED4 viewer within JAS3.
WIRED4 View
First, download an LCIO data file such as this qqbar sample in the sid02 detector.
Then open it using the File > Open command.
Next, select File > New > WIRED4 View.
Press the Go 1 button to load the next event in the LCIO file.
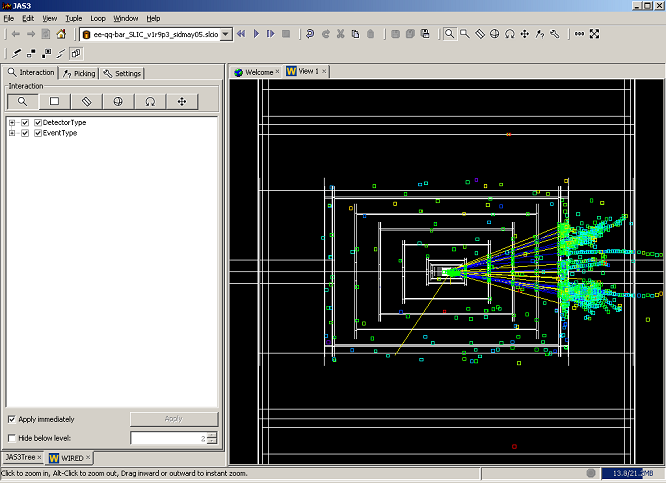
You should see something similar to this screenshot.
Basic WIRED4 View
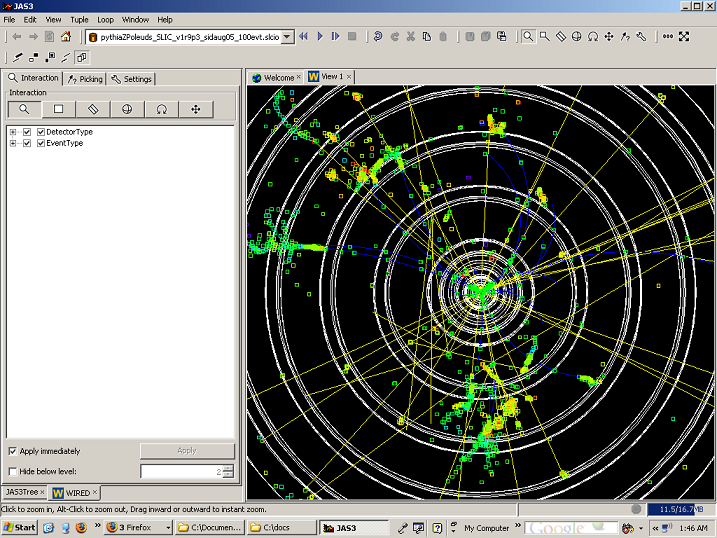
The detector geometry is drawn in white on the black background. (In general, structures within the detector such as layers and sublayers are left out to improve performance and reduce visual clutter.)
This display colors hits according to their energies ("Rainbow" view), charged particles in blue, and neutral particles in yellow.
In additional to objects from simulation, such as hits and particles, WIRED4 can also draw analysis objects such as clusters. (Writing out analysis objects will not be covered in this tutorial.)
The above screenshot was produced by code from Steve Magill.
Interaction Menu
The Interaction commands are used to "get around" the WIRED event display.

Available actions include translation (e.g. panning), rotation and zoom in/out.
For convenience, this menu can be accessed from three places.
- Interaction tab on the left
- Toolbar buttons underneath the drop-down menus
- Right click, Interaction menu
To execute an Interaction command, select the appropriate tool's icon from one of these menus.
Click within the WIRED4 event display pane to activate the tool's command, such as zoom or translation.
Interactivity Section
Refer to the Interactivity Section of the WIRED4 Manual for complete instructions on each of the Interaction tools.
Zoom
Zooming (or scaling) can be performed using a number of different mouse and keyboard actions.
Start by selecting the magnifying glass icon.
Zoom out using any of these methods.
- Hold the Alt key and left click to zoom out by a fixed factor.
- To zoom out smoothly, left click and hold, and then move the mouse cursor towards the center of the image.
- Another method for zooming in smoothly is to scroll the mouse wheel away from you.
Zoom in using one of these shortcuts.
- Left click to zoom in by a fixed factor.
- To zoom in smoothly, left click and hold, and then move the mouse cursor away from the center of the image.
- The mouse can also be used to zoom in by scrolling the wheel towards you.
Try zooming out until you can see the entire detector. It should look similar to this.
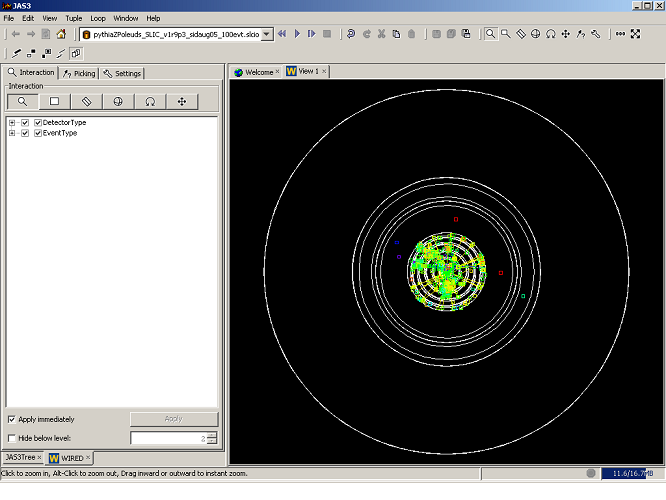
Also, try zooming in until you can only see the particles at the Interaction Point (IP).
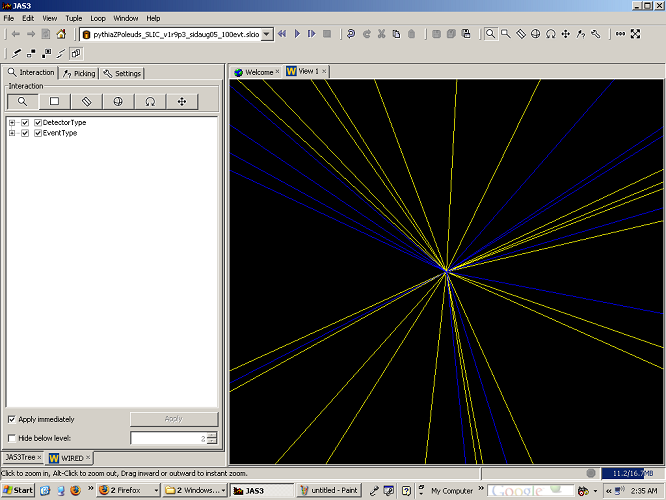
Experiment with the controls until you are comfortable zooming in and out of the event display.
Resetting the Display
In order to reset the view back to the original one that showed when the WIRED4 view was first loaded, right click on the display and select Action > Reset from the menu. This will reset the display back to the default view.
Fit to Window
WIRED4 can fit the current image into the event display window by applying the appropriate zoom factor. To make WIRED fit the image, right click and select Action > Fit to Window.
Translation
The translation tool is used to move the image in the display "side to side", "up and down" or anywhere in between.
Select the translation tool from the Interaction menu. (This is the cross with arrows on the ends.)
Click and hold the left mouse button while moving the cursor to move the image in the event display.
A single click on the event display will center the display on that point.
Holding Alt and clicking will move the "current" center point to the selected point.
Try zooming in a few times and looking at a calorimeter cluster.
![]()
Pretty, isn't it?
Rotation
The rotation tool can be used to view the image from different angles.
First, select rotation by clicking on the ball icon.
Holding the left mouse button and moving the mouse will rotate the picture in that direction.
Holding Shift in addition to the above will limit the rotation to the X axis.
Holding Ctrl will limit movement to the Y axis.
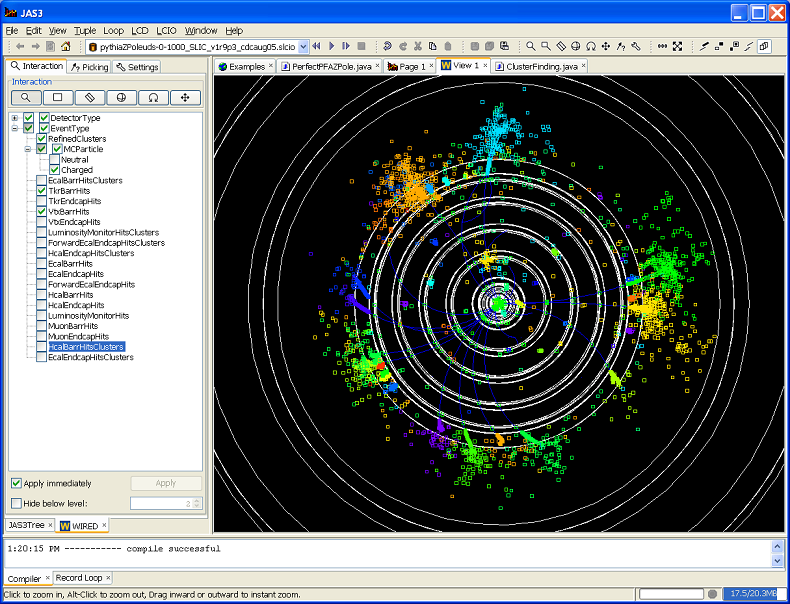
Try using translation, zoom and rotation to get a view similar to this, one.

The Interaction tools can be quite useful for "zeroing in" on an interesting part of an event, such as the showers in the endcap in the above screenshot.
Projections
Projections are default views for the display.
Access the available projections by right-clicking and going to the Projection submenu.
The ParallelProjection submenu contains the most useful projections for our purposes.
Try selecting Projection > ParallelProjection > ZY.
This is a "side view".
The XY projection is a front or beam view, which is the same as the view when the LCIO file was first loaded.
Picking
The picking command is for selecting objects, displaying their attributes, and rotating around them.
Activate picking by selecting the Picking menu from the lefthand menu.
Now left click on a track.
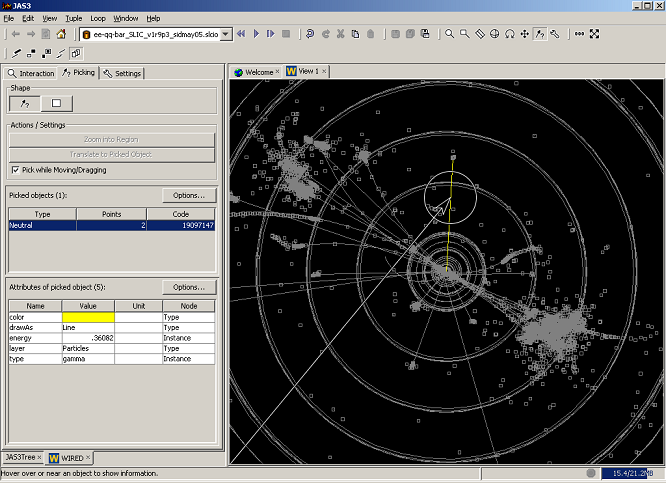
The tracks HepRep attributes are displayed in the window. For instance, my selection is a gamma particle with energy of 0.36082 GeV.
Notice that if you select Translate to the Picked Object from the Picking menu and rotate the picture, the rotation will occur around the picked object rather than the center of the image.
Visibility Tree
The visibility controls are used to control whether or not objects are shown in the display.
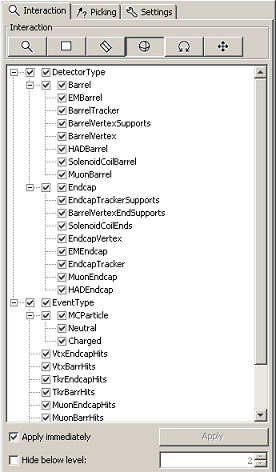
Make an object invisible by deselecting its (righthand) box in the Visibility Tree.
Other options for expansion of the tree and hiding all children of the current node are available by right-clicking on the object's entry in the Visibility Tree.
Saving the Display
Right click and select Save As to open the Export window, which will allow you to save the display to a variety of different graphics formats.
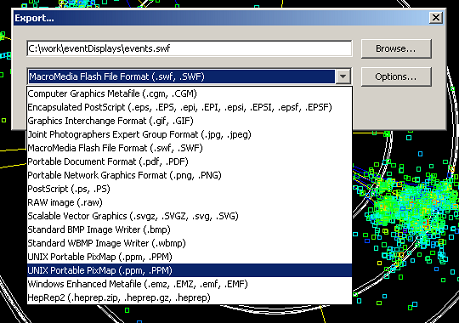
These include PNG, JPEG, GIF, and PNG.
Saving to HepRep will allow loading of the file later using the File > Open menu. This is handy for loading back single displays of interesting events.
Multiple WIRED4 Windows
It is possible to show multiple WIRED4 views simultaneously, such as XY and ZX.
First, change the default window view by going to View > Window Style > Internal Frames.
Now, you can load additional WIRED4 views using File > New > WIRED4 View and adjusting the window sizes to show them simultaneously.
It should look something like this.
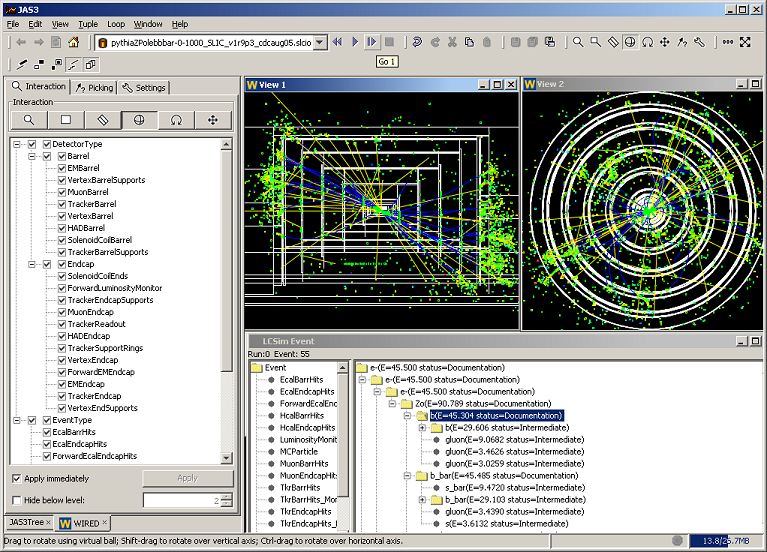
I have also loaded an LCSim Event Browser.