=== Startup ===
After following the setup instructions in <link to setup page>, the glue robot and associated peripherals are ready to use. Complete documentation for the glue robot is available in the Janome Points manuals which includes descriptions of logic and user functions. This page will show how to make a simple starting program and draw a ring of patterns using the points programme.
Open the Janome points programme by double cliking on the Jr icon on the PC desktop: 
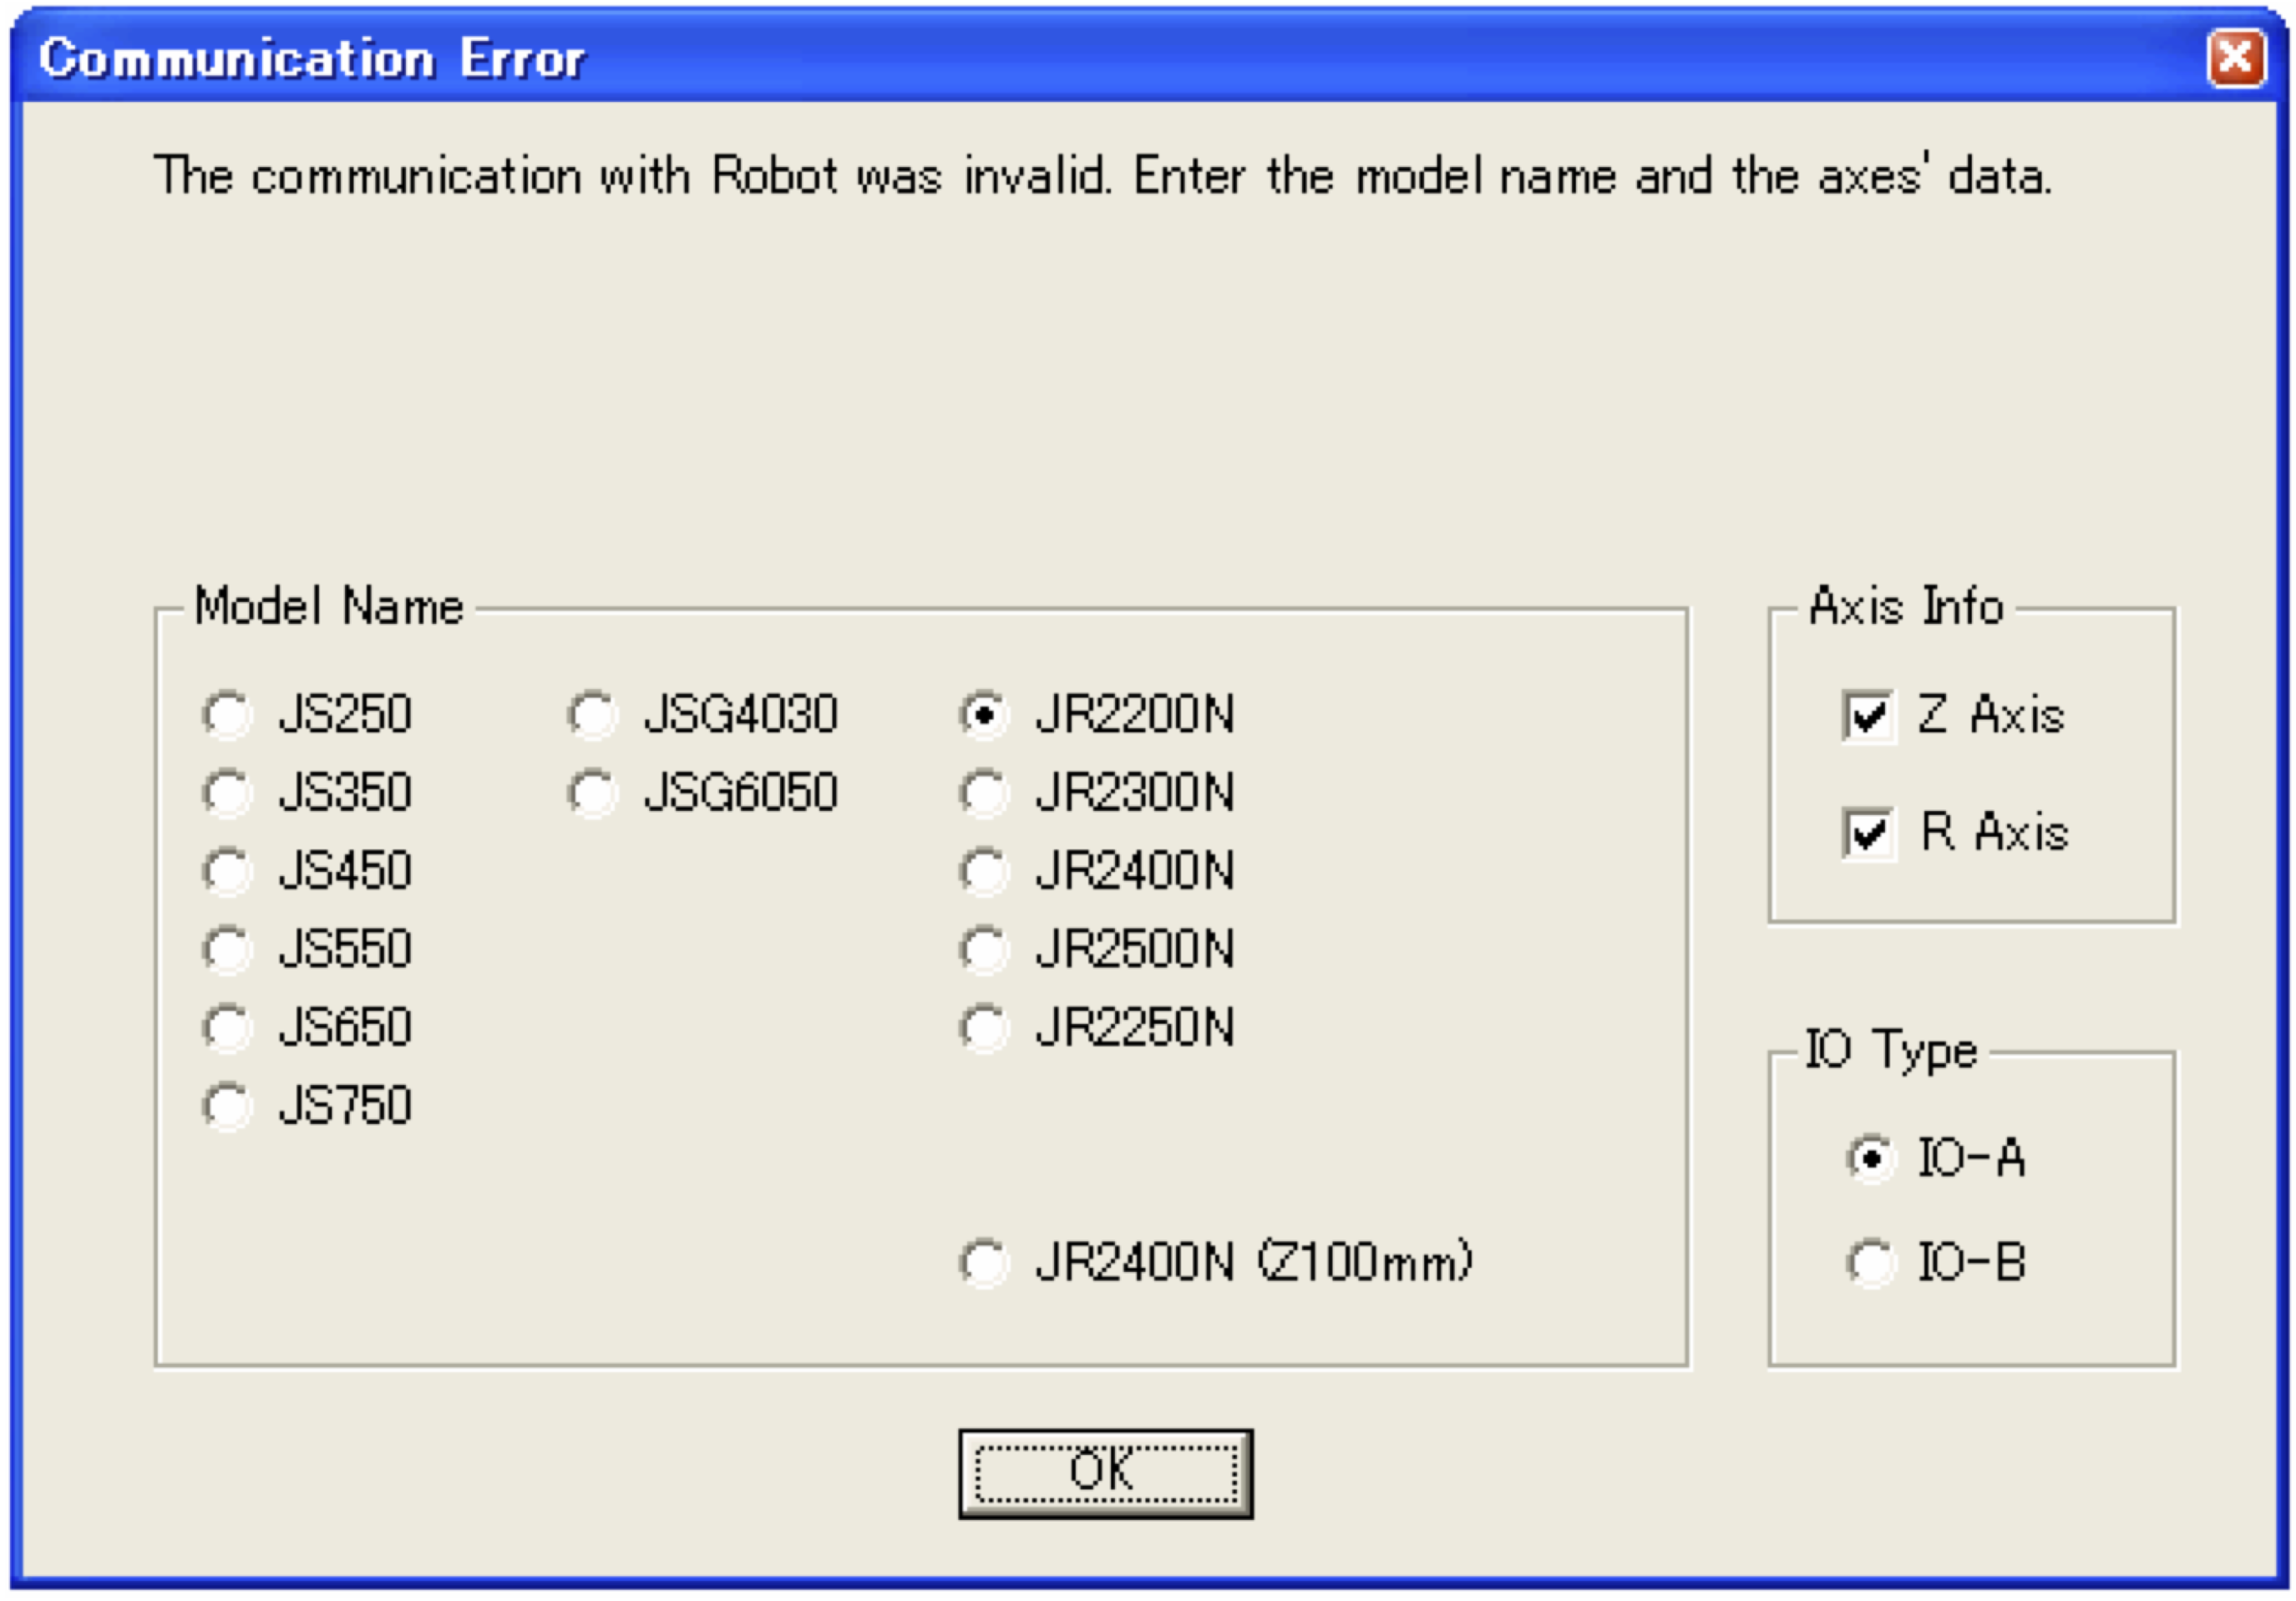
This will open the start menu which allows you to select the correct robot edition. If the robot is already powered on this screen may not appear at all. From this screen select the JR2500-N bullet and tick boxes with z-axis control but no R-axis control and IO-A.
With teh robot selected you will then be placed in the starting window of the programme. The programme is organized as shown in the picture below.
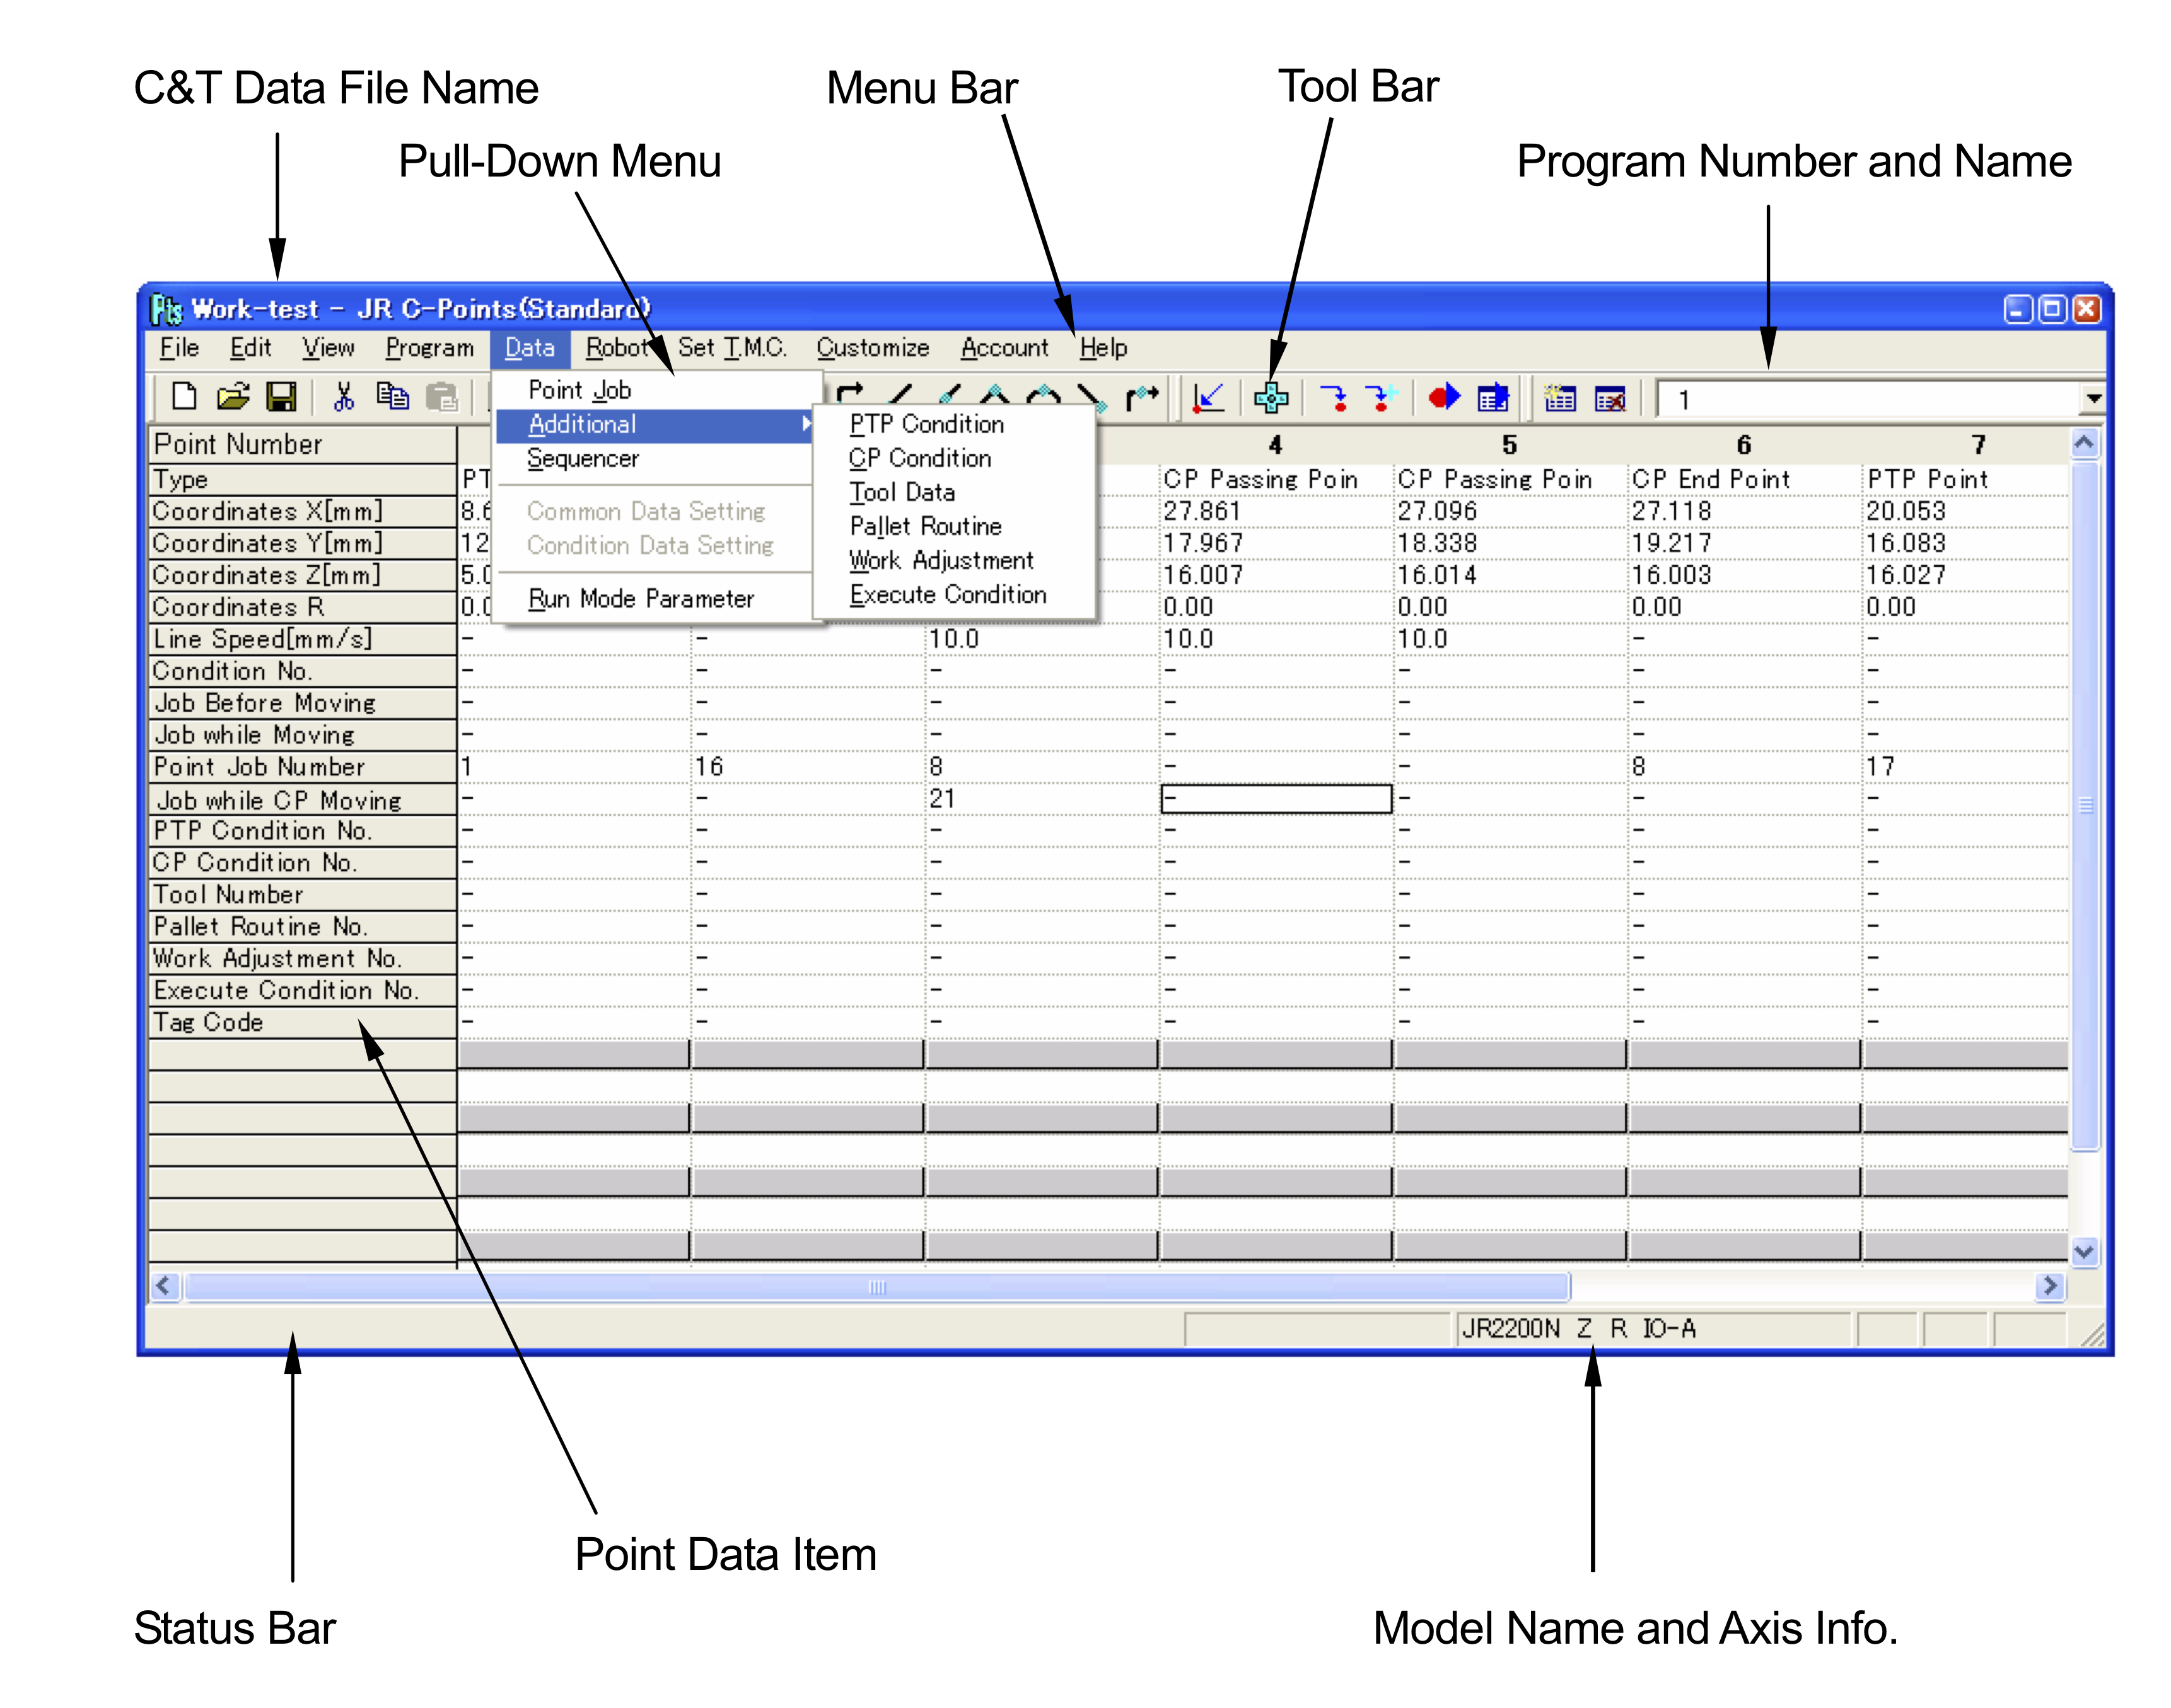
The general format of the programme is like a spreadsheet with time along the progressing columns and various functionality subdivided into rows. Each column represents a different Point, or action, taken by the programme. In the screenshot above, there are 7 Points visible, i.e. 7 columns. Each row then has the following fucntionality:
<ul>
<li><b>Type:</b> The Point type to be used, either PTP (point-to-point) Point or CP End Point are the most common.</li>
<li><b>Coordinates: </b>the starting position for the robot to begin executing the point job. Any relative positions in the point job will be take with respect to these coordinates. The x-y axis is in the plane of the gluing table and the z-axis is the up-down movement of the robot head.</li>
<li><b>Line speed:</b> is how fast the robot will move to these coordinates. If not explicitly defined in the main programme page it is outlined elsewhere in the programme.</li>
<li><b>Condition number:</b></li> a conditiion can be specified within a point job to trigger partial programme execution and use the same point job multiple times.
<li><b>Job before moving: </b>it is possible to execute a point job before moving to the next point, this could be to recalculate a parameter or fix some external IO.</li>
<li><b>Job while moving: </b> as above but instead to run a job whilst moving from one Point to another.</li>
<li><b>Point Job Numer: </b> this is the index of the point job executed after moving to this point via the PTP protocol. The Point Job programme is explained later in the page.</li>
<li><b>PTP & CP condition numbers:</b>conditions upon which the jobs are executed.</li>
<li><b>Tool number</b>: specifies which tool on the Janome robot should be used. Carefully check the manual to ensure the correct one is selected.</li>
<li><b>Pallet routine number:</b> the pallet routine to run in this Point. Pallet routines will be discussed later in the documentation.</li>
<li><b>Work adjustment number:</b> It's possibel to pre-save work adjustments in the programme to be used with specific Points. This is the index of which number should be used. </li>
<li><b>Execute & tag condition numbers</b>: are additional numbers used to give the user more control within the same programme. See text for details. </li>8
</ul>
This is the main page, all aspects of the programme including running the robot and programming start from here. Whilst the complete documentation of these functionalities exists in the manuals, the remainder of this page will show you hpw to make a simple program.
=== Configuring the robot ===
After turning the robot on and opening the point programme the robot must be configured. To configure the robot its mode must be switched. There are two main modes used during operation: teaching mode, which is used to send data to the robot or manually adjust the head & stage in real time, or Switcj Run Mode, which allows the programme to operate in batch mode, simply executing the programme after the start button is depressed and terminating either with the prgramm or if the emergency stop is hit.
To switch the robot mode got to 'Robot' menu and select Changing Mode, the fourth option in the drop-down. This will bring up the Changing Mode window. From this select 'Teaching Mode'.
++++ Meca Initialize ++++