| sample | Label | dimension | quantity | who | date |
| Heaters single size | A19 | 21.3x20.5 | 9 | Marco | 3/21/19 |
| Heaters single size | B19 | 21.3x20.5 | 9 | Marco | 3/21/19 |
| Heaters quad size | C19 | 45x41 | 25 | Marco | 3/21/19 |
| Heaters dummies for tests (wafer edges) | D19 | 45x41 | 20 | Marco | 3/21/19 |
| Stavelets | 12-16 | (2 quad heaters per stavelet) | 5 | Marco | 2/20/19 |
Dummy Heaters Inventory (the table above is a screenshot of 3/22). The latest status is at
Resistance measurement of a single quad heater:
1.9 ohms
Spare heaters soldered at SLAC:
Resistance for the spare quad heater: 3.5 ohms
Soldering Procedures
List of Materials:
1. Using cobar core solder 63/37 (Sn64 Pb37) type with flux core or.... the type of solder makes too much difference.
The diameter of the wire needs to be small 0.012" to 0.020".
2. The solder wick is either Solder-Wick by Chemtroncs. Or Hex-Wick by Hexacon Electric Co.
3. Liquid flux for between the wick and silicon.
The liquid flux defines where the solder will flow. Don't get the flux anywhere you don't want solder.
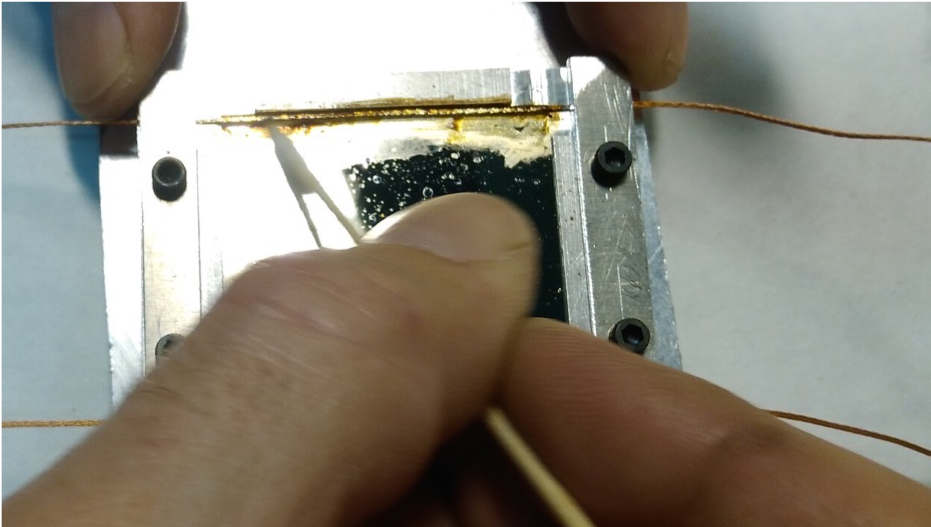
4. Alcohol for cleaning the flux from the fixtures after the soldering. A wood toothpick and cotton swab is useful to rub off some of the remaining flux.
Also rinse the remaining wick with alcohol as it contains dry flux and looks nicer when its cleaned off.
5. Heaters
6. Fixture to hold heaters and fixtures
7. Hot plate (to achieve 220C)
8. Protective equipment
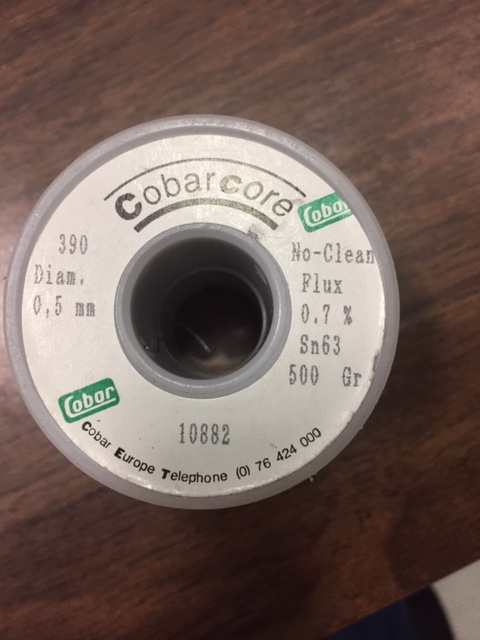
Cobar core solder 63/37 type with flux core
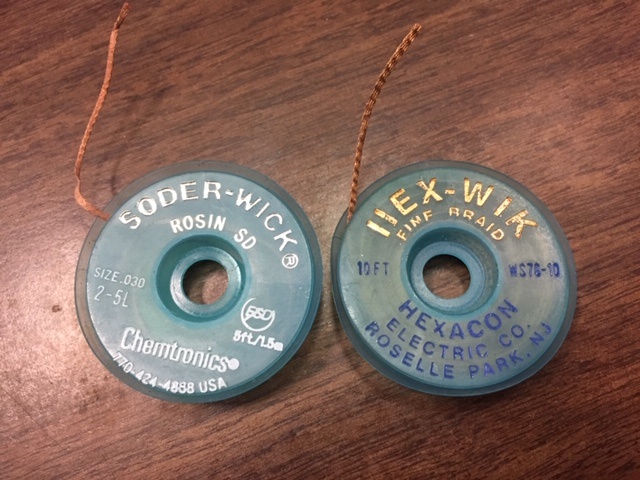
Solder-Wick by Chemtroncs (Left). Hex-Wick by Hexacon Electric Co.
List of Steps
(use photos for reference - NOTE: the "single" and "quad" modules are used interchangeably in the photos)
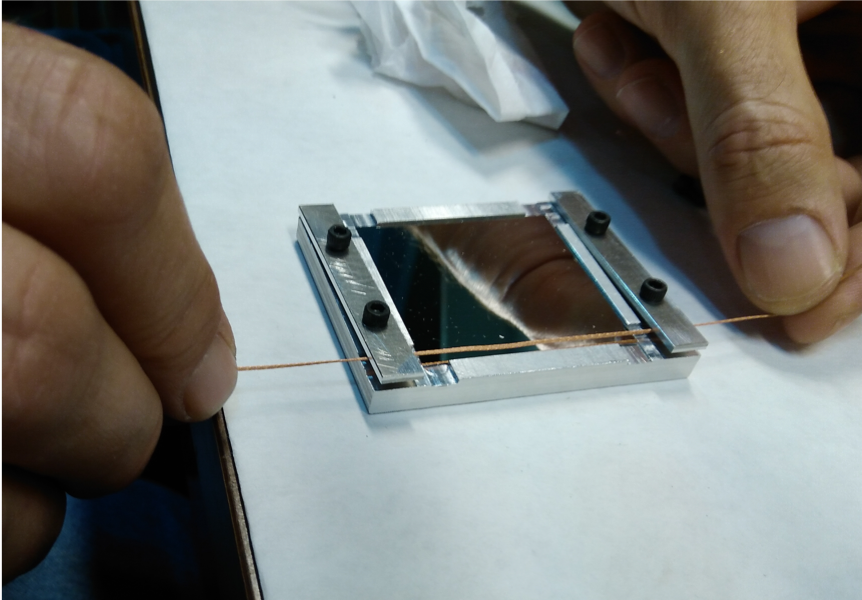
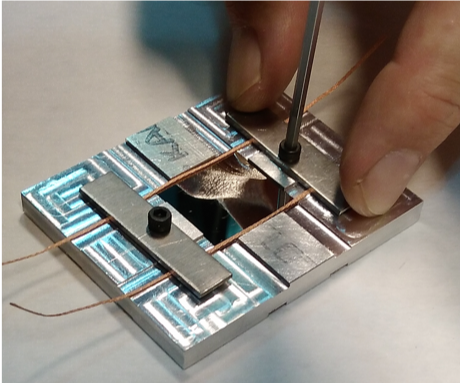
- Place heaters in the fixtures
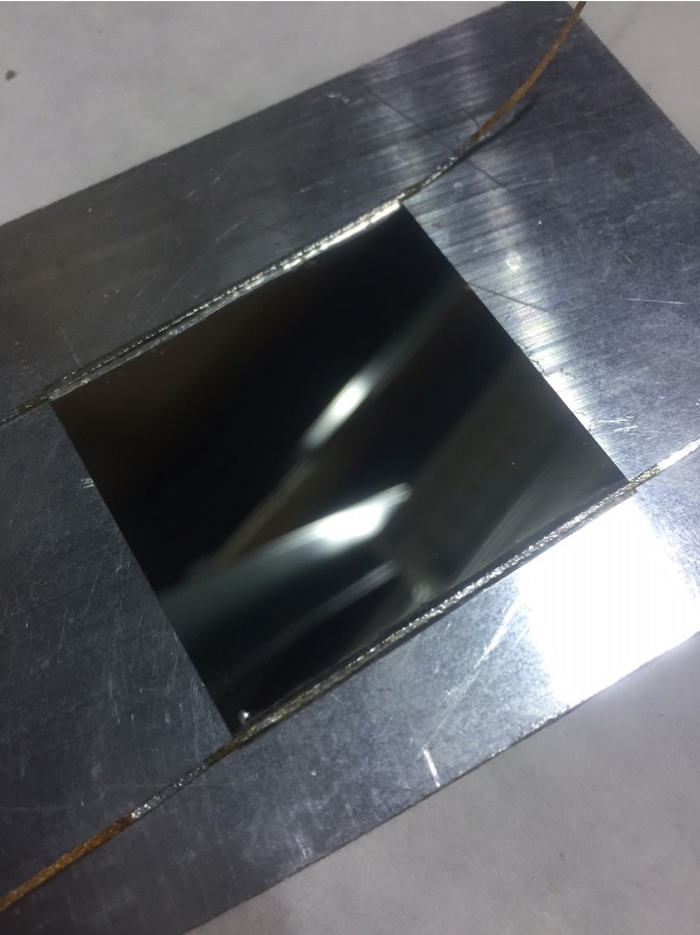
- Align 2 solder wicks across the edge of the heater and hold them in place with the aluminum bar
- Fasten the aluminum bar down with the screw to keep the wick from moving
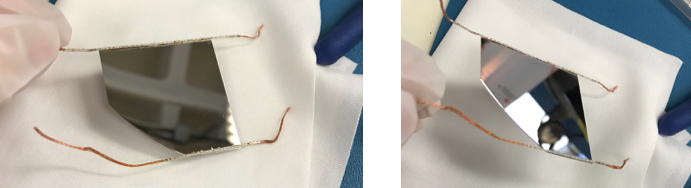
This step are illustrated in the photos here (for the quad modules):
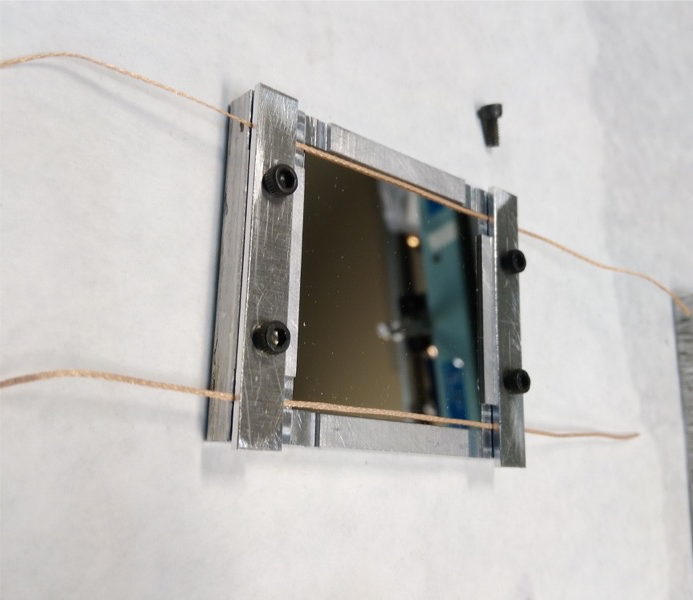
and for the single modules here:
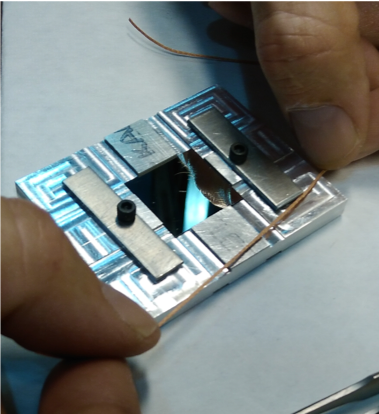
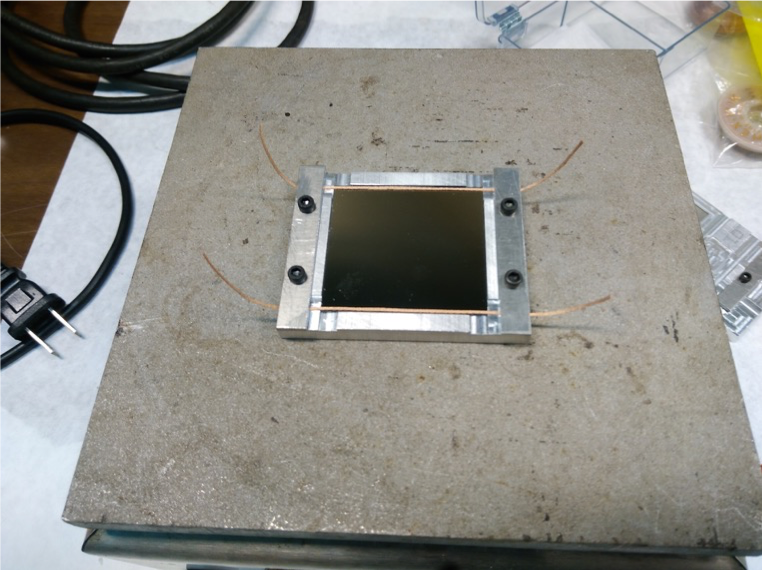
- Once in the heater is assembled into the fixture place it on top of the hot plate
- Bring the hot plate up to 220 C
- When the aluminum fixture reaches temperature of the hotplate: apply flux to the area between the solder wick and the heater
- Try to keep the flux contained to the location where the solder will go ("Don't get the flux anywhere you don't want solder")
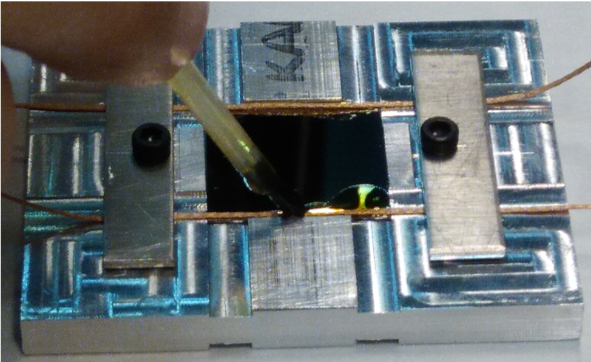
- Apply the solder to the area between the solder wick and the heater. (the solder wick should be 0.03 inches in diameter, the solder wire should be between 0.012 and 0.02 inches in diameter

- Once the solder is applied, turn off the hot plate and remove the fixture with the heater
- Wear protective gear!! Be careful: do not to touch the hot plate!!
- Let the solder cool
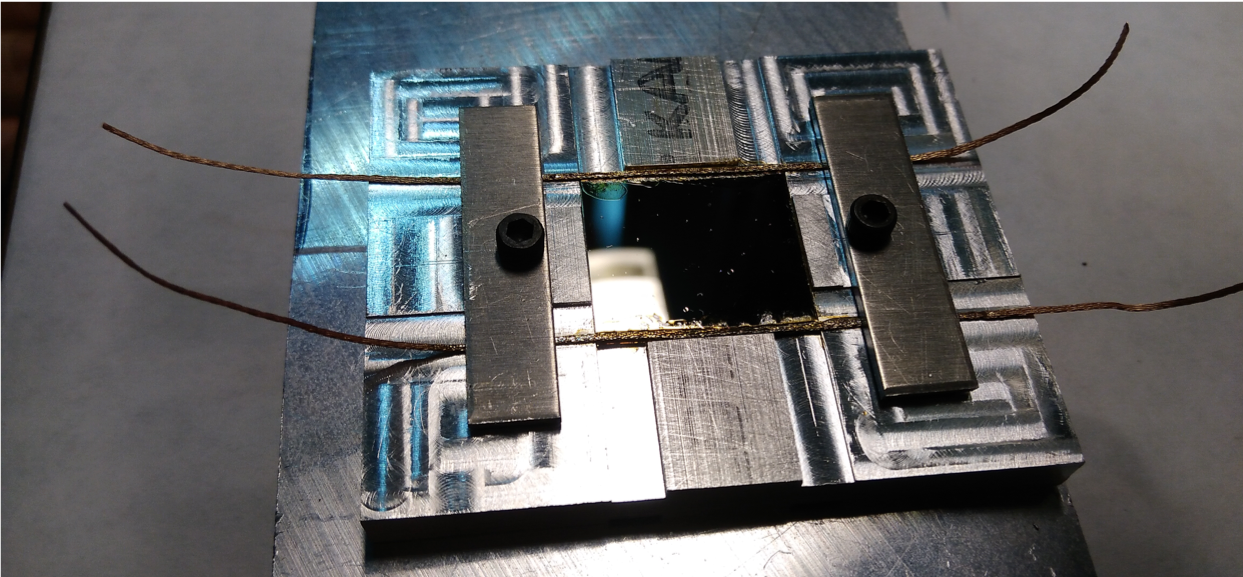
- Once the solder is cool clean the flux away with alcohol and a wooden q-tip stick
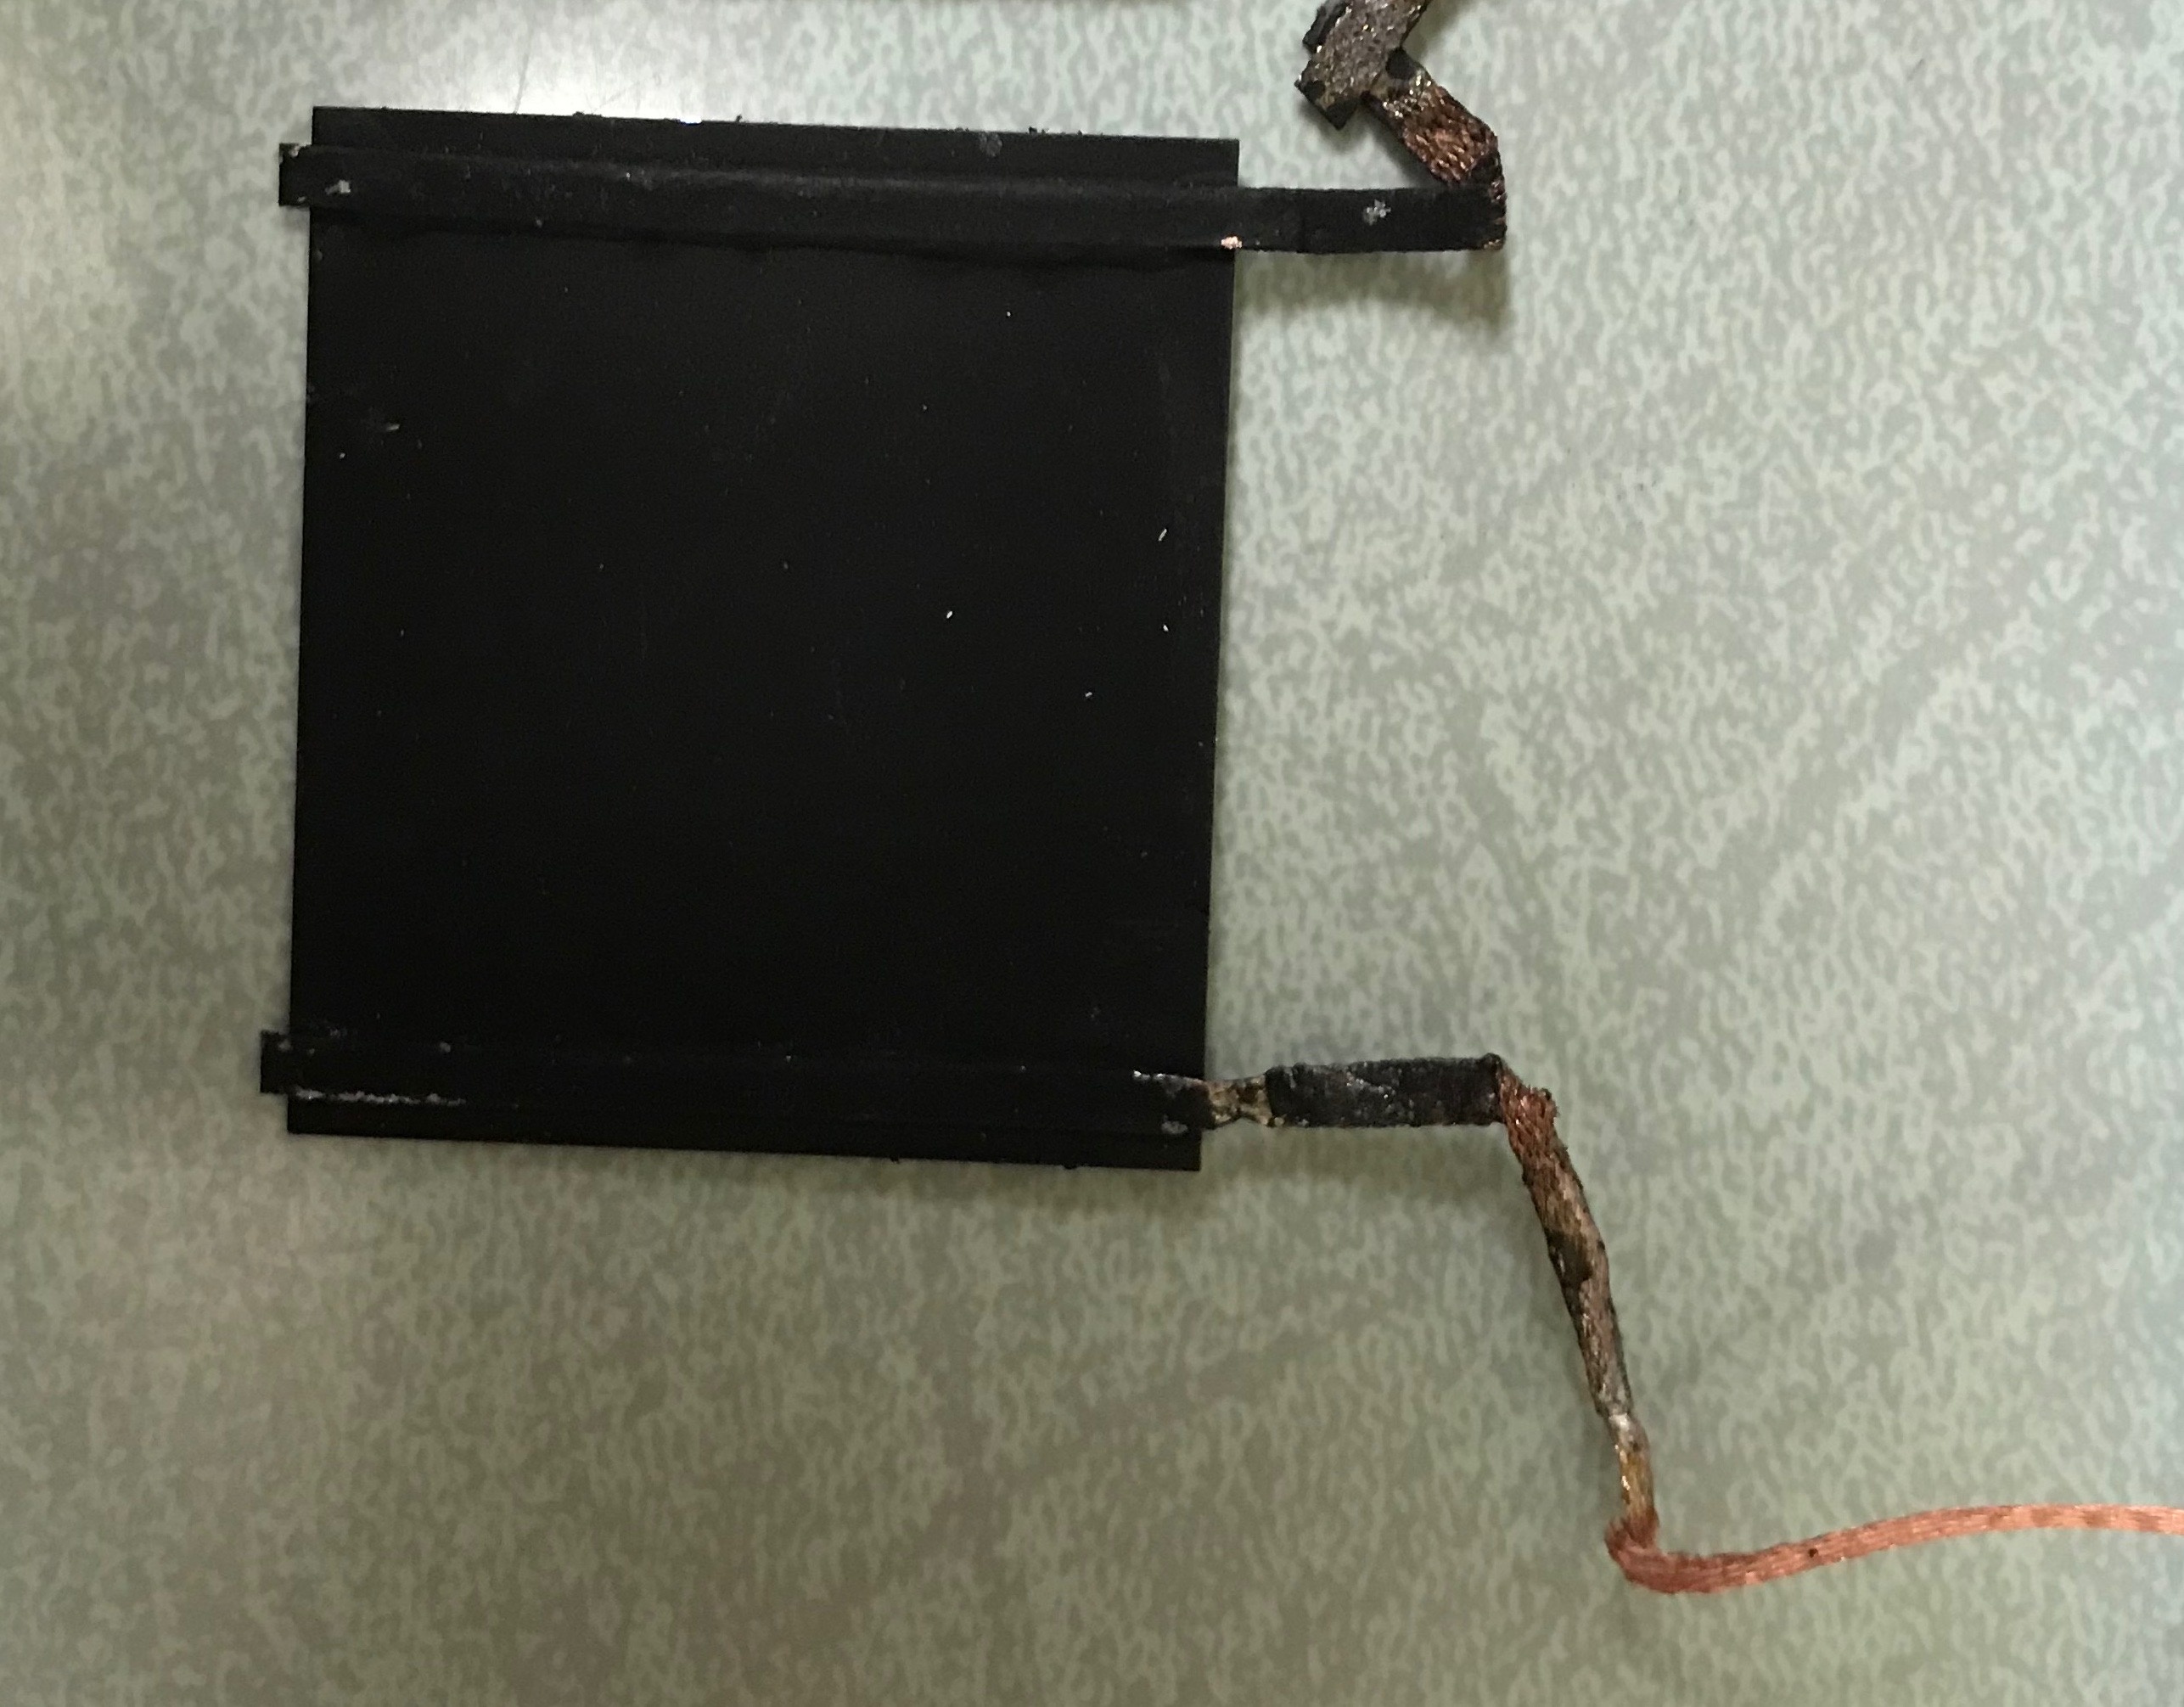
- Once complete the heater with the soldered on wicks will look like this: