This procedure is written for the LPL operation after the 100J upgrade. The LPL upgrade changed the beam size and relay imaging after the 1" CD amplifier. The upgraded setup employed new irises and new camera imagers for alignment checks with higher precision. The new procedure includes the hardware turn-on, the software turn-on, a new alignment routine (using imagers and irises), commands for SHG and HWP optimization, and recipes for new pulse shapes.
TO DO
- add a capability to put by default 'dither' to Yes
- press Y after the dither step again
- Add detailed/"expert" alignment steps as a link
- press Y until happy with the shape
- after SHG optimization, if you want to check Scope B enable 10 Hz on nsSlicer
Brief overview of LSS panel
Figure 0: Shutter S4 releases the output of the YFE. Transport shutter T3 is to allow the LPL into the chamber and T4 is to allow the Visar into the chamber. (Red: open, Green: closed)
Turn on hardware
- Set hutch to “Class 1”, or “Class 4 Glass Laser”, or “Class 4 Dual Laser”, or “Class 4 Split Mode
- At the LSS display, badge in and open Shutter S4, and press the “Press to reset interlocks"
Turn on four chillers
Figure 1: 4 chillers
Turn on four TDK Lambda power supplies. Power switch to “1” .Press the tiny “out” button at each of the 4 supplies.
Figure 2: TDK Lambda power supplies
- Turn on six eDrives: keys and power buttons
Figure 3: six eDrives
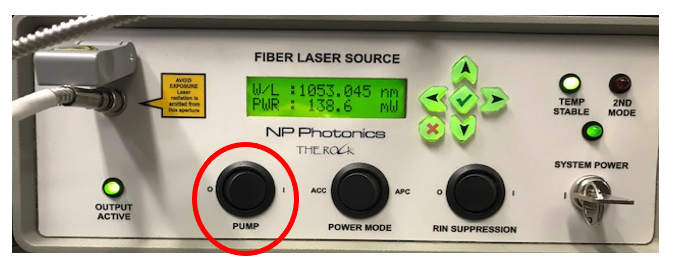
- Switch on NP Photonics Seed Laser: toggle the “pump” switch from position 0 to 1. You will see PWR ramp up to around 140mW.
Figure 4: NP Photonics seed laser
Turn on YFE
Do the following on the terminal:
- ssh mec-laser
- mecpython
- import meclas
- meclas.YFE.On()
- There will be a series of events that will happen to stabilize the seed laser prior to turning on the current to the YFE laser heads. If and when all conditions are stabilized, a series of audible ringing chimes can be heard coming from the e drives. It can take anywhere from 10's of seconds to several minutes for the conditions to be sufficient that the e drives can be turned on. This is the indication that the YFE laser is operating the that a beam is present at the LSS shutter S4.
Open LSS shutter, LPL Control window, and scope menu
To confirm YFE is running and a 10Hz beam is present on amplifier table without having to open the roll up door:
- Open LSS shutter S4
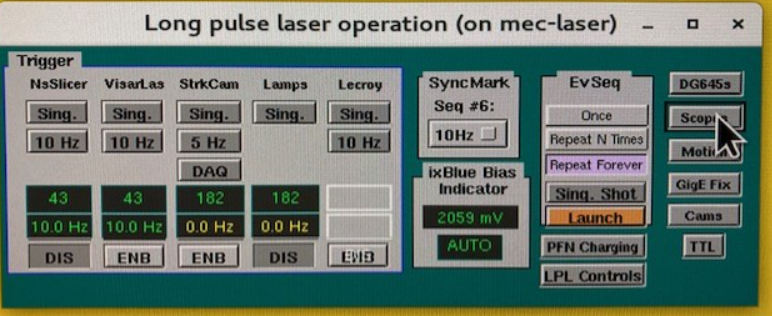
- Open Long pulse laser operation from MEC home
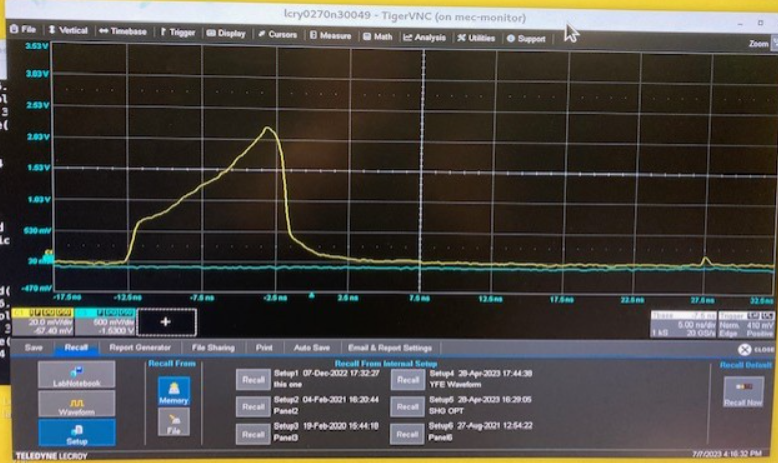
- Open Lecroy B scope to monitor 10Hz pulse shape
- If trace is not present on Lecroy B, make sure that 10Hz operation is enabled.
Physical inspection of the 10Hz beam
It may be desirable to physically inspect the beam alignment from the YFE laser through the amplifiers and SHG crystals. Go to class 4 and open the roll up doors to inspect the quality of the 10Hz 527nm beam. This is most easily done by placing the orange fluorescent paper in the beam path just after the expanding telescopes for both the East and West beams.
If the 527nm beam profile looks good, then proceed with firing amplifier heads. If the beam profile has spatial features that look irregular, it may be necessary to adjust the pinhole position in the VSF to confirm that there is no "flaring" of light at the pinhole.
If there are some visible sign of clipping in the pinhole and/or irregular profile when observing beam on orange paper, then make adjustments in both axis of the VSF pinhole to minimize the clipping/flaring of the beam. This adjustment, in turn, should improve the spatial profile of the beam when observed at 10Hz YFE only on the orange paper when the paper is placed just after the final telescope before the beam reflects up from large periscope. Adjustments to the pinhole will have pretty significant affects on the spatial profile delivered to the amplifiers but there are not any conditions on the alignment or mis-alignment of this pinhole that can result in damage to the amplifiers.
As an alternative to using the orange paper as the indication on good beam quality through the pinhole, the Cam 3 and Cam 4 can be used. To do this, the large roll up doors will need to be opened so that the Nd filters in front of these cameras can be temporarily removed. This procedure and additional steps necessary for a more detailed alignment of the YFE beam through the amplifier heads can be found in this link:
??
Load the waveform recipe and shape the waveform
meclas.LPL.psmenu(): this command gives you a list of recipes to choose from (Fig. 5). Then type in the recipe from the menu list, for example, l56 == "U10ns00gradE100J"
- meclas.LPL.psefc10Hz(numIterQ=150): this command will shape the 10Hz pulse until it reaches the target waveform. You can set numIterQ = x to run x times of iteration. In figure 6, the upper left shows all the parameters you can set. The right plot shows the 10Hz pulse (blue) and the target waveform (red). For more detail please check how to make a new recipe.
Figure 5: choose the pulse recipe: use commend "meclas.LPL.psmenu()" Figure 6: shape the 10Hz pulse as designed.
Open the beam monitor cameras -minimum cameras needed for operation
There are 2 cameras in the upgraded LPL layout used to monitor the East and West beams delivered to the TC. the new camview can be opened in mechome [detectors>view-long pulse Laser Cams> dropdown (figure below 1)]. For camview detail please check New Camview Feature
For operation and monitoring purposes only LPL_100J_1, LPL_100J_3, LPL_100J_4, are needed to open. For full alignment, using these 6 cameras is recommended. These imagers locations and descriptions are as followed (figure below 2).
- LPL_100J_3: the imager looking at combined east 527nm (IJ+GH output)
- LPL_100J_4: the imager looking at combined west 527nm (AB+EF output)
It will be necessary to take an amplified shot to check the integrity of the 527nm beams from the combined legs on the East beam and the combined legs on the West beam because there are ND filters in front of both Cams 3 and 4 that are set to attenuate the full amplified energy from all beam legs. If the 10Hz beam quality through the amplifier legs is to be viewed on either of these two cameras, it will be necessary to open the doors, remove the filter assy in front of both Cam3 and Cam4 cameras, and trigger the cameras at 10Hz.
Figure 7. Open Long Pulse Laser Camview
Open the beam monitor cameras -All cameras needed for full alignment
There are 6 cameras in the upgraded LPL layout: the new camview can be opened in mechome [detectors>view-long pulse Laser Cams> dropdown (figure below 1)]. For camview detail please check New Camview Feature
For operation and monitoring purposes only LPL_100J_1, LPL_100J_3, LPL_100J_4, are needed to open. For full alignment, using these 6 cameras is recommended. These imagers locations and descriptions are as followed (figure below 2).
- LPL_100J_2: the imager looking behind the 1" amplifier and before the relay tube
- LPL_100J_1: the imager looking behind the big Faraday Rotator
- LPL_100J_5: the imager looking before the east side 2" heads (IJ, and GH input)
- LPL_100J_6: the imager looking before the west side 2" head (AB and EF input)
- LPL_100J_3: the imager looking at combined east 527nm (IJ+GH output)
- LPL_100J_4: the imager looking at combined west 527nm (AB+EF output)
Figure 8. Long pulse laser cameras and irises layout
Check alignment
- align 10Hz pulse through the pinhole (visual check: should not see scatter light or adjust the pinhole position)
- check i1 and i2: if it's very off, adjust with M3 and M4 (use LPL_100J_1 or IR card)
- check i3: beam should be in the center of i3 (use LPL_100J_1 or IR card)
- check i4: close i3 to create ring pattern (use LPL_100J_1 or IR card) adjust with the mirror befoer i3.
- check i5 and i6: (use LPL_100J_5 and LPL_100J_6) adjust with M8 and M9
- check i7, i8 and i9, i10 (use LPL_100J_3) adjust with M2, M22 and BS3
- check i11, i12 and i13, i14 (use LPL_100J_4) adjust with M10, M13 and M18
- check i15, i16 (use card) first close i3 half way, block GH, adjust LWP15 and M26. Then open GH, block IJ, adjust with LWP10 and LWP12
- check i17, i18 (use card) first close i3 half way, block EF, adjust LWP2 and M15. Then open EF, block AB adjust with LWP6 and LWP8
Optimize SHG and HWP
- check if all TTL shutter are all working. If not, open all TTL shutter and run the command " meclas.TTL_shutter.Refresh() "
- command meclas.TTL_shutter.Status() shows TTL shutters status: in = 1, out = 0.
- command meclas.TTL_shutter.Toggle("openAB") opens shutter on AB heads.
- command meclas.LPL.SHG_opt() will run four SHG crystal rotation stages and find the maximum one by one. You can only run one arm by meclas.SHG_opt(armsQ='XX')
- You can open scope B to check if the SHG signal is there.
Figure 9: SHG optimization
Optimize HWP
Run " meclas.HWP.HWP_opt()". You can also run one or two arms by " meclas.HWP.HWP_opt(armsQ='ABIJ)". No need to run this if no changes to HWP's were made in effort to "trim" energy.
Fire a shot
- Make sure the final shutter, T3a and T3b, are closed. If it is open, make sure things are properly blocked inside the target chamber.
- check event sequence configuration: play status "stopped" in case the lamps got misfired.
- change camera trigger to "single shot": in MEC Home> EVR > New MEC LAS EVR > Front Panel B change to 182 (single shot) from 43 (10Hz)
- change Ns Slicer and Lamps to single shot: Long pulse laser operation> click Single buttons on NsSlicer and Lamps
- Charge: MEC:PFN> click "stop", "Stand By", "Ready" and "Charge"
- Fire: click "single shot"
- run postshot: meclas.LPL.pspostshot(save_flag = True, display = True), it shows a plot and energy output.
- or show energy meter: meclas.EMeters.EGall()
Figure 10. left: Event Code Sequence, Middle: new MEC LAS EVR, the camera trigger is at cha 11 (Front Panel B), right: Long pulse laser operation and MEC:PFN
Figure 11. upper left: 10Hz YFE pulse shape (blue) and designed pulse shape (red). upper right: combined 100J shape. left: camview "LPL_100J_3" and "LPL_100J_4" showing single beam profiles, right: run "LPL.pspostshot()".


