Page History
...
mask.npy has the shape (8, 512, 1024) for this jungfrau4M detector. We refer to this shape as an unassembled 3D ndarray which can be used in psana python scripts.
...
In this section, we will find peaks on the detector image. To find the peaks on the image, set the "Algorithm" to “Droplet”
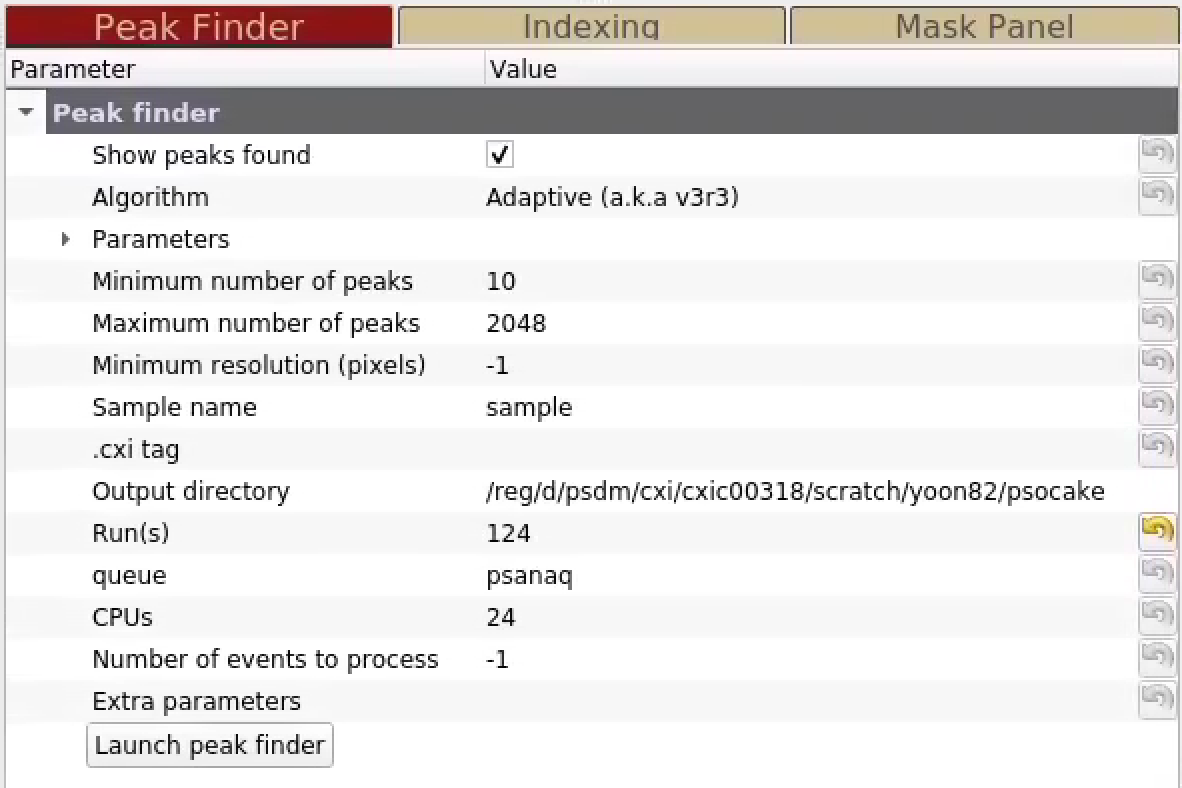
Default setting in the Peak Finder panel . Details of the peak finding algorithm is given here: Hit and Peak Finding Algorithms#Twothreshold"Dropletfinderis to "Show peaks found". You should notice peaks being highlights highlighted in the Image panel. If you are happy with the peaks found, you are done. Otherwise, you can interactively tune peak finding parameters by expanding the "Parameters" field. Details of the peak finding algorithm is given here: Hit and Peak Finding Algorithms.
Let's define the area of the peaks that you are looking for. Examine the peaks found by zooming inLet's define the area of the peaks that you are looking for. Examine the peaks found by zooming in/out with the middle mouse scroll (or a two finger slide on a Mac touchpad). Notice that the Bragg peaks are composed of 2 to 8 30 connected pixels. Setting the radius to 2 3 sets a 5x5 7x7 cyan boundary around around the Bragg peaks (radius x 2+1 = 57). Change You can change the following values in the Peak Finder panel.
- Set npix_min: 2
- Set npix_max: 820
- radius: 2
The two threshold droplet algorithm requires us to set two thresholds; a low and a high. The low threshold is the background noise level. The high threshold is the minimum height of our peaks of interest. Move the green square over the water ring to study the level of background noise in the ROI Histogram panel. Notice that the water ring intensities can go up to 120 ADUs. Strong Bragg spots are at least 250 ADUs. Ideally, we want to reject peaks that have low signal to noise ratios. Let's set it to 7 sigma, typically you need to stay above 4. So set the following values.
- 3
I can see the peak finder has done a reasonable job, but missed some Bragg peaks. Hover the mouse pointer over the Bragg peaks that were not identified to study the pixel values. Let's decrease amax_thr to 140. This means every Bragg peak should have a maximum pixel that is at least 140. Let's decrease atot_thr to 300. This means a Bragg peak's pixel values will total at least 300. Let's also decrease the minimum signal-to-noise ratio (son_min) to 8.
- amax_thr: 140
- atot_thr: 300
- son_min: 8
If you have trouble finding peaks due to high background scattering, you could turn on median background subtraction. In the
- thr_low: 120
- thr_high: 250
- son_min: 7
Hover the mouse pointer over the Bragg peaks to study the intensities. The sum of the Bragg peak pixels are above 500 ADUs. Set the following values:
Set atot_thr: 500If you have trouble finding peaks due to high background scattering, you should turn on median background subtraction. In the Experiment Parameters panel, set the Image properties to "median background corrected ADU".
Let's launch the peak finder on the cluster for a small number of events to see how this set of parameters performs. The output directory on the Peak Finder panel should already be automatically set to: /reg/d/psdm/cxi/cxitut13cxic00318/scratch/<username>/psocake
Since we are analyzing run 10124, /r0010 r0124 directory will be generated under the output directory.
The default setting will analyze run 10 124 on psanaq with 24 CPUs. Number Number of events to process set to -1 analyzes all the events.
For this demo, let's analyze only 50 events with 2 12 CPUs.
- Run(s): 10124
- Queue: psanaq
- CPUs: 212
- Number of events to process: 50
To check which queues are freeyour job progress in the queue, type the following in the terminal :with your own username:
| Code Block | ||
|---|---|---|
| ||
$ bqueues | grep ps psnehhiprioq 117 Open:Active - - - - 0 0 0 0 psfehhiprioq 117 Open:Active - - - - 0 0 0 0 psnehprioq 116 Open:Active - - - - 0 0 0 0 psfehprioq 116 Open:Active - - - - 0 0 0 0 psnehq 115 Open:Active - - - - 0 0 0 0 psfehq 115 Open:Active - - - - 520 276 244 0 psdebugq 114 Open:Active - - - - 0 0 0 0 psanaq 112 Open:Active - - - - 7466 6612 854 0 psnehidleq 70 Open:Active - - - - 96 0 96 0 psfehidleq 70 Open:Active - - - - 104 0 0 104 psanaidleq 70 Open:Active - - - - 552 432 0 120squeue -u <username> |
At the time of writing this documentation, psanaq is quite busy processing 7466 jobs. 6612 jobs are pending. 854 jobs are currently running. For more information on which queue you are allowed to use, see Batch Nodes And Queues#BatchNodes
...
Overview
Content Tools