Page History
...
Application panel under ROI (Region Of Interest) tab has a minimal number of control fields, which allow to specify the file with image and open/close Mask Editor UI in separate window.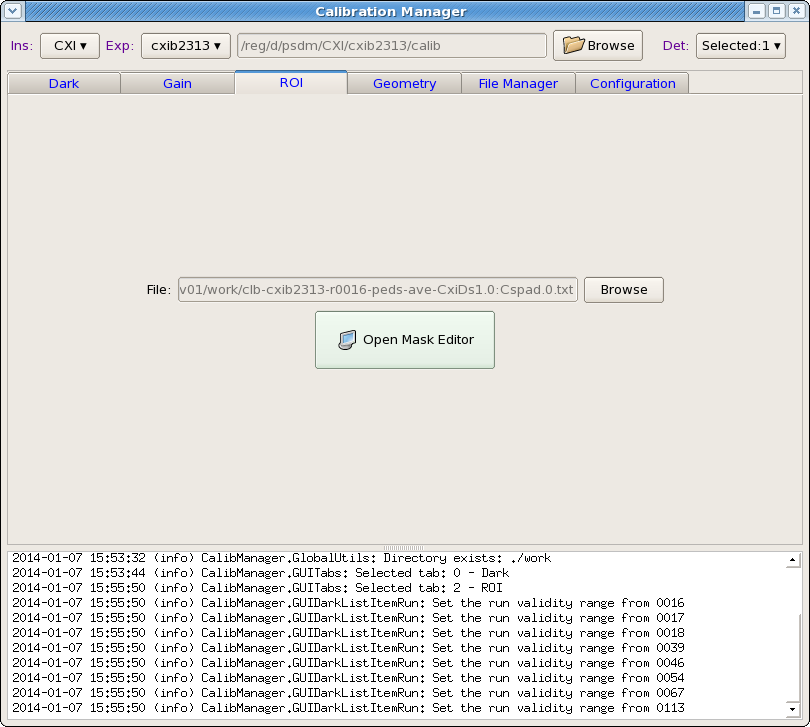 contains re-implemented algorithms of the command line
 roicon, described in Make ndarray for ROI mask.
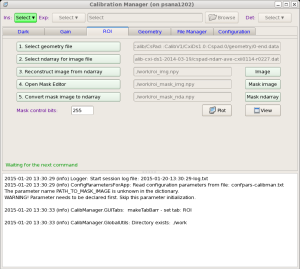
The files with ndarray and geometry constants should be selected as input parameters in the first two options of this GUI. The names of other intermediate and output files for "Image", "Mask image", and "Mask ndarray" are optional. Next three buttons
- 3. reconstruct image from ndarray,
- 4. Open Mask Editor, and
- 5. Convert mask image to ndarray
executes associated procedures. "Mask control bits" parameter controls sensor pixels, which will to be masked. For example, for CSPAD
- Mask control bits = 0 - do not mask sensor pixels
- +1-mask edges,
- +2-wide pixels,
- +4-non-bounded pixels,
- +8-non-bounded pixel neighbours.
When launched, Mask Editor works as completely independent application. The Mask Editor allows to draw on image any number of a few geometry figure types and finally generate and save positive or negative mask for loaded image.and finally generate and save positive or negative mask for loaded image. When mask is created it needs to be saved in the "Mask image" file. After that mask editor can be closed.

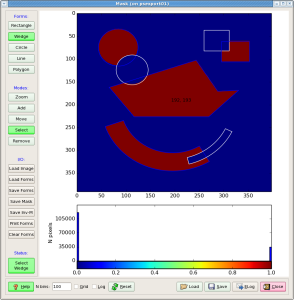
All files and images of the ROI application can be "Plot"-ted and "View"-ed. For now, mask file is saved in the work directory and is not deployed. In stead, its path could be used in the ImgAlgos.NDArrCalib module.
| Anchor | ||||
|---|---|---|---|---|
|
...
Overview
Content Tools