Page History
Contents:
| Table of Contents |
|---|
| Anchor | ||||
|---|---|---|---|---|
|
...
If the DAQ system is not already running, then there should be a "Restart DAQ" icon on the operators console. Open that to start the DAQ system. When you do you will get a number of windows opening. In XPP or XCS, use "restartdaq" from a terminal. "restartdaq -w" will put the windows in predetermined locations on the screens/
| Anchor | ||||
|---|---|---|---|---|
|
...
The EVR (Event Receiver) is responsible for generating readout triggers for the detector. It can be configured to generate trigger pulses of a selected polarity, duration, and delay, and in response to signaled events (eventcodes) from the accelerator timing system like the arrival of beam. The EVR configuration screen, labeled "EVR" is found among the other detector configurations as described above. After clicking "EVR" in the "Reconfigure" window, you will be able to select either "EvrConfig" or "EvrIOConfig" in the "Component" section. 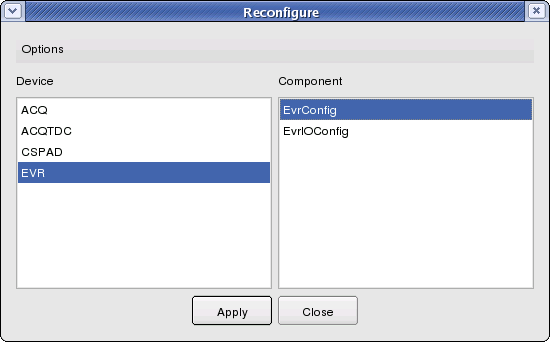
The "EvrIOConfig" panel is not in use anymore, the names for the triggerlines are now set from the <hutch>.cnf. The "EvrConfig" panel allows you to rename trigger lines (cables plugged into the EVR module in the hutch). The "EvrConfig" panel allows you to edit the trigger settings.edit the trigger settings. 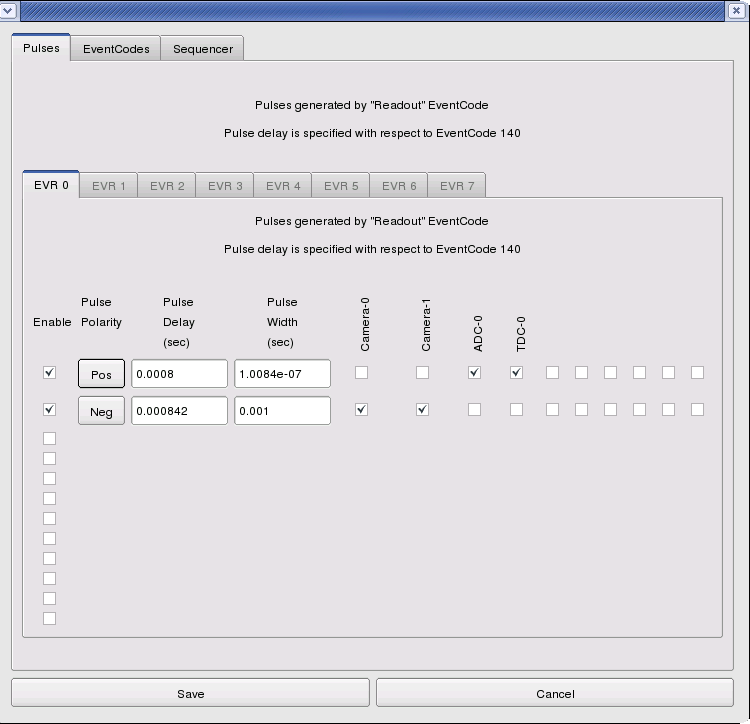
The "EvrConfig" panel has three tabs labeled "Pulses", "EventCodes", and "Sequencer". The Pulses tab allows you to edit the set of trigger pulse parameters along with the set of output lines they drive. Pulse delays and widths are expressed in seconds assuming the global timing system clock runs at exactly 119MHz. The pulse delays are expressed with respect to the timeslot reserved for the arrival of eventcode 140 (the eventcode that signifies the presence of beam). The software will internally modify this number when a readout eventcode other than 140 is selected (see below) in order to maintain the same pulse delay with respect to the timing system fiducial. 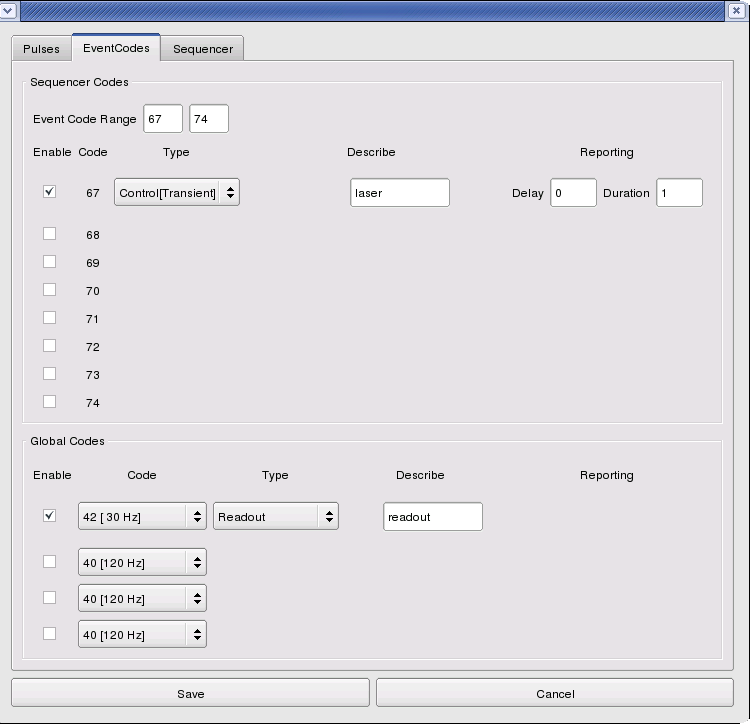
The EventCodes tab is where you can select to record the arrival of various eventcodes and choose the eventcode from which the trigger pulses will be generated. The Sequencer Codes section is where eventcodes specific to your experiment are listed, and the Global Codes section is where the eventcodes available to all experiments are listednow depreacted and cannot be selected anymore. An eventcode can be designated as Readout, Command, Control(Transient), and Control(Latch). An eventcode designated as Readout will generate the trigger pulses on each occurrence. There should be only one eventcode designated as such. An eventcode designated as Command will generate a software event which can be used for software command generated readout (like for a Princeton camera). That software generated event will collected along with the other detectors on the next occurrence of a Readout event. An eventcode designated as Control(Transient) will be recorded in the datastream for each occurrence with the specified delay and duration (in units of readout occurrences). This allows a record to track the occurrence of some event triggered from that eventcode elsewhere, like the pump laser for instance. It is also possible to add a list of event codes to record in the <hutch>.cnf file, removing the need to set commonly used event codes in the EVR config if they are needed for recording only. An eventcode designated as Control(Latch) will be recorded in the datastream on every readout event following its occurrence until the complementary Control(Latch) code is received. For example, a pulse picker state can be recorded by the occurrence of the commands responsible for its "Open" and "Close" operation. For many experiments, only the Readout eventcode needs to be designated.
...
A new window opens, and initially all detectors are selected by default:
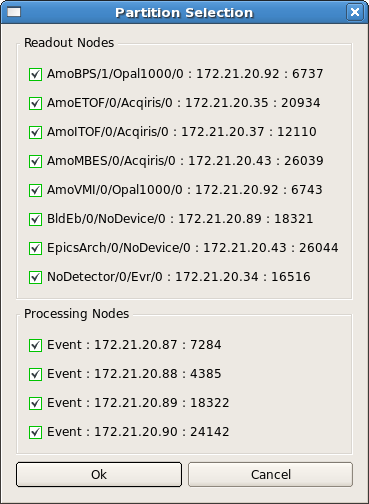
used the last time the DAQ was run are selected. If nodes had to be powercycled, the processes running on them are deselected. Sometimes processes will just become unselected, so be sure to check your partition!
Click on a checkbox to unselect the corresponding readout node. Do not unselect the Nodetector/0/Evr/0 node, as it provides timing for the DAQ system.
...
- Remove unused readout nodes to reduce data volume
- Remove an unresponsive readout node to eliminate errors
- Test a readout node in isolation
Please note that for ami to (reliably) work, you need to select all dss nodes that are listed in the <hutch>.cnf file.
The following example shows the selection of a single camera. Note that the Evr is always required:
...
The DAQ system also supports a socket interface to allow scripts or other processes to make acquisition requests of the DAQ. In this way, the script becomes responsible for iterating the scan variable (setting an EPICS PV) and commanding the DAQ to acquire data at each scan point. Thus, non-linear scans or multi-dimensional scans may be implemented as needed by the user.
This is integrated into the <hutch> python environment which most hutches have which is described in more detail elsewhere. We recommend using that over writing your own scripts.
An example An example Python script for running a scan may look like this:
| Code Block |
|---|
import socket
import DaqScan
import ConfigDb

if __name__ == "__main__":
#
#  Connect the socket to the appropriate hutch DAQ system
#
    s = socket.socket(socket.AF_INET, socket.SOCK_STREAM)
    s.connect((options.host,options.port))
#
#  Get the current configuration key in use and set the value to be used
#   (assumes we are using the same detector configuration as currently running)
#
    cdb = ConfigDb.Db()
    cdb.recv_path(s)
    key = DaqScan.DAQKey(s)
    key.set(key.value)
#
#  Send the structure the first time to put the control variables
#    in the file header
#
    data = DaqScan.DAQData()
    data.setevents(0)
    data.addcontrol(DaqScan.ControlPV('EXAMPLEPV1',0))
    data.addcontrol(DaqScan.ControlPV('EXAMPLEPV2',0))
    data.addmonitor(DaqScan.MonitorPV('BEAM:LCLS:ELEC:Q',options.qbeam,1.))
    data.send(s)
#
#  Wait for the DAQ to declare 'configured'
#
    result = DaqScan.DAQStatus(s)
    print "Configured."
#
#  Wait for the user to declare 'ready'
#    Setting up monitoring displays for example
#
    ready = raw_input('--Hit Enter when Ready-->')
    for cycle in range(options.cycles):
        data = DaqScan.DAQData()
        data.setevents(options.events)
        data.addcontrol(DaqScan.ControlPV('EXAMPLEPV1',cycle))
        data.addcontrol(DaqScan.ControlPV('EXAMPLEPV2',100-cycle))
        data.addmonitor(DaqScan.MonitorPV('BEAM:LCLS:ELEC:Q',options.qbeam,1.))
        print "Cycle ", cycle
        data.send(s)
        result = DaqScan.DAQStatus(s)  # wait for enabled , then enable the EVR sequence if needed
        result = DaqScan.DAQStatus(s)  # wait for disabled, then disable the EVR sequence if needed
#
#  Wait for the user to declare 'done'
#    Saving monitoring displays for example
#
    ready = raw_input('--Hit Enter when Done-->')
    s.close()
|
...
- AMO:
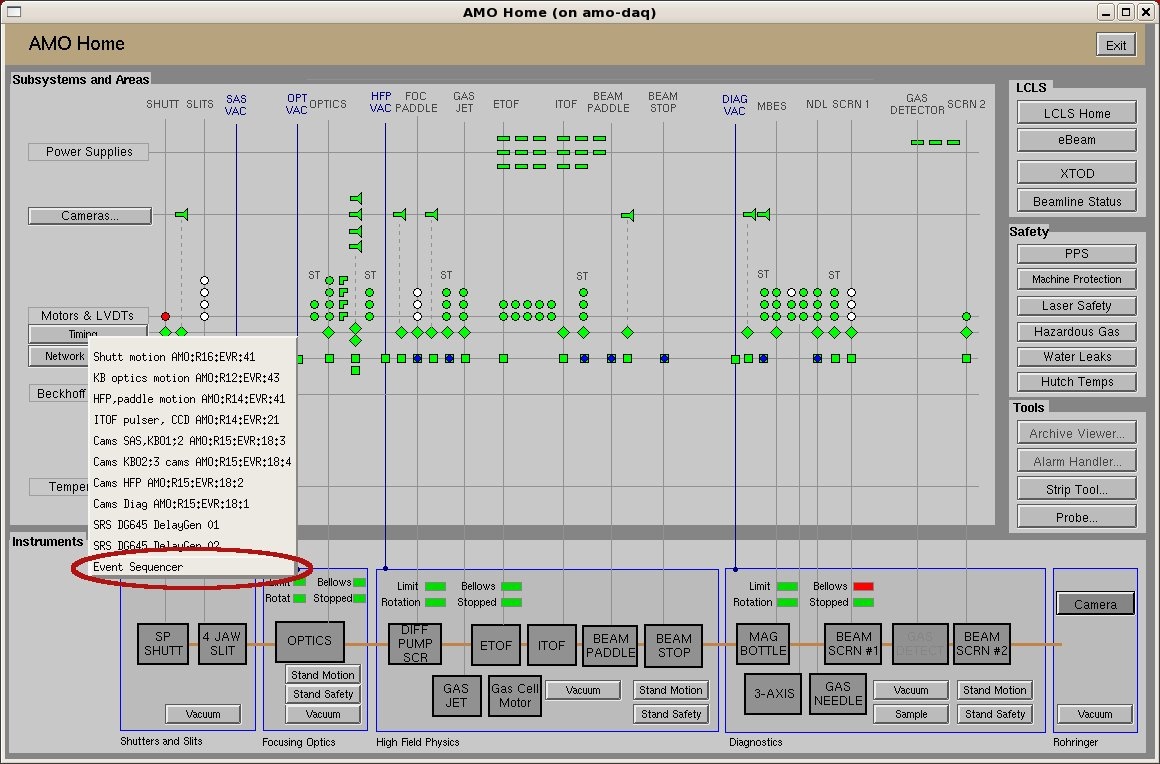
Note: Click on the menu "Timing"->"Event Sequencer" to bring up the event sequencer window. - SXR:
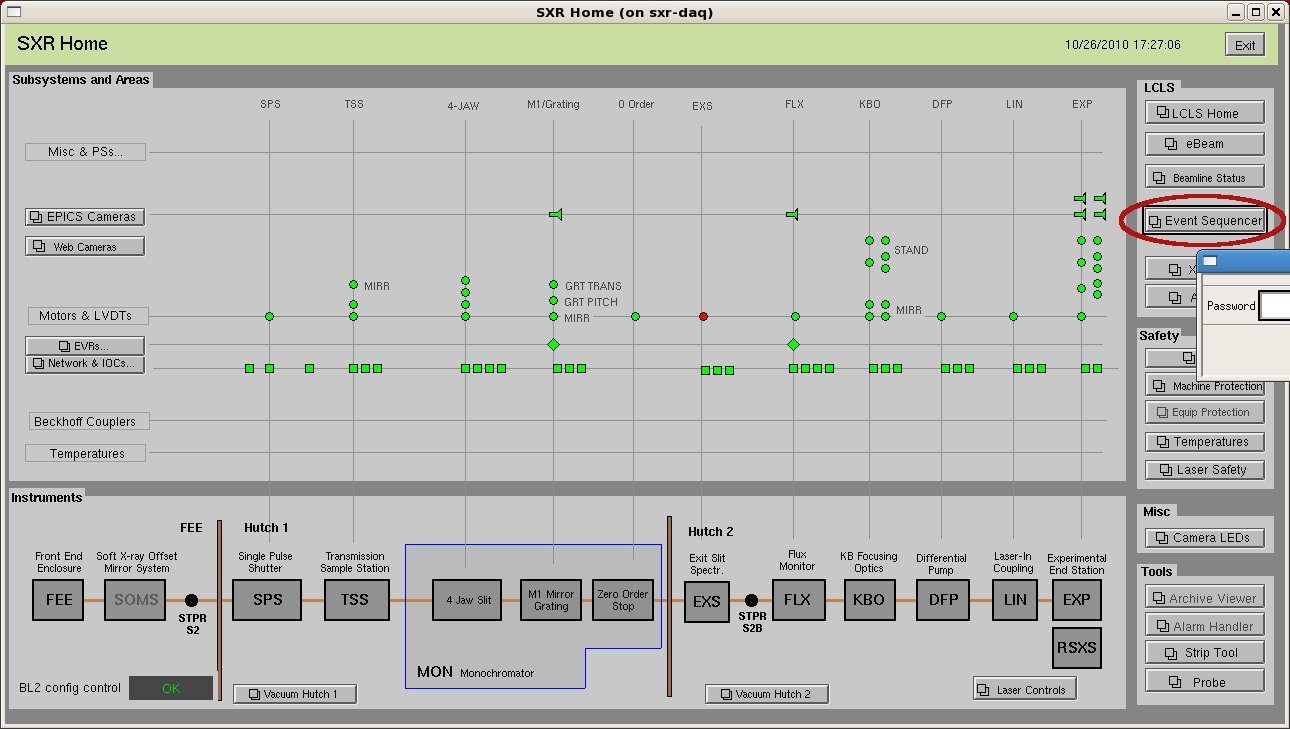
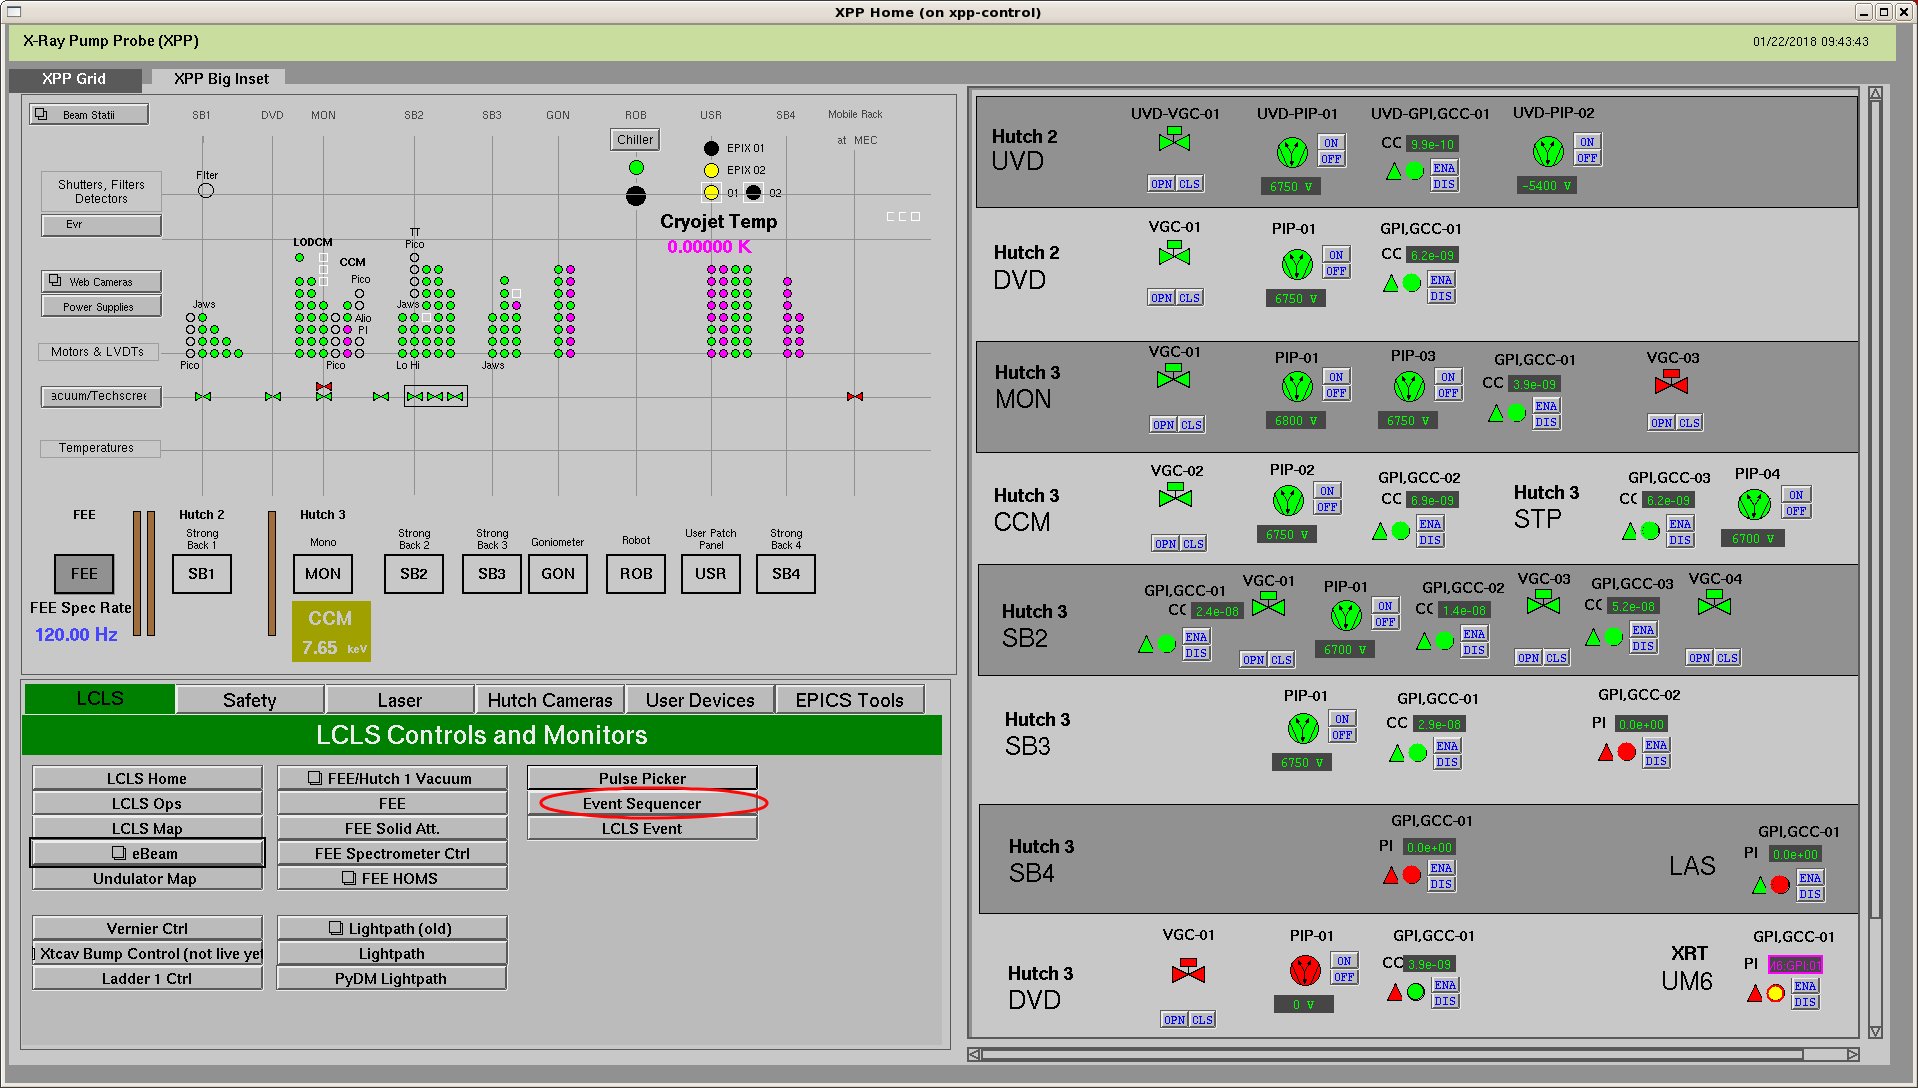
Note: The event sequencer window is password protected. - XPP or XCS:

Note: The event sequencer window is password protected.
...
- look in the LCLS tab of the lower left region of the screen.
After clicking on the event sequencer button in the epics window, and entering the password (if necessary), the event sequencer window will pop up, as below:

...
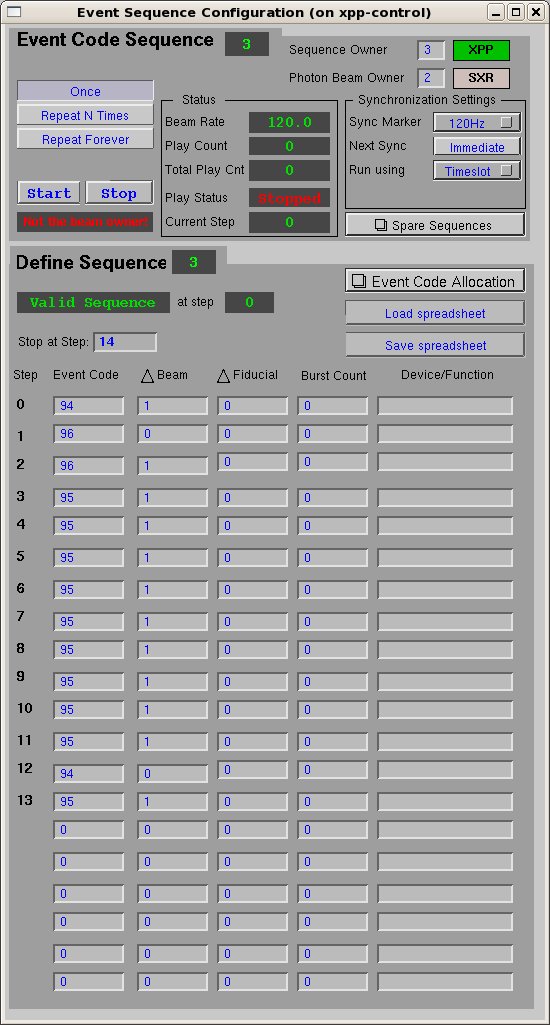
The main function of the "Run Sequence" part is to let you start or stop the sequence playing, but clicking on the "Start" or "Stop" button.
Also it shows the current beam rate, play counts and the running status of the sequencer. You can also control the play looping by clicking on
"Once", "Repeat N Times" or "Repeat Forever". More details can be found at this confluence page.
The event sequencer window has upper (titled as "Run Sequence") and lower parts (titled as "Define Sequence"). Here we only focus on the upper part.
If you click If you click on "Repeat N Times", there will show an additional input field for entering the number of loops.
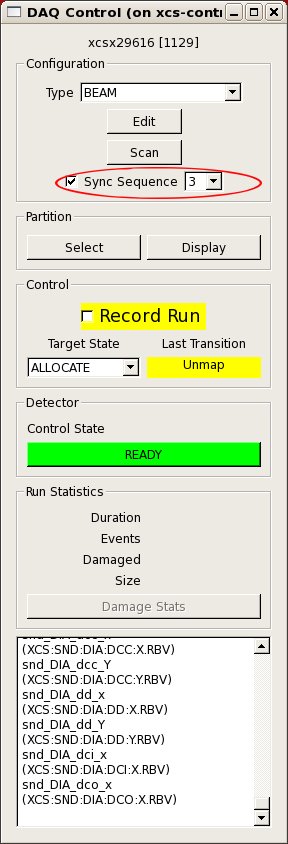
In the DAQ, you have the option to select "Sync Sequence" where you have to enter the sequence you want to sync to. The DAQ will now start the sequencer on the "enable" transition and stop it on "disable". This is useful for scans in which a sequence will be repeated for each step. Please check that the timing of the sequence running the the DAQ works, in particular if you have slow to configure detectors in the DAQ.
| Anchor | ||||
|---|---|---|---|---|
| ||||
| Anchor | ||||
|
...
Recovering from errors:
LCLS-1 DAQ Tier-1 Troubleshooting
Scans etc (presentation from Oct 2021)
Running scans, PVs, elog, and smalldata tools overview
To (re)start the DAQ system open the icon labeled "Restart DAQ" on the DAQ console:

Overview
Content Tools