YFE Turn on Procedure:
- Set hutch to “Class 1”, “Class 4 Glass Laser” or “Class 4 Dual Laser”or “Class 4 Split Mode
- Don the appropriate eyewear
- At the LSS display, badge in and open Shutter S4
Turn on each of the 4 chillers:
- Requires a ~ 30 minute run time to reach stable set temp
- YFE output energy will be low until set temperature is reached
- Set Temperature for each chiller is:
- 2mm ABCD = 30.3 degrees C with 49psi and a .95GPM flow rate
- 2mm EFGH = 30.3 degrees C with 49psi and a .95GPM flow rate
- 6mm AB = 26 degrees C with 43psi and a 2.0GPM flow rate
- 10mm CD = 24 degrees C with 47psi and a 2.0GPM flow rate
At the NP Photonics Seed Laser:
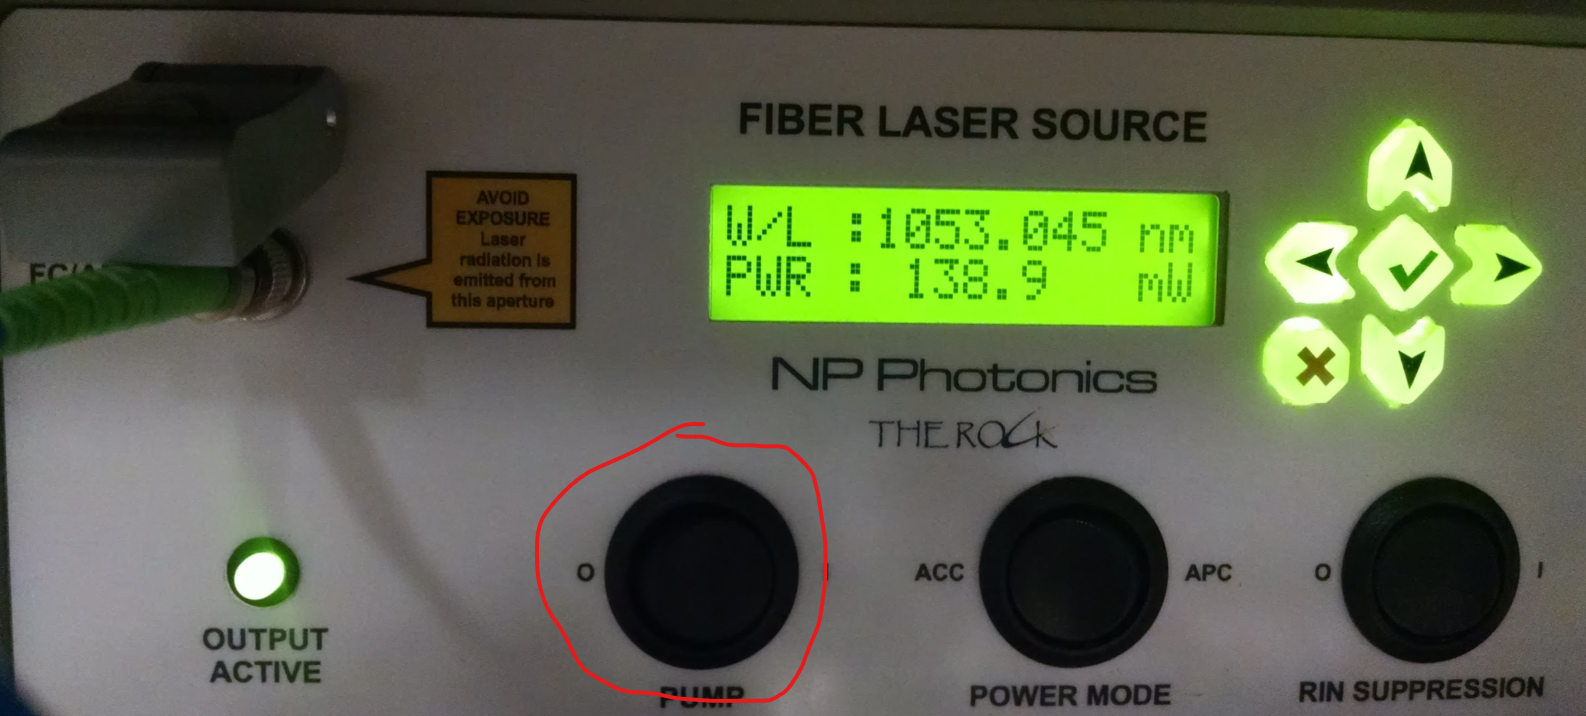
- Verify NP Photonics Seed Laser is Operational
- If power output reads 0 then:
- Go to LSS display, badge in and press the “Press to reset interlocks” button at the top right of screen
- At the NP Photonics seeder, toggle the “pump” switch from position 1 to 0 and then back to 1
- The output power indicated on the screen should now begin ramp up to the max value of ~ 140mw
- Power mode = ACC and Run Suppression = 0
Note: there are TWO NP Photonics "The Rock" seed lasers in rack R64B along the south wall of the hutch:
- the free-standing unit sitting at the top of the rack (as indicated in the picture below) is the operating unit
- the rack-mounted unit in the middle of the rack is a spare – don't get fooled by this unit without any lights on
At Epics:
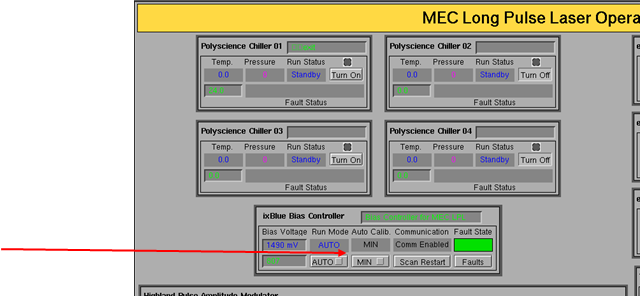
Verify in Epics that seed laser is “locked” to min and not max
Verify Pulse is Locked:
Blue ring should be illuminated along with the green “lock” LED
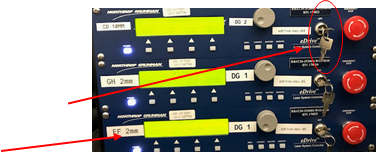
eDrive Turn On:
- Rotate key switch clockwise at each eDrive
- Press “Power” button at each eDrive
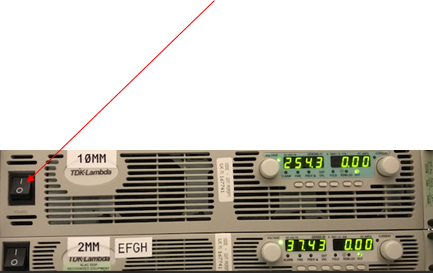
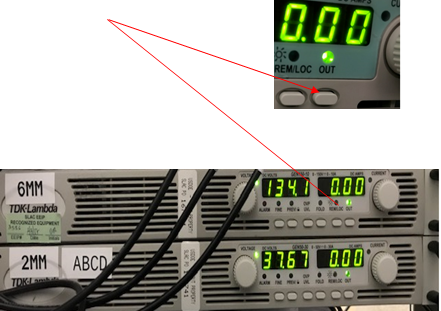
Turn on TDK Lambda power supplies:
- Toggle power rocker switch to “on” position at each of the 4 supplies
- Press the tiny “out” button at each of the 4 supplies. The green LED above the button should then be illuminated


