Page History
GUI intended to create mask of the bad pixels and save it as 2-d image and 3-d data like array.
Content
Table of Contents
Main window GUI
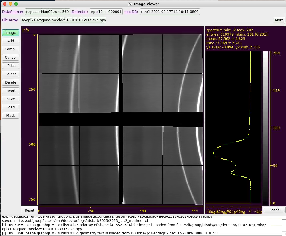
Image with axes and cursor info panel
Spectrum with statistical data
...
Control fields and buttons

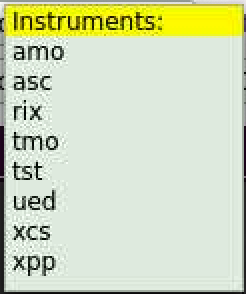
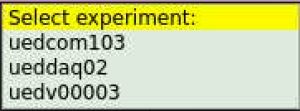
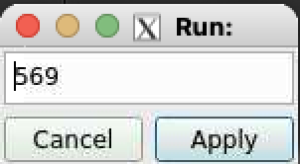
Select DB parameters
After click on DataSource button a bunch of sequentially pop-up windows for instrument, experiment. and run number simplify to set DB parameters.
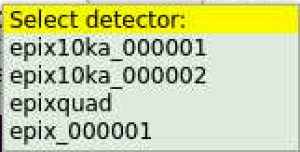
Select detector
ROI control buttons
...
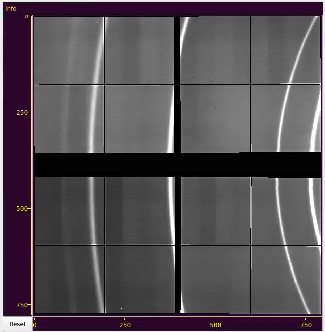
Click on Image mode button, then click and drag or scroll mouse for translation or zomming zumming image, respectively.
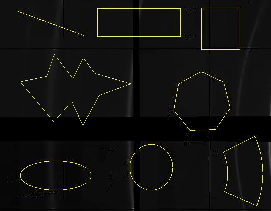
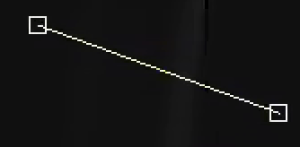
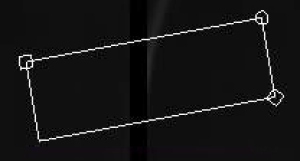
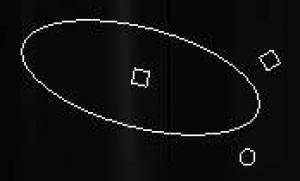
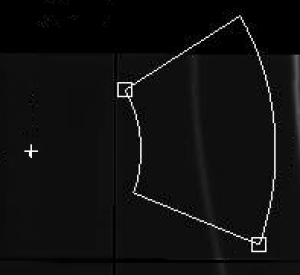
Add ROI
...
Right after selected ROI type click on image to mark ROI control point locations as manyy many times as it is necessary to define particular ROI shape.
Add/
...
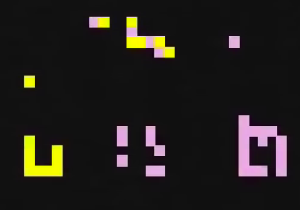
Remove PIXEL and PIXGROUP
Right after click on Add button and selection of PIXEL or PIXGROUP ROI, start clickiing clicking on desired pixels or click-hold and pan. Added pixels will be marked by color. Double click remove removes appropriate pixel. Input of the PIXGROUP is compleated compleated by the click on Compl. button
Select ROI
Currently Select mode is used in combination with Delete in order to preview deleting ROI.
Click on Select button, then on ROIs to select them. Selected items will change color.
PIXEL type ROI will be selected one-by-one. PIXGROUP ROI will be selected as whole by a single click.
Edit mode


Select file GUI
Use standard dialog to select I/O files
...
Overview
Content Tools