Installing Eclipse and plug-ins to work with org.lcsim
| Info | ||
|---|---|---|
| ||
Eclipse is written in Java, but supports also C/C++ and Jython editing. Even a Fortran plug-in exists. See bottom of page for links |
First you have to download Eclipse and install it. Go to http://eclipse.org/downloads/index.php and download version 3.1
Extract the archive to a location of your choice and start eclipse.
Installing plug-ins
| Note |
|---|
The following instruction are still correct, but the Maven 2 plug-in is much easier to install and provides a better experience overall, so the recommended course of action is to skip installation of Mevenide, proceed to checking out the project from cvs and use the Maven 2 plug-in instead. |
The most important plugin to install is the Mevenide which allows Eclipse to build a project with Maven.
Select Help->Software Updates->Find and Install...
You will see the following
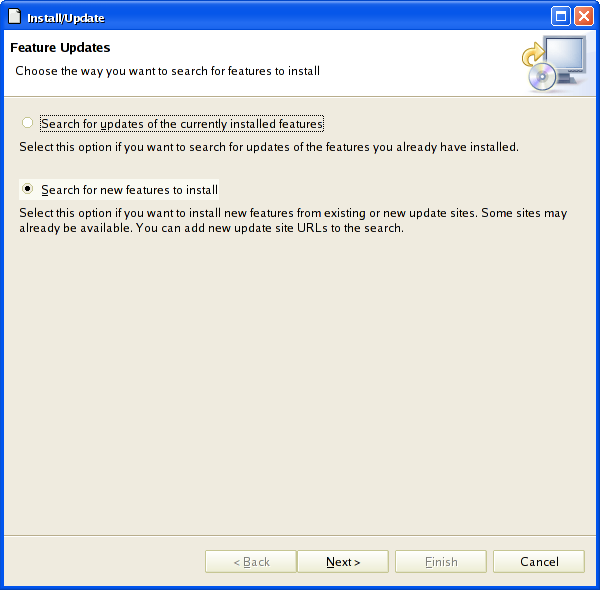
Select 'Next>'
Select 'New Remote Site...'
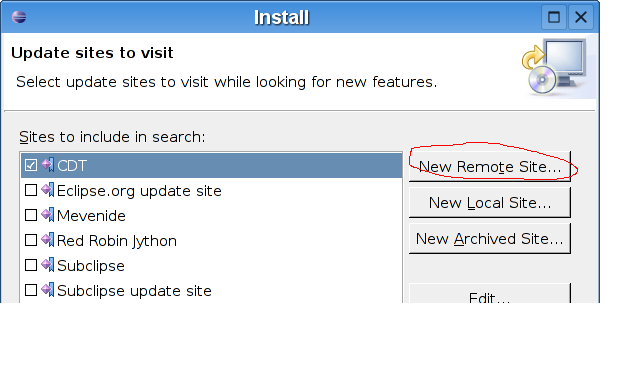
In the following dialog, enter "MevenIde" for Name.
In the Location field enter http://mevenide.codehaus.org/release/eclipse/update/site.xml
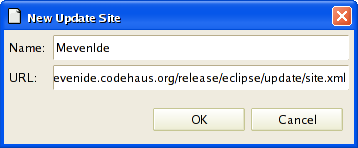
Confirm with 'OK'
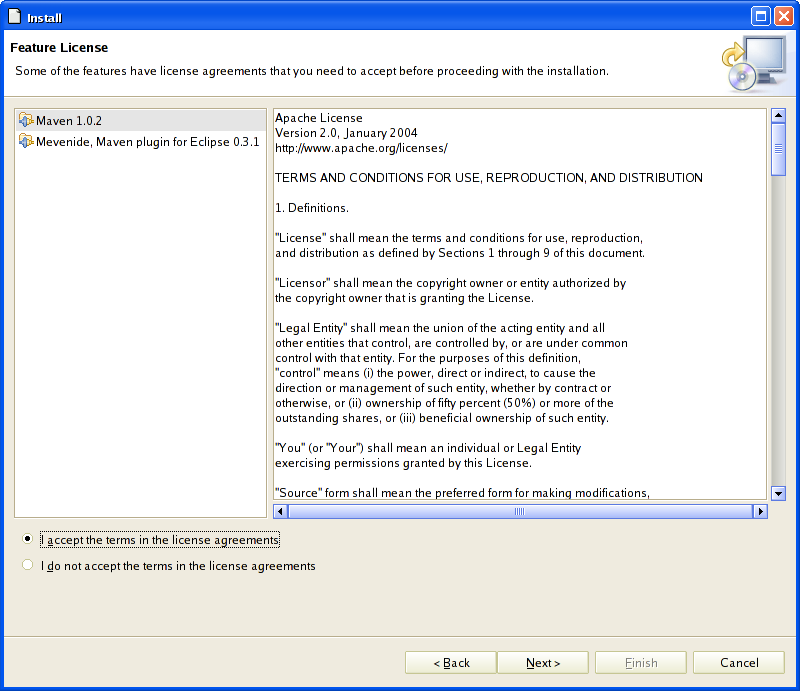
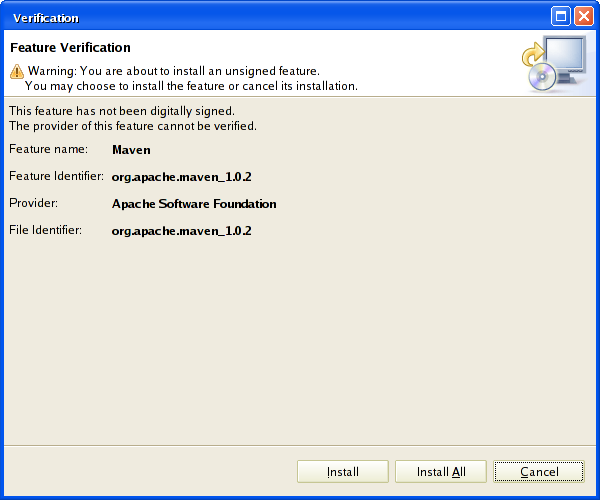
In the following dialog, select the latest versions of Maven and Mavenide.
| Note |
|---|
The Mevenide plug-in requires the Maven plug-in to be installed. |

Click on 'Next>'
You will have to agree to the following Trems and Conditions before the plugins can be installed
Eclipse wil then download the plugins you selected. You will be asked to confirm the installation.
Once the installation is complete, you have to restart the workbench. Confirm the following dialog with 'Yes'

Congratulations ! You have successfully installed Eclipse and a first plugin.
Checking out org.lcsim from CVS
We will now learn how to check out org.lcsim from CVS and configure the project.
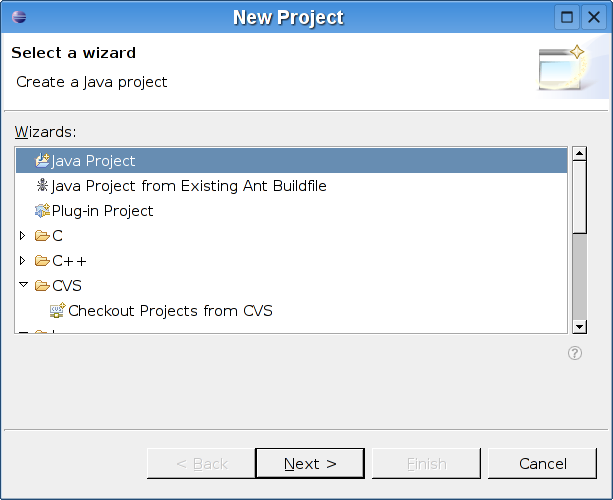
Select File->New Project
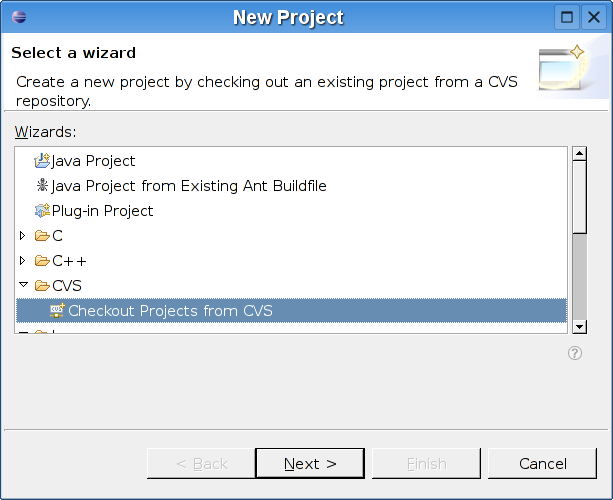
Select Checkout Project from CVS and click Next.
Select Create a new repository location and click Next.
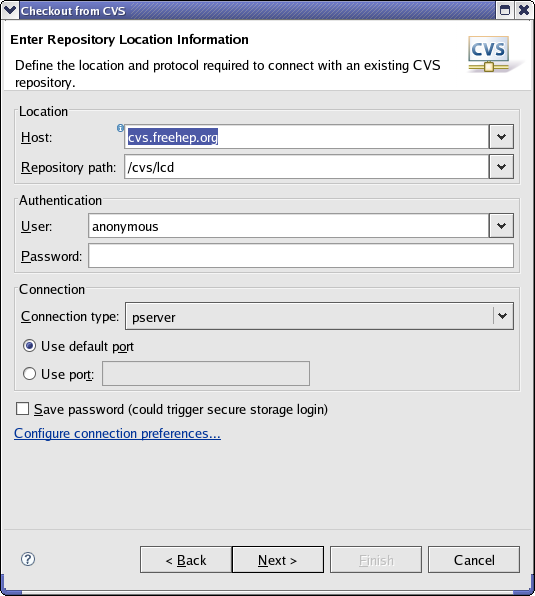
Enter the appropriate entries in the fields and click Finish.
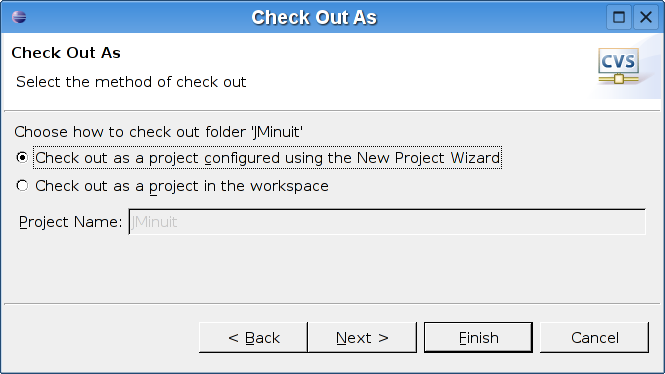
Select Check out as a project configured with the New Project Wizard and click Next
Choose Java Project and click Finish
The org.lcsim project will now be checked out from CVS and into your Workspace.
In order to be working with Maven from inside Eclipse, there are still some adjustments to make.
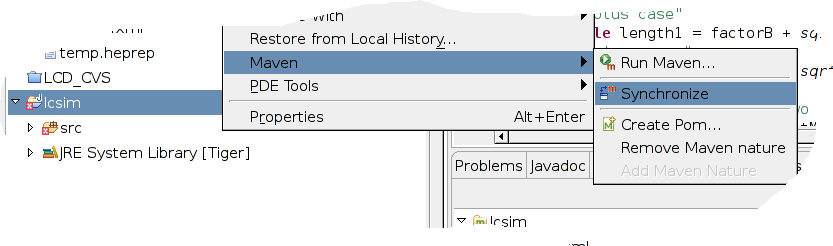
Right click on your project and select Maven->Synchronize
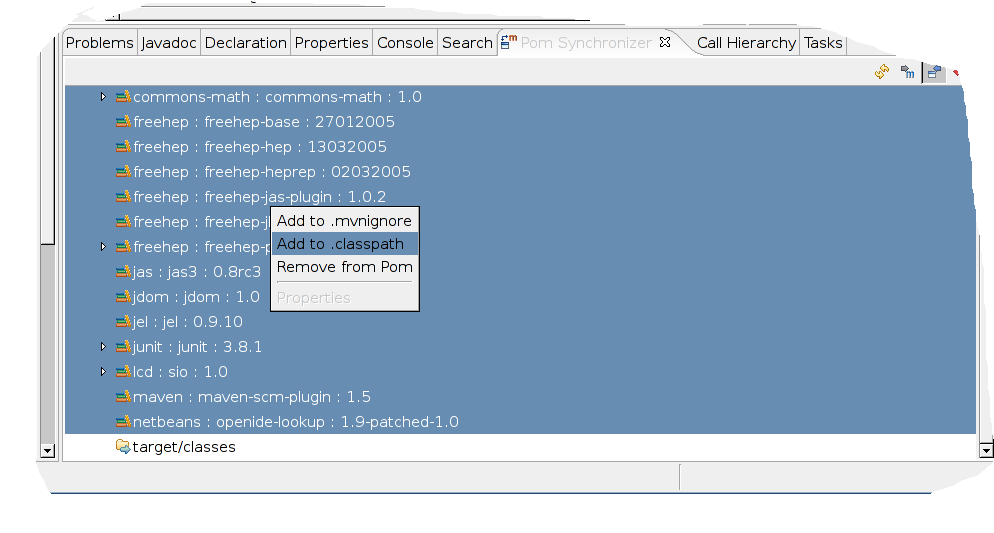
You will see a window with all dependent .jar files.
Select all .jar files, right click on the selection and choose add to .classpath.
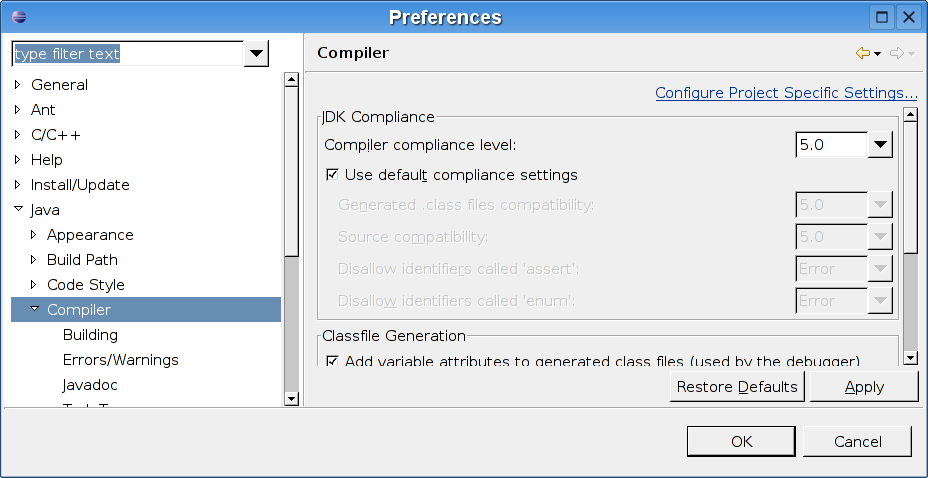
Finally you will have to change the Compiler to Java 5.
Choose Window->Preferences... from the menu and select Java->Compiler
Select 5.0
That's it !
You can now run all Maven targets just like from the command line.
Select Maven->Run... from the project context menu.
Installing other plugins
One of the strengths of the Eclipse IDE is its extensibility. There are many plugins available. Just google "eclipse + your favourite keyword" to see what's out there. Installation of additional plugins is straightforward once you mastered the previous section.
Some potentially interesting plugins:
Mevenide: http://mevenide.codehaus.org/mevenide-ui-eclipse/update/index.html
Jython: http://home.tiscali.be/redrobin/jython/
| Tip |
|---|
Jython is the Java implementation of Python, a popular and powerful scripting language with a large community. Two good starting points for more information are http://www.jython.org http://www.python.org |
C/C++: http://www.eclipse.org/cdt/
Fortran: http://www.eclipse.org/proposals/eclipse-photran/index.html
Classpaths using Maven
Maven can generate the .project and .classpath files for Eclipse. From a maven-based project, execute this command.
| No Format |
|---|
maven eclipse |
Now the .classpath file will have all the jars needed by that project.
However, Eclipse does not know where the Maven repository lives. Add a classpath variable to Eclipse from Window -> Preferences -> Java -> Build Path -> Classpath Variable. In Maven 1, this variable should be called MAVEN_REPO. On Linux, it should point to ~/.maven/repository.