Prerequisites
SCons Overview
Read at least the SCons Introduction page in the Workbook. Developers should also read SCons for Developers.The third page in the collection, Making Builds with SCons, is of less interest if you're planning to work primarily in Visual Studio. If you're used to CMT, definitely check out the CMT-SCons Comparison chart .
Python
If you don't already have it (python external libraries under GLAST_EXT don't count) install python from the official site . Version should be at least 2.5; 2.6 or 2.7 preferred. Do not attempt to use a version in the 3.x series.
SCons
You'll need 1.3.0 or newer; at least 2.1.0 is preferred. You can get it from the official SCons site .
GlastRelease
Installers
The simplest way to get the source for a particular tag and the externals it uses is with one or the other of the installers. Because of a recently-fixed bug, older tags are not available this way, but tags made on or after May 29th should be. Here are links for the gui and command-line installers.
If you need access to other tags or if you want to check out code which has not yet been tagged you will need to resort to the techniques described below.
Another option is to use the Installer just for externals (uncheck the box for the GlastRelease code itself) and check out the source with a cvs command as described below in the section GR source.
GR source
First determine what specific tag you want. (As of November 26 the most recent tag, dated October 21, is GlastRelease-20-06-04. A new one is expected soon.) It can be checked out of CVS
cvs co -d GR-20-08-10 -r GlastRelease-20-08-10 GlastRelease-scons
(note the -d option above is not necessary. Including -d GR-20-06-04 will cause the top-level directory of the check-out code to be called GR-20-06-04. By default it would be named after the module being checked out; i.e., GlastRelease-scons)
or you can copy a zip file of source from SLAC nfs. In this case, the path for the debug build is
/nfs/farm/g/glast/u52/ReleaseManagerBuild/Windows-i386-32bit-vc90/Debug/GlastRelease/GlastRelease-20-06-04-source.zip
Replace "source" above with "devel" to get a zip file which includes final build products along with source.
Externals
You will also need a compatible set of externals. For tags not available from the installer, the easiest way to get any that you don't already have is probably to copy them from the V disk. To find out which externals were used for any particular RM build, go to the compile output for that build. This output can be found for each build in the RM II web pages or by running the stand-alone program RMViewer , available via ftp . The list of externals used is near the top, following a string of lines starting "Checking for C++ ..." That output for the debug build of 20-06-04 can be found here .
Building Preliminary Targets
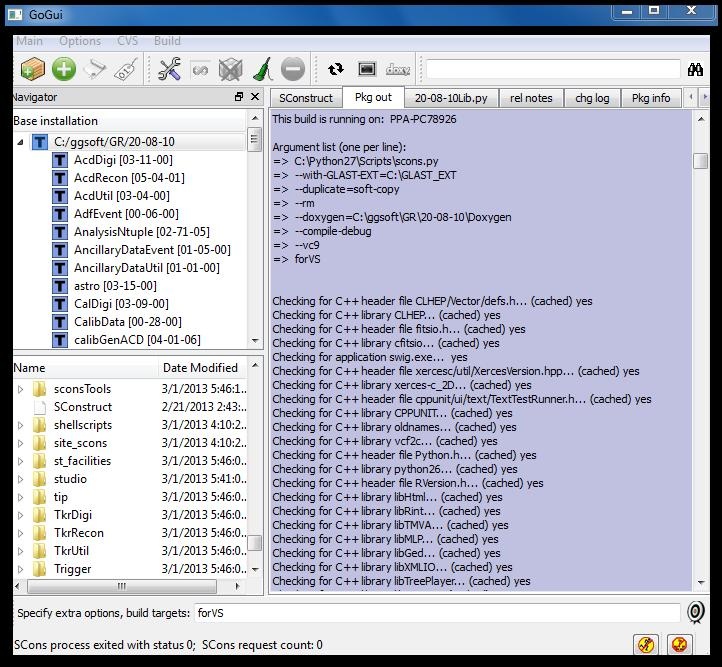
There is a certain amount of bootstrapping which has to take place before you can use Visual Studio. Assuming scons is in your path and GLAST_EXT is properly defined, from a VS 2008 console window you can cd to the root directory of your GlastRelease source and issue the following command to build some special targets:
scons --with-GLAST-EXT=%GLAST_EXT% --compile-debug --vc9 forVS
or use GoGui , available via ftp, to do the same thing:
- As described in the documentation, use menus to set base path, compile options, location of SCons on your system, and so forth
- Select the top line (root directory of your installation of GR) in the Base installation pane of the Navigator panel
- At the bottom, in the field labeled "Specify build target", type the target name (forVS, combination of targets setup, to_install and StudioFiles) and hit Enter or click on the target icon.
- For older versions of GR the target forVS does not exist. In that case, you will need to build the three targets setup, StudioFiles and to_install one at a time.
Building the setup creates a file, _setup.bat, which defines environment variables needed before starting up Visual Studio or for running executables belonging to GR once they are built.
The StudioFiles target includes project files for all library and executable targets. It also writes a solution file for each package and two special files all.sln (references all project files) and allGleam.sln (references all library projects plus Gleam and test_Gleam projects).
to_install installs all xml files, job options files, etc. In most situations it also installs headers, but, since this caused considerable grief for VS developers, SCons will not install headers for recent tags of GR on the Windows platform only. In any case, to be certain to avoid compile- and run-time failures due to missing source files of one sort or another, it's recommended you start out by installing all source files that need installing from SCons by building the to_install target . Re-installs after updates can be done from within VS.
Starting up VS
From command line
Bring up a VS 2008 console window. Define the environment variable INST_DIR to point to the top-level folder of your installation, the one containing the SConstruct file. Run the setup file created above. Relative to the top-level folder of your source installation, it will have a path more or less like
bin\Windows-i386-32bit-vc90-Debug\ _setup.bat
Next cd into the folder containing the project and solution files. Relative to the top-level folder this will be something like studio\Windows-i386-32bit-vc90-Debug
Then start up VS on one of the solution files, e.g.
devenv allGleam.sln
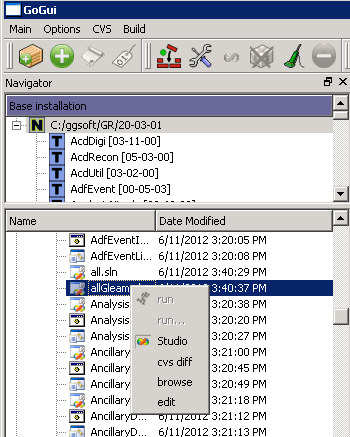
From GoGui
Alternatively you can start up a solution file from within GoGui. Select the root directory. Then, in the bottom navigator pane, navigate to the subdirectory with a name like studio\Window-i386-32bit-vc90-Debug. (If you don't see such a directory, you might have to refresh the listing first by clicking the refresh icon. You can start up VS by right-clicking on any solution file and selecting the Studio menu item.
Known issues
Installing headers
VS project files do not have the same level of granularity that SCons does in handling the installation of header files. SCons parses C++ source to compute dependencies on headers and will automatically install any header needed to compile an object it is trying to build. As far as I can tell, VS project files do not natively support the idea of installing files. The approach I originally took was to generate a .bat file for each package which installs files (headers, job options, xml, etc.) belonging to that package, then invoke it in a project file belonging to that package. Usually it's the same project file that builds the package's library. If the package doesn't build a library, there is an extra VS project file which does nothing but invoke the .bat file. However, there is no easy way to determine dependencies and build order among these project files.
I think that most scenarios of modifying headers from within Studio will be handled correctly, but it is somewhat awkward. The intent was that developers modify the original (within the package) copy of the header,job options file or what have you, and the build process should install it.
Installing headers Take 2
The original scheme was sufficiently troublesome to Windows developers, in particular Windows GlastRelease developers, that newer versions of GR don't install headers. Other source files (xml, job options, etc.) are still installed. "Newer versions" means anything with SConsFiles tag SConsFiles-01-00-00 or greater; for working supersede need SConsFiles-01-10-00 or greater. The tag of SConsFiles belonging to a particular GR can be verified by looking at the first few lines of the top-level file SConstruct.