Introduction
This is a project suggested by Bebo White to build a PingER monitoring host based on an inexpensive hardware called Raspberry Pi (see more about Raspberry Pi) using a linux distribution as OS (see more about Raspbian). If successful one could consider using these in production reducing the costs, power drain (they draw about 2W of 5V DC power compared to typically over 100W for a deskside computer or 20W for a laptop) and space (credit card size) assisting monitoring sites to be able to procure and support such monitoring hosts. This could be very valuable for sites in developing countries where cost, power utilization and to a lesser extent space may be crucial.
Raspberry Pi Model and Specifications
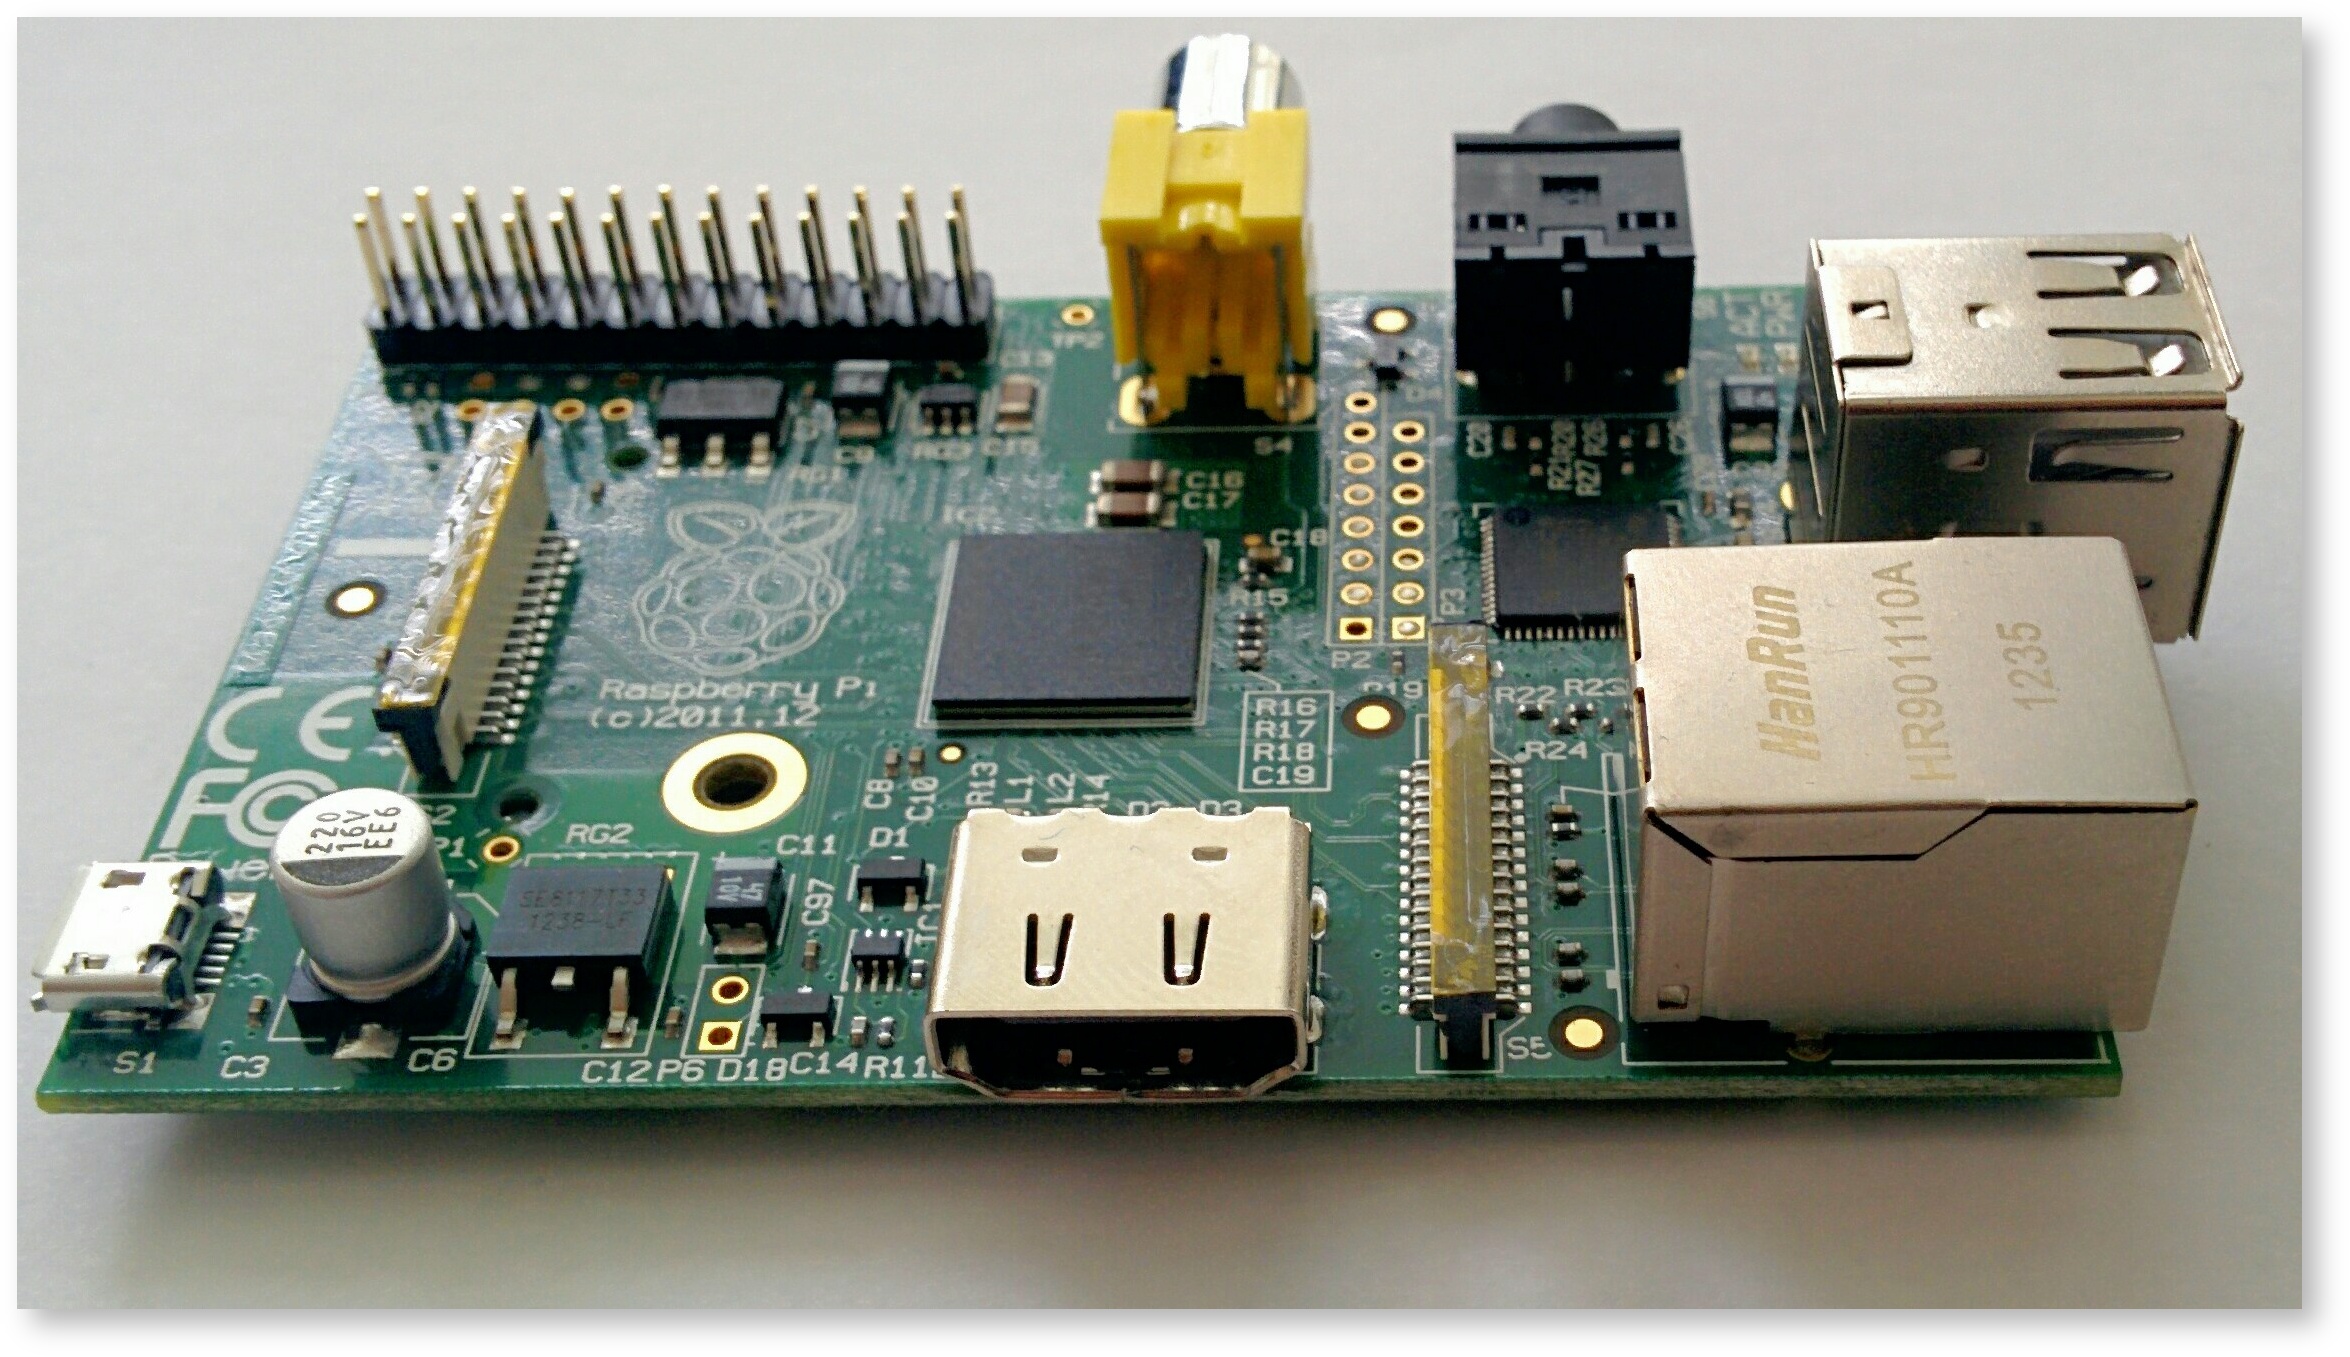
The Raspberry belongs to Bebo White and it is the version 1 of Raspberry Pi, model B. The cost is about $25/each + costs of the SD card. The Raspberry purchased each has 512MB RAM, on a 700Mhz ARM CPU and a 32GB SD Card ($18) was used. They have 2 USB and 1 100Mb/s Ethernet interfaces and 1 HDMI port. Keep in mind that is necessary to have a keyboard, a mouse and a HDMI monitor to do the installation process, but once that Pinger is working they are not necessary anymore. We measured the power (Wattage) during normal use and it is 2.7 Watts. When using the Dell mouse with an LED powered from the Raspberry Pi it crept up to 3.2Watts.
Operating System
The installed system is called Raspbian a Debian Linux variant. The OS had Perl, Make, dig, ping and mail installed. We accessed it through the graphic interface of Raspbian. We just had to install: Apache and XML::Simple.
Installation of PingER2
The first step, before start the installation process we had to change the hostname in Raspbian.
sudo nano /etc/hostname
sudo /etc/init.d/hostname.sh
Notice that the hostname here must include the domain. So, our hostname was pinger.raspberry.slac.stanford.edu.
Then, we followed the instructions in PingER End-to-end Reporting version 2. After installing the PingER2 monitoring code, we installed the ping_data gathering agent, the traceroute server and the pinger_trimmer following the instructions.
When we tested everything, we got a error message on the pingerCronStat.stderr file telling us that the ParserDetails.ini file was missing. We used this approach to fix this.
We entered the machines as monitors in the PingER meta data base of hosts.
Obs: Make sure to change the default password for Raspbian.
Analysis
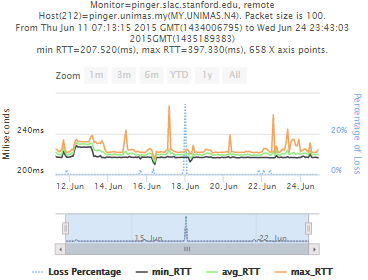
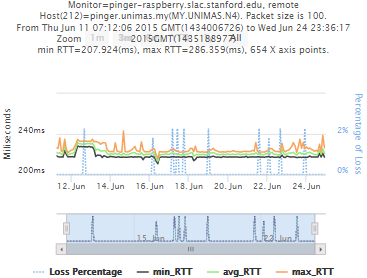
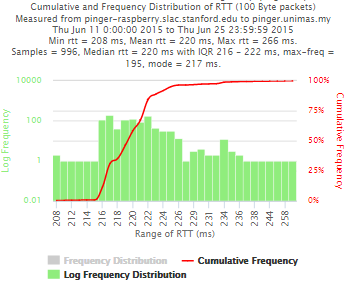
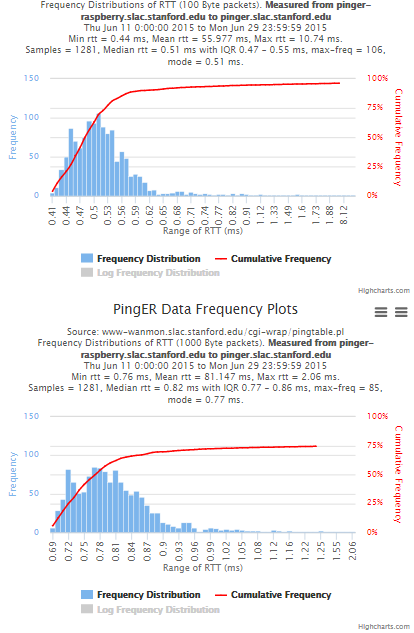
Example target = pinger.unimas.my (~220 msec.)
For both 100Byte and 1000 Byte pings (not shown above) the round trip time series for RTTs have similar behaviour and there are similar losses 7:10 (pinger : pinger-raspberry for 100 Byte pings), note the different Y scales for losses. The losses are about double for 1000Byte pings.
| Time Series | Frequency Distributions |
|---|---|
 |  |
 |  |
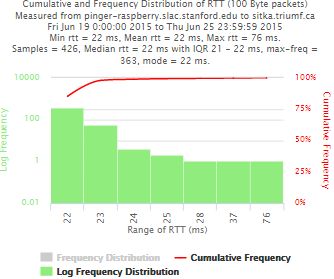
Example target sitka.triumf.ca (~22msec.)
| Time series | Frequency distributions |
|---|---|
 | 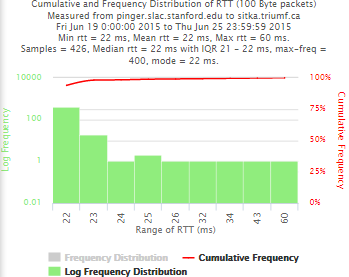 |
 |  |
Example between pinger.slac.stanford.edu and pinger-blackberry.slac.stanford.edubb
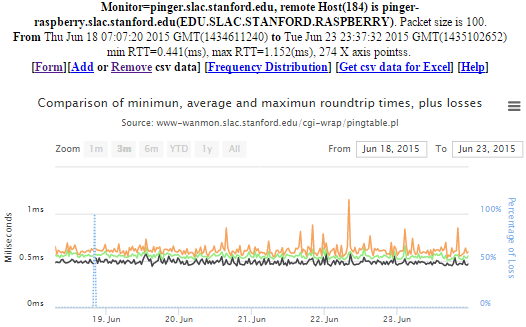
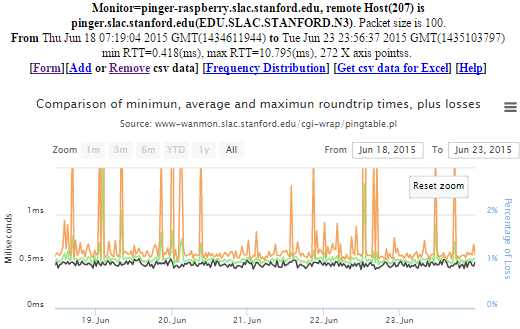

| pinger to Pinger-raspberry | pinger-raspberry to pinger |
|---|---|
 |  |