...
- Set hutch to “Class 1”, or “Class 4 Glass Laser”, or “Class 4 Dual Laser”, or “Class 4 Split Mode
- At the LSS display, badge in and open Shutter S4, and press the “Press to reset interlocks"
Turn on four chillers. Note that the chillers will not be at their set operating temperature for at least 15 minutes after turn on. The YFE laser output power will be lower than normal operating power until the chiller temperatures have reached their set values.

Figure 1: 4 chillers
Turn on four TDK Lambda power supplies. Power switch to “1” .Press the tiny “out” button at each of the 4 supplies.

...
- ssh mec-laser
- mecpython
- import meclas
- meclas.YFE.On()
- There will be a series of events that will happen to stabilize the seed laser prior to turning on the current to the YFE laser heads. If and when all conditions are stabilized, a series of audible ringing chimes can be heard coming from the e drives. It can take anywhere from 10's of seconds to several minutes for the conditions to be sufficient that the e drives can be turned on. This is the indication that the YFE laser is operating the that a beam is present at the LSS shutter S4, if LSS shutter S4 is closed. If LSS shutter S4 was opened as described above in Turn On Hardware section, the the beam will be present through the LPL amplifiers and SHG crystals.
Confirm YFE operation before firing shots
- Open Long pulse laser operation from MEC home
...

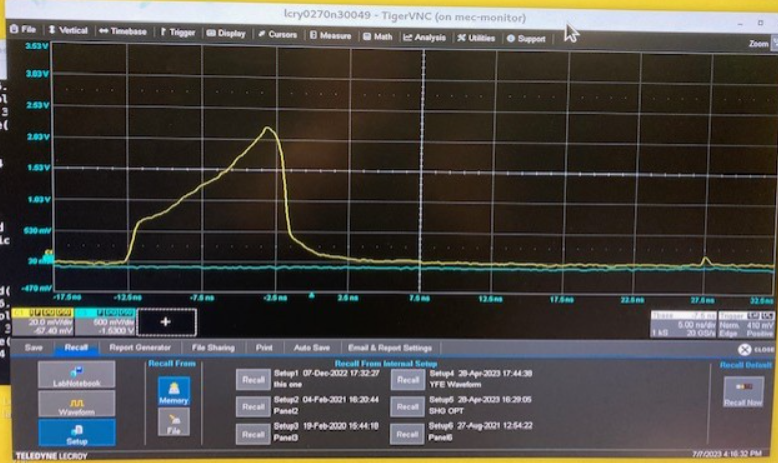
- If trace is not present on Lecroy B, make sure that 10Hz operation is enabled.

- If the trace is not present, confirm shutter 4 on the LSS is on
- If the trace is still not present, it may be necessary to cycle meclas.YFE.Off() and meclas.YFE.On() until the trace is present.
Load the waveform recipe and shape the waveform
...
- It may be necessary to repeat meclas.LPL.psefc10Hz(numIterQ=150) if the blue trace is not fit well to the red trace.
- Confirm YFE operation before firing shots
Confirm SHG crystal angles are optimized
- command meclas.LPL.SHG_opt() will run four SHG crystal rotation stages and find the maximum one by one. It is recommended that meclas.LPL.SHG_opt() is run at least once per day, preferably before the 1st day of the shot is taken.
Optimize HWP
- Command meclas.HWP.HWP_opt() will set all four half-wave plates at zero degrees (zero energy trim). No need to run this if no changes to HWP's were made in effort to "trim" energy.
Open the beam monitor cameras -minimum cameras needed for spatial beam quality check
...
Figure 7. Open Long Pulse Laser Camview
...
There are 6 cameras in the upgraded LPL layout: the new camview can be opened in mechome [detectors>view-long pulse Laser Cams> dropdown (figure below 1)]. For camview detail please check New Camview Feature
For operation and monitoring purposes only LPL_100J_1, LPL_100J_3, LPL_100J_4, are needed to open. For full alignment, using these 6 cameras is recommended. These imagers locations and descriptions are as followed (figure below 2).
- LPL_100J_2: the imager looking behind the 1" amplifier and before the relay tube
- LPL_100J_1: the imager looking behind the big Faraday Rotator
- LPL_100J_5: the imager looking before the east side 2" heads (IJ, and GH input)
- LPL_100J_6: the imager looking before the west side 2" head (AB and EF input)
- LPL_100J_3: the imager looking at combined east 527nm (IJ+GH output)
- LPL_100J_4: the imager looking at combined west 527nm (AB+EF output)

Figure 8. Long pulse laser cameras and irises layout
Check alignment
- align 10Hz pulse through the pinhole (visual check: should not see scatter light or adjust the pinhole position)
- check i1 and i2: if it's very off, adjust with M3 and M4 (use LPL_100J_1 or IR card)
- check i3: beam should be in the center of i3 (use LPL_100J_1 or IR card)
- check i4: close i3 to create ring pattern (use LPL_100J_1 or IR card) adjust with the mirror befoer i3.
- check i5 and i6: (use LPL_100J_5 and LPL_100J_6) adjust with M8 and M9
- check i7, i8 and i9, i10 (use LPL_100J_3) adjust with M2, M22 and BS3
- check i11, i12 and i13, i14 (use LPL_100J_4) adjust with M10, M13 and M18
- check i15, i16 (use card) first close i3 half way, block GH, adjust LWP15 and M26. Then open GH, block IJ, adjust with LWP10 and LWP12
- check i17, i18 (use card) first close i3 half way, block EF, adjust LWP2 and M15. Then open EF, block AB adjust with LWP6 and LWP8
Optimize SHG and HWP
...

Figure 9: SHG optimization
Optimize HWP
...
Fire a shot
- Make sure the final shutter, T3a and T3b, are closed. If it is open, make sure things are properly blocked inside the target chamber.
- check event sequence configuration: play status "stopped" in case the lamps got misfired.
- change camera trigger to "single shot": in MEC Home> EVR > New MEC LAS EVR > Front Panel B change to 182 (single shot) from 43 (10Hz)
- change Ns Slicer and Lamps to single shot: Long pulse laser operation> click Single buttons on NsSlicer and Lamps
- Charge: MEC:PFN> click "stop", "Stand By", "Ready" and "Charge"
- Fire: click "single shot"
- run postshot: meclas.LPL.pspostshot(save_flag = True, display = True), it shows a plot and energy output.
- or show energy meter: meclas.EMeters.EGall()
...