Installing Maven Support in Netbeans
This tutorial will show you how to install support for the Maven build tool.
The tutorial assumes that Netbeans (version 4.1) and a Java JDK (version 1.5.x) are already installed.
Install Maven
Download the stable version of maven (1.0.2) from http://maven.apache.org/start/download.html.
The version of Maven should be 1.0.2. The 1.x series has been found to be buggy. And the 2 release is incompatible with 1.x.
Install Maven by double-clicking on the downloaded file which should be called maven-1.0.2.exe.
If JAVA_HOME is not set, an error will occur.
You can set the path to Java home from the Start -> Settings -> Control Panel -> System menu.
Click on the Advanced tab and then click the Environment Variables button.
Click "New" to add a new variable.
Environment Variable Menu
After installation, also set the MAVEN_HOME variable to point to the base installation area.
Install Mevenide
Download this small autoupdate module.
To install, start NetBeans and select the Tools -> Update Center.
Select the "Install Manually Downloaded Modules (.nbm Files)."
On the next page, select "Add..." from the "Modules to Install" panel and navigate to the location of the downloaded file.
On the next page, transfer that file from the "Available Updates and New Modules:" panel to the "Include in install:" panel and click on the "Finish" button.
Restart Netbeans.
Now go back to Tools -> Update Center. Select "Check the web ..." and the "Mevenide Update Center" box, only. Click next. Now click the double-arrow to move all maven plugins into the righthand box. Click next. Click the "Include" checkbox for each plugin and then the "Always Accept" button. All of the Maven plugins should have the "Include" box selected, now. Click next. Now restart Netbeans.
Test the Installation
Now check whether all plugins were loaded successfully.
Go to Tools -> Options -> IDE Configuration -> System -> Modules -> Maven.
Maven Plugins
All the Maven plugins should have the Enabled box checked.
Set these all to Enabled if they are not already. This may clear up errors that can occur during the installation.
Open Project
If all went well, you should see a small box next to Maven projects that Netbeans can open.
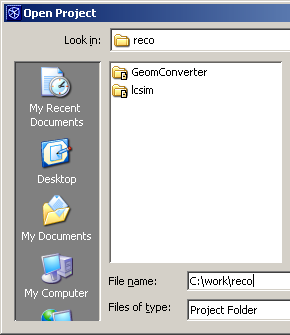
To open a project, click on it and select "Open Project Folder".
The project itself will have the following options, which will now call Maven commands.
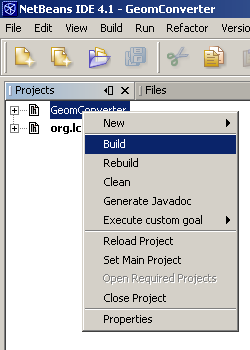
To build the project, right-click on build in this menu.
The console should show the Maven splash screen.
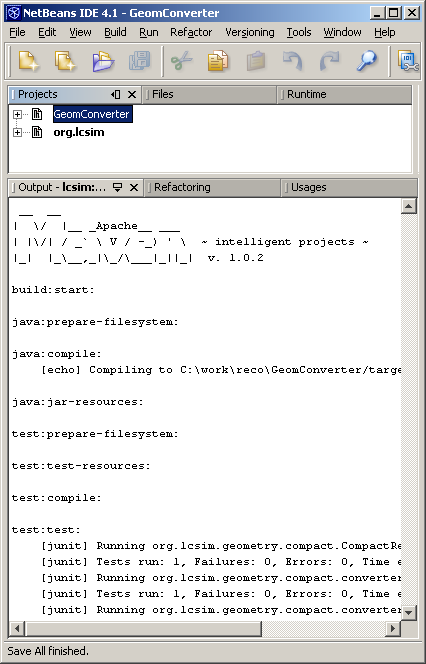
Now you have successfully installed Maven support into Netbeans.