This is a step-by-step procedure to use the Nordson Robot in B33 to deposit SE4445 in the star pattern. This page supersedes the content at Building 33 - Setting up for gluing in the lab.
Step-by-step guide
Turn dry-air valve counterclockwise ¼ turn.
There should be a hissing noise from the air flow.This dry air is used to control EFD and height gauge.
Turn EFD on
The screen will display a default menu.
The settings for SE4445 are preset 001 and make sure it is set on "steady".To change the settings refer to Building 33 - Setting up for gluing in the lab for instructions.

- Turn on glue robot.

The Itk account on the PC has the Janome Points software installed to control the robot.
The password is AtlasItkBox. For info about the itk-admin account contact Matthias Wittgen
- Click on the desktop icon JR C-Points to start the program

- If a window is shown - please select the following options to initialize the program :
- JR2500-N bullet
- z-axis control
- R-axis control (not ticked!)
- IO-A (not ticked)
Open the file
Neha_2020Feb3_InnerRingx3.cpdit should be the most recent file select the program #The program # is displayed on the right.

We are using the program #13 for the triplet in a row.
Note that the pallet routine is #22 (plane, with auto-increment)
Initialize the robot with
Meca Initialize: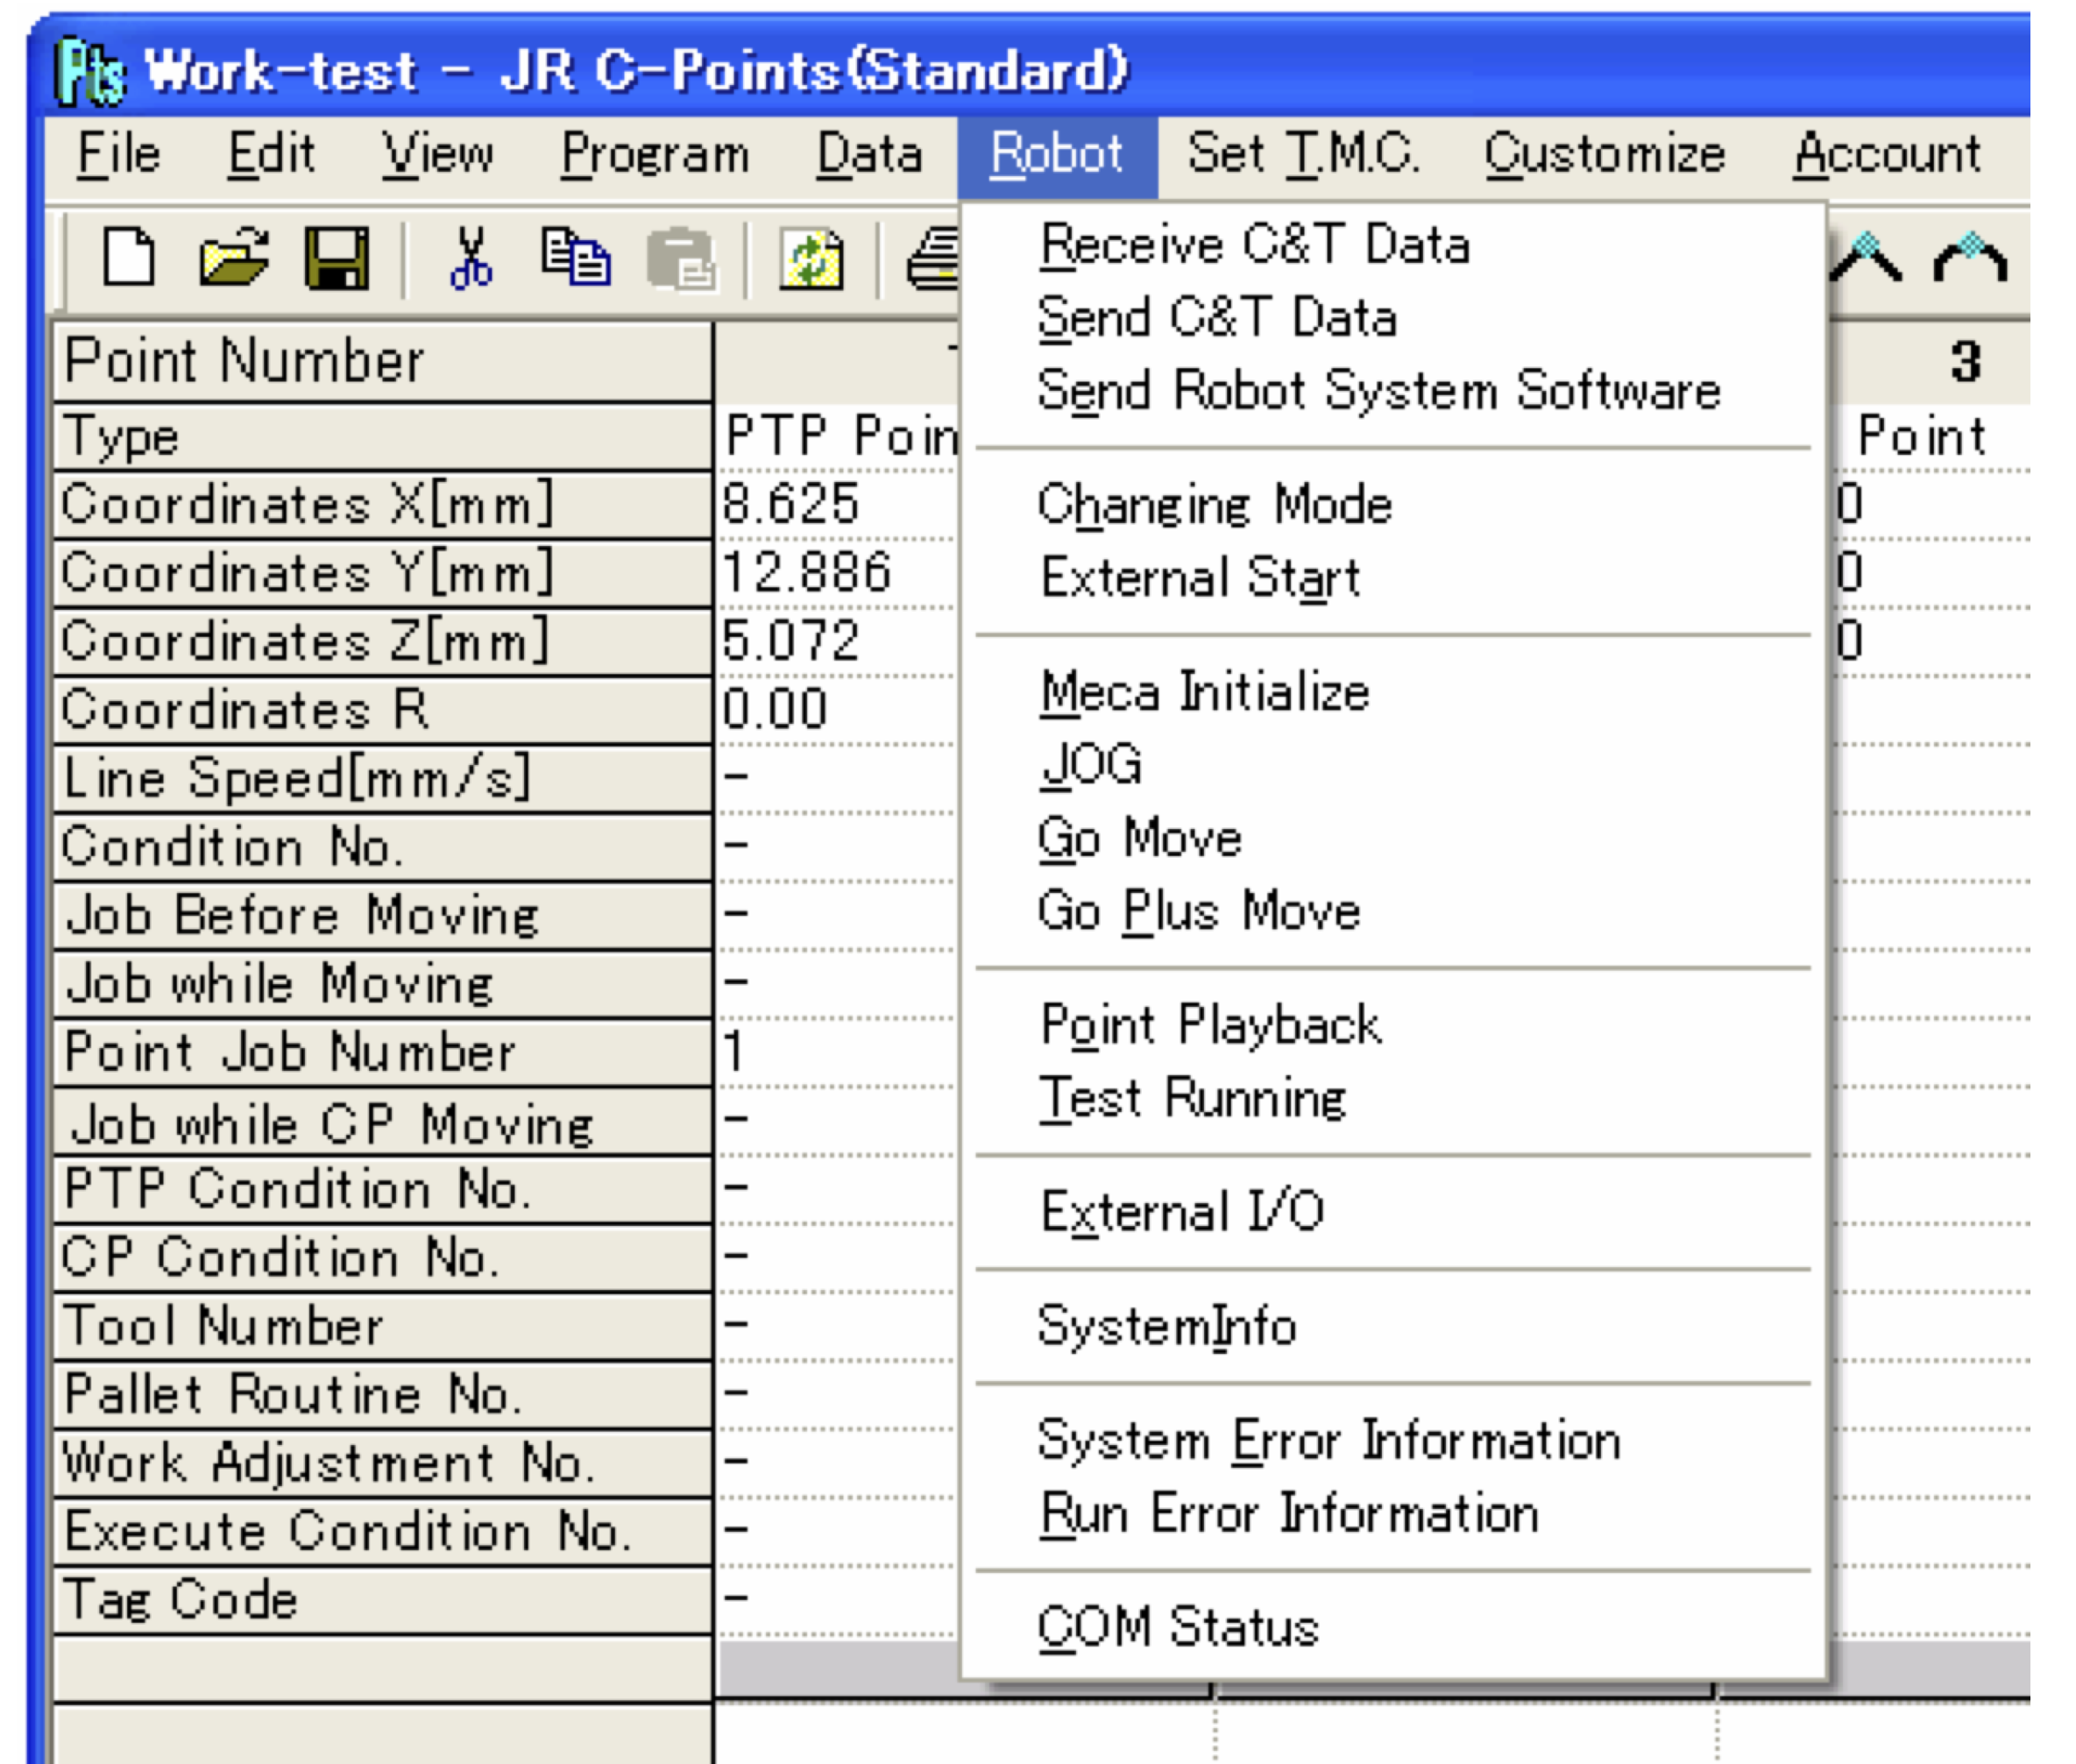
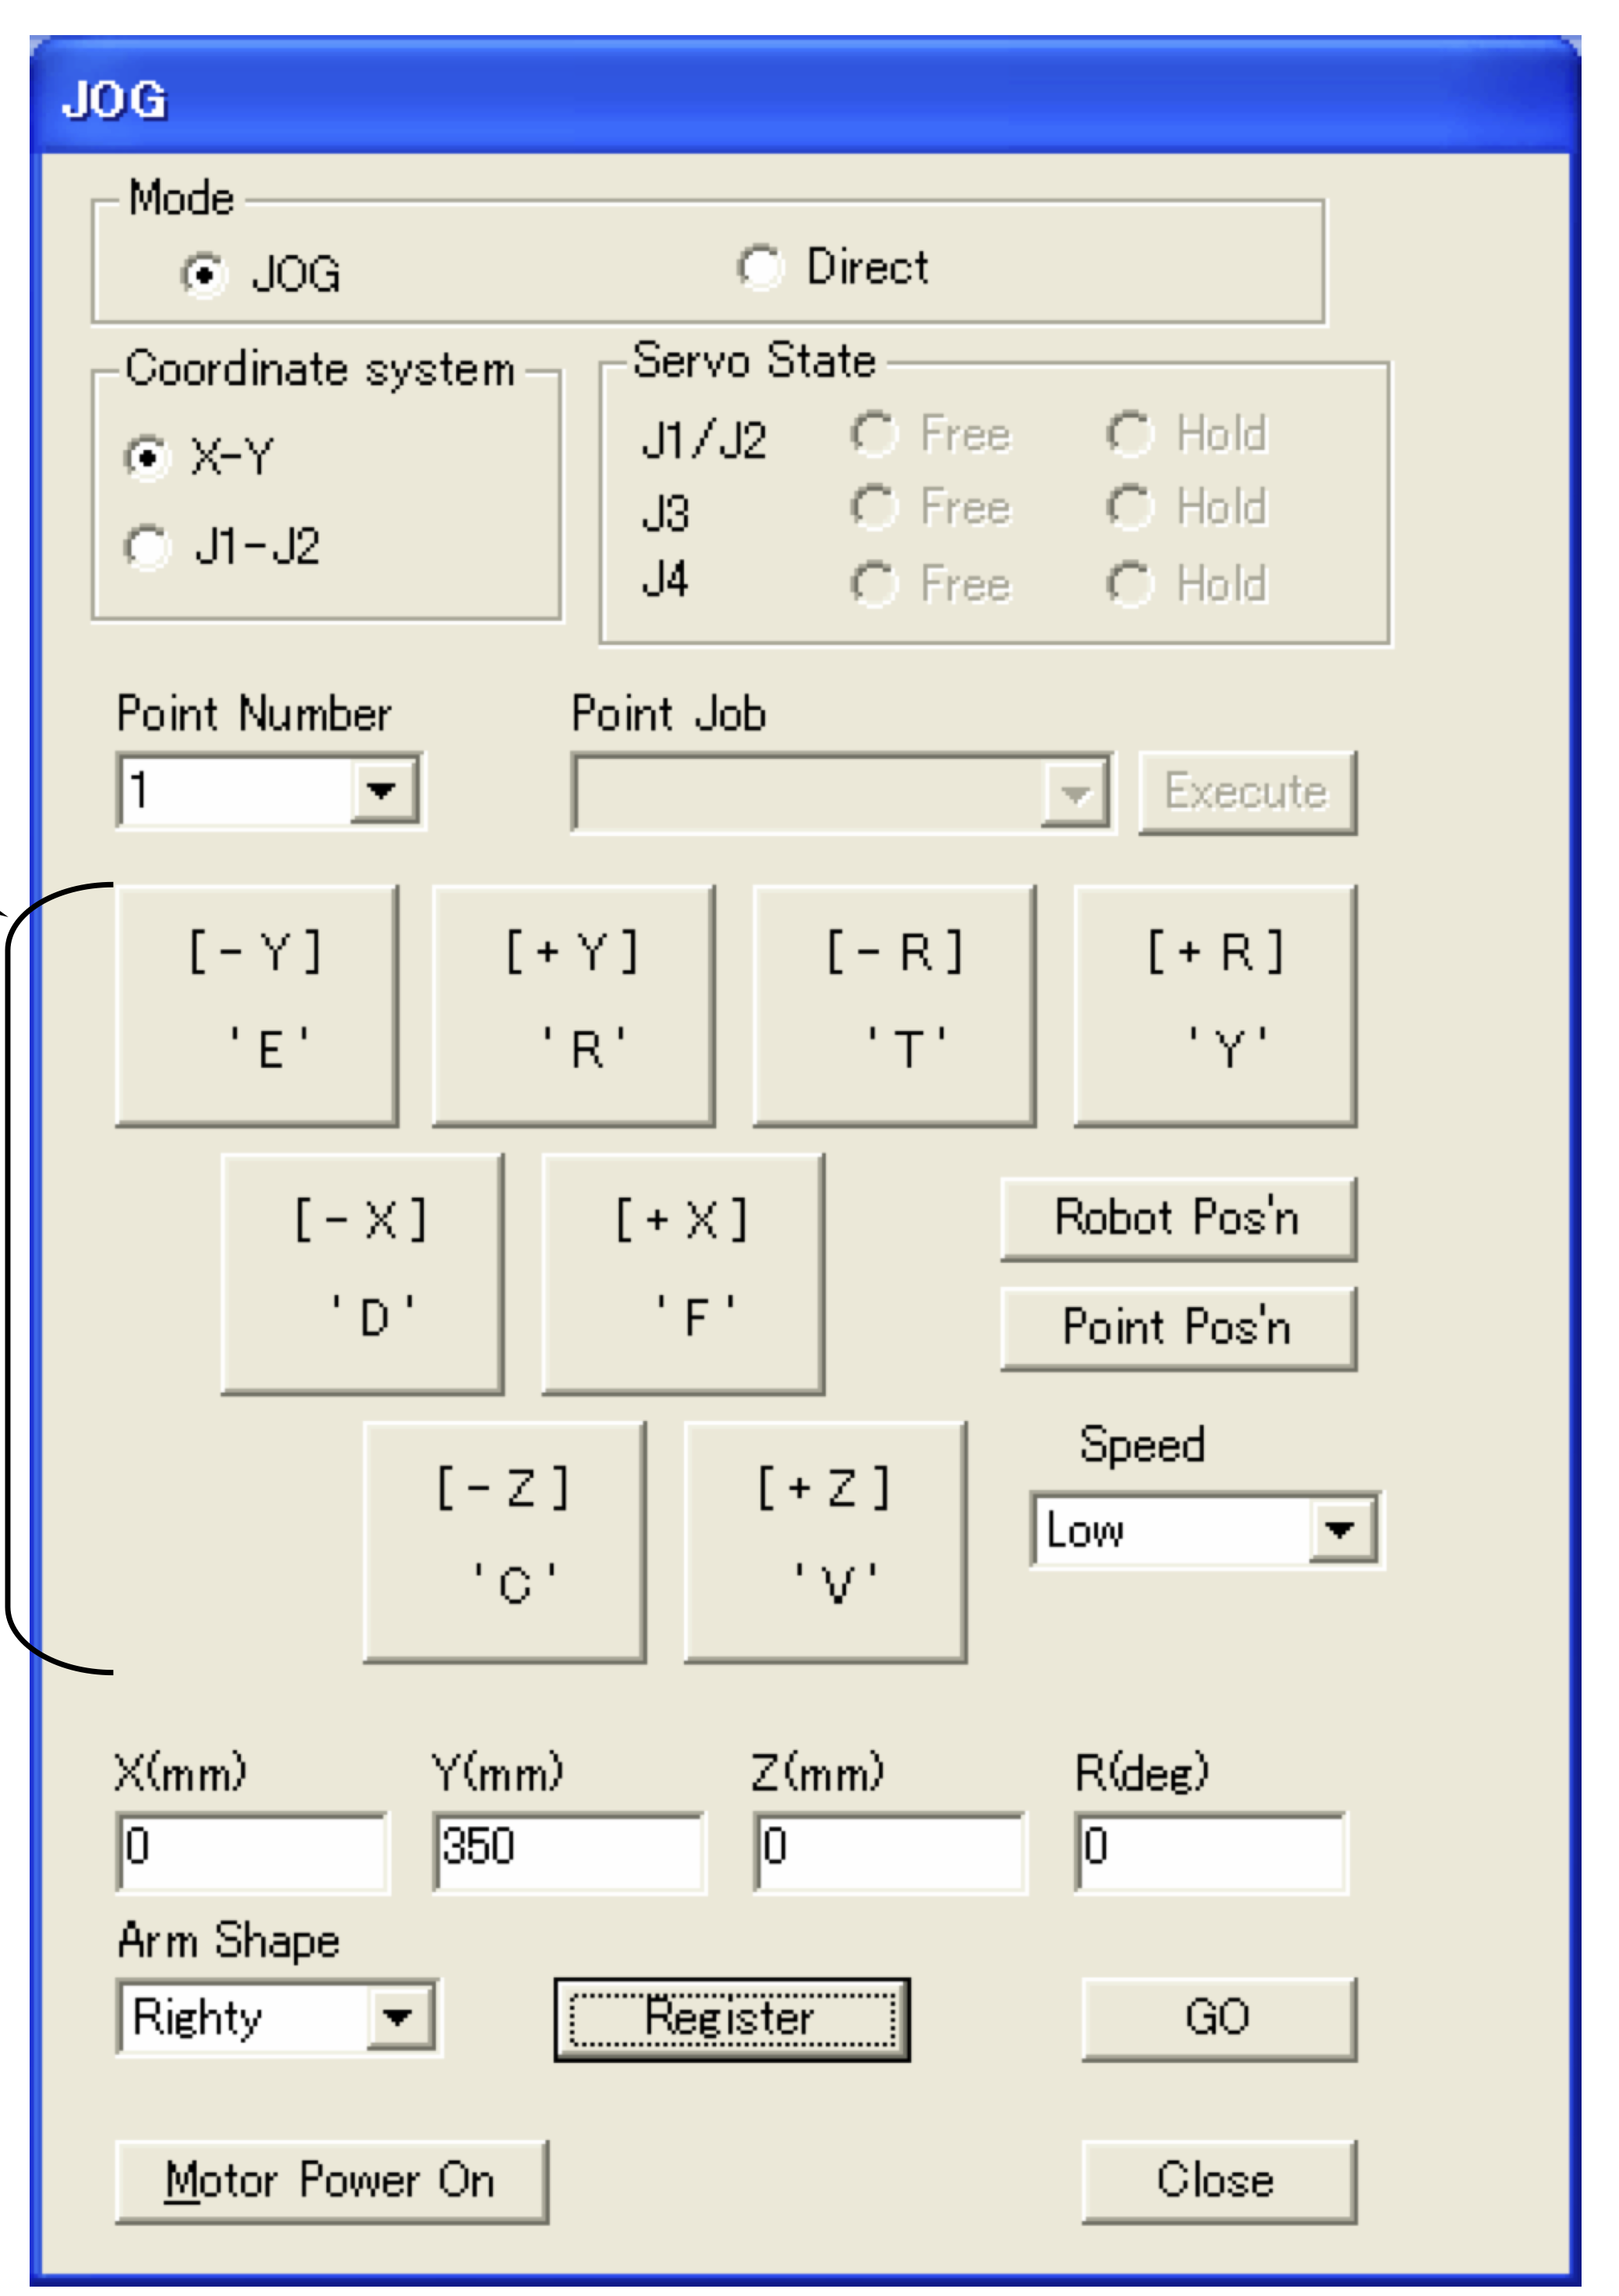
Verify that the z position is placed correctly by using the Tool option to verify the PTP point – hit Go and don't hit Register until you are sure about you want to update the xyz position.
To execute the program hit
Send C&T datafrom the Robot menu.Make sure that the Robot is set in
Teaching modein theChanging Modewindow from the Robot menu.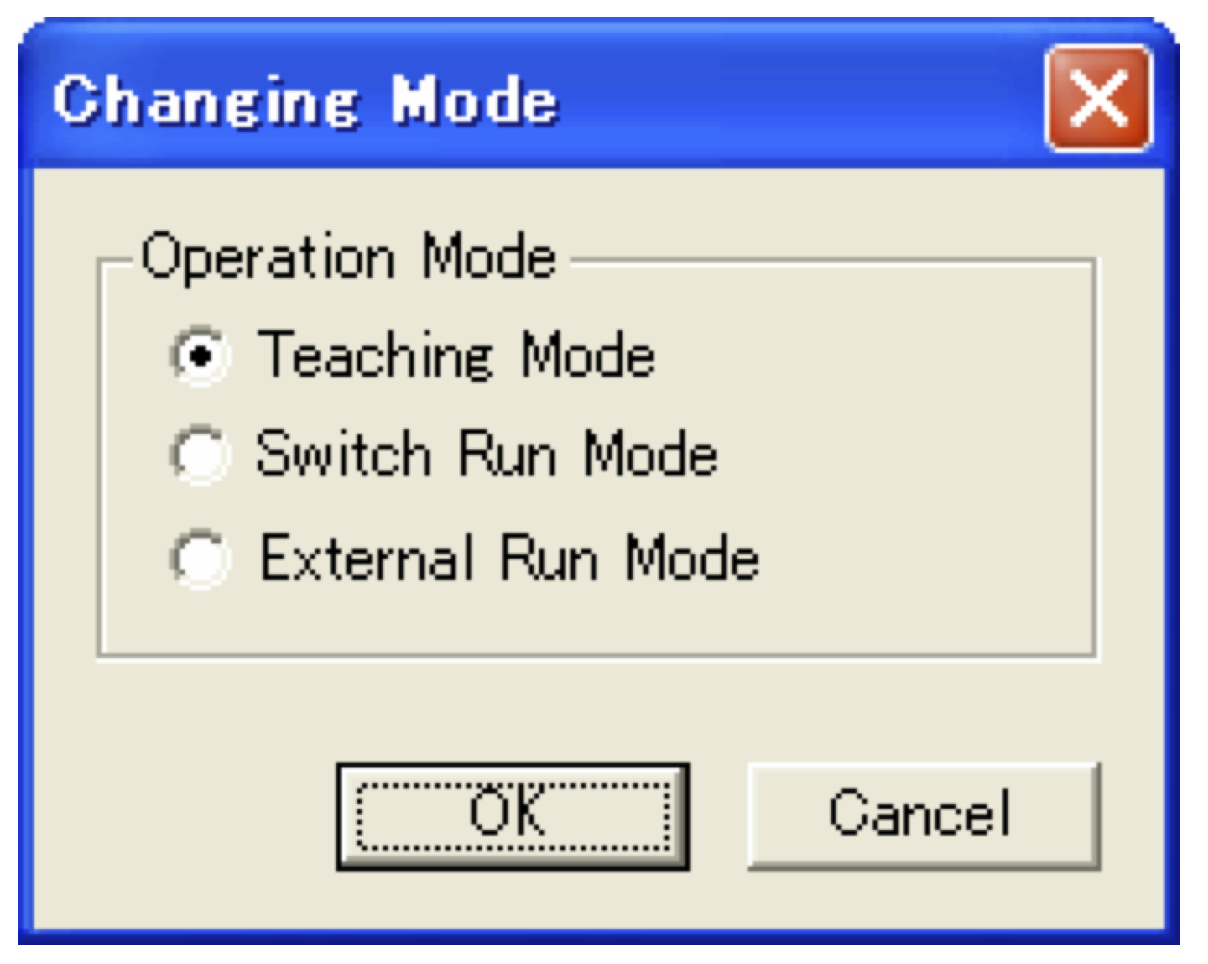
Select Switch Run Mode in the
Changing Modewindow from the Robot menu.Select the program # to execute from the Robot command buttons. It will be displayed on the LED.

Make sure to use the same # selected in point 7.
Push the green start button.
At any moment if any issue to terminate push the RED button
- To repeat :
- switch to
Teaching modein theChanging Modewindow from the Robot menu. - made the proper changes to the program
- restart from #9
- switch to
- To terminate - before you leave the station:
- Bring the robot back in the original position with
Meca Initialize - Shut down the robot
- Shut down the EFT
- Turn off the valve
- Terminate the program
- Shut down the screen only of the PC
- Bring the robot back in the original position with
Related articles
Related articles appear here based on the labels you select. Click to edit the macro and add or change labels.
|
Glue deposition procedure
Program file name: Rachel_Hannah_StarAtArbAngle_CarbonFiberEdition
A single JRC program file may contain many programs. A complete glue deposition program contains program data and a point data array specifying where to take actions. The actions themselves are encoded in point jobs. The confluence page Building 33: Programming and using the glue robot breaks down some key concepts. Further information is in the JR-C manuals, linked for download at {gotta upload them}
| You can view the complete list of programs using the drop down program menu in the Toolbar. Program numbers with names beginning "----" are actually empty. Those program numbers serve as visual dividers so that we can comment the program menu. |
|---|

Program list & purposes
|


|

|

Program #6 is a blank program, serving as a visual divider between calibration-oriented programs and the Temporary Fixtures series (programs 7 and 8)
|


Program #9 is a blank program, serving as a visual divider between the Temporary Fixtures dispensing series and the Full Ring dispensing series. Each member of the Full Ring dispensing series dispenses all triplets or quads on one side of the ring local support with pause. There are four programs, corresponding to the 2 sides ("tubes up" and "tubes down") and the two module types.
|

Ring wedge blah blah |
|

