On this web page we will describe how to install the necessary software to work with the lcsim software framework. The lcsim reconstruction and analysis framework is java based and therefore works on Linux, Windows and MacOSX. In this tutorial we describe the installation and configuration of the following three software packages.
The machines at the Fermilab computer training center were preinstalled with Scientific Linux Fermi (SLF) 6.3 (32 Bit). For both windows and Linux we recommend using the netbeans jdk bundle. To install it first get the netbeans java jdk bundle from below.
http://www.oracle.com/technetwork/java/javase/downloads/jdk-netbeans-jsp-142931.html
make the installation script executable and execute it (check the Preferences of your Browser to find out where the file is downloaded):
chmod +x /[path to your Download area]/Downloads/jdk-6u38-nb-7_2_1-linux-i586-ml.sh
/[path to your Download area]/Downloads/jdk-6u38-nb-7_2_1-linux-i586-ml.sh
On MacOSX Java is usually installed and it one can just use the existing version. If it is not installed one can get it from the Apple download side:
http://support.apple.com/downloads/#java
Then one can obtain netbeans from:
http://netbeans.org/downloads/
If the bundled installer doesn't work, you can try these directions. This is not preferred because the JDK binary installs to your root filesystem instead of in your home folder. Obscure versioning conflicts may occur.
Get JDK (6u38) from below and follow the installation instructions.
http://jdk6.java.net/download.html
Get NetBeans (7.2.1) in the Java SE bundle from below and follow the installation instructions. Then follow the same instructions for installing and configuring CVS in NetBeans.
http://netbeans.org/downloads/index.html
Now, launch NetBeans. Since the lcsim software is located in the CVS code repository first get the necessary CVS plugin for NetBeans
Select Tools-> Plugins->Available Plugins
then select CVS -> Install and accept the licence agreement and click finish.
Now to install the lcsim framework:
select Team->CVS->Checkout
specify the CVS Root as shown below and leave the password field blank
:pserver:anonymous@cvs.freehep.org:2401/cvs/lcd
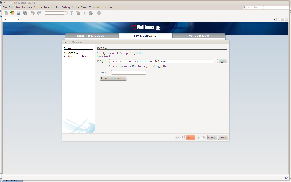
(Note: Click on thumbnail to expand. If that is still too small, right click and select 'Open in Image New Tab...')
Click the Next button and type GeomConverter into the Module field. Click Finish and the package will begin downloading.
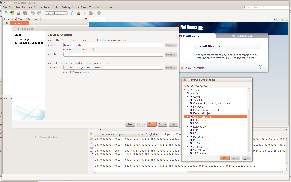
After you clicked Finish, NetBeans will pop open a window asking if you want to open the project.
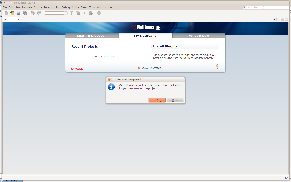
Click OK / Create Project / Open Project and run the priming build when it asks. This will take a while since initially all necessary libraries need to be downloaded from the maven code repositories. Hopefully in the end it will say:
BUILD SUCCESS
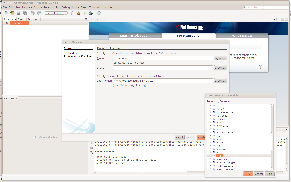
(Note: org.lcsim will not build successfully until GeomConverter has been built)
So repeat the process for the lcsim module.
Open the project right click on org.lcim and select build. Again this will take a while. To speed up the process in the future you might want to select to skip the tests the next time you build.
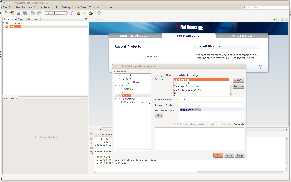
Right click on the org.lcsim package and do:
org.lcsim_> Properties->Build->Actions-> Build project -> Add-> skipTests=true
org.lcsim_> Properties->Build->Actions-> Clean and Build project -> Add-> skipTests=true
Repeat the above process for the lcsim-contrib and mcd-analysis modules. You can also browse the ilc repository by clicking Browse... instead of typing in the module name
For further help and instructions, refer to the parent page
The latest version of JAS3 is 0.9.9:
http://java.freehep.org/maven2/org/freehep/jas-assembly/0.9.9/jas-assembly-0.9.9-distribution.tar.gz
Run the following command to extract JAS3
tar xzvf /[path to your Download area]/Downloads/jas-assembly-0.9.9-distribution.tar.gz
and then launch it with:
jas-assembly-0.9.9/jas3
You may want to create a shortcut pointing towards this executable. The jas-assembly-0.9.9 folder includes an icon for this (jas3png).
From the menu bar select View -> Plugin Manager.
Now choose the Available Tab, and select all of the following:
from hep -> visualization:
(Note: if you have properly built the org.lcsim package in NetBeans, the org.lcsim plug-in should already be listed as installed in the Plugin Manager when you first run JAS3)
from hep -> linearcollider
If you used the netbeans jdk bundle (windows and linux) make sure you use the same Java that was bundled with netbeans and that you build lcsim etc. with:
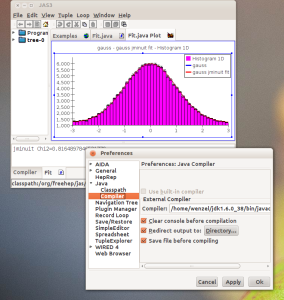
From the menu bar select View -> Preferences -> Java -> Compiler
and set to the correct javac:
/[path from which you ran the JDK+NetBeans installer]/jdk1.6.0_38/bin/javac
(Note: on MacOSX this step is not necessary)
(Note: if you used the Alternate Installation instructions, JAS will likely already have the correct compiler set. If not, try /usr/bin/javac)
For instructions on creating and running your own analysis, check out the parent page:https://confluence.slac.stanford.edu/display/ilc/LCSim+Tutorials