...
in the Command Window.
Viewing Live Images

In the Image Acquistion window, select a camera and check the "Show Live Image" box. After a short delay, the window expands, and you can see the live image as well as the #Image Processing Panel, which can be found on all three main windows of ImgMan.

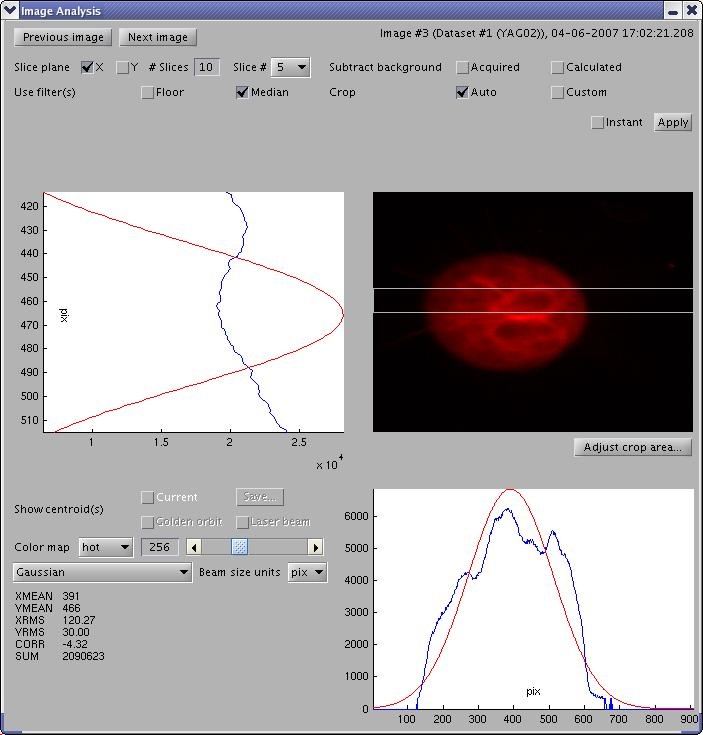
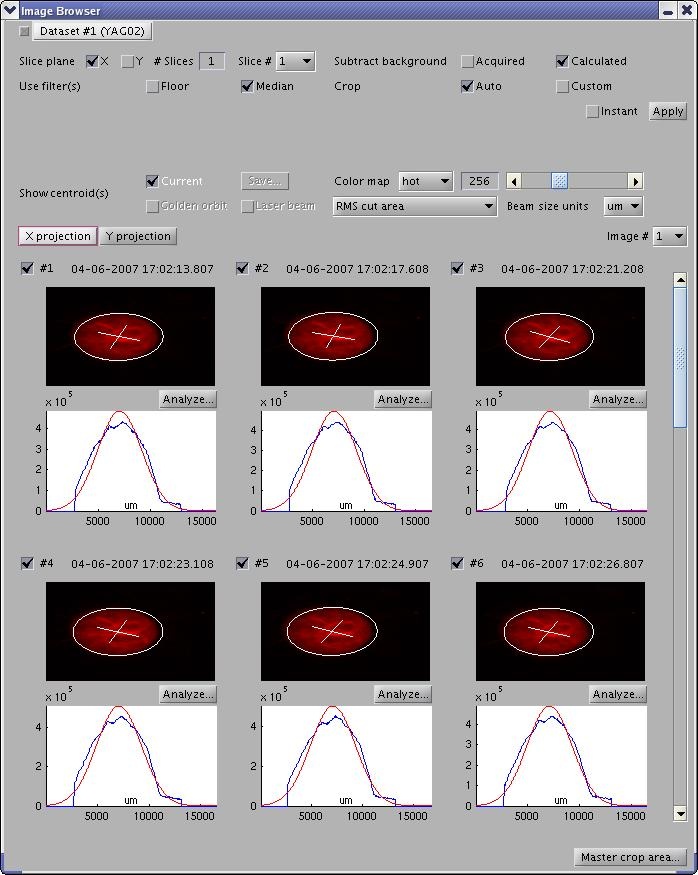
Image Processing Panel

Image Processing Panel contains widgets for setting image processing parameters, e.g. slicing, background subtraction, filters, cropping, color mapps, annotations (centroids), unit scales, the image processing algorithm. ImgMan applies some of the parameters directly, for others you must press the "Apply" button (or you can check the "Instant" Apply box).
Collecting Images
In the Image Acquisition window, specify the desired number of background and beam images, and press the "Measure" button. If you don't want to save images locally, uncheck "Save Images" box. You can follow the progress of the measurment either in the Image Acquisition window or in cmlog. Each measurement results in one dataset of images. When the measurement is finished, the number on the dataset label increases by 1.
Saving and Loading Datasets
Press "Save" button to open "Save As..." dialog and save your image datasets. Press "Load" button to open a "Load..." dialog and load image datasets.
Browsing Image Datasets
In the Image Acquisition window, press the "Browse..." button to open the image browser. You can select a dataset, browse images, and specify image processing parameters through an #Image Processing Panel.
Analyzing Single Image
In the Image Browser window, press the "Analyze..." button to open an Image Analysis window for the corresponding image. Image Analysis also contains an #Image Processing Panel.