Introduction
This is intended to lead you from scratch (well, you have Eclipse and MyEclipse installed and can look at our cvs repository) to obtain, configure, build and run applications in the glast-ground project.
All the projects currently live in the glast-ground directory under infrastructure in the cvs repository.
Getting the Project
Open the cvs repository view and navigate to the infrastructure directory. You'll see glast-ground under it. Right click on glast-ground and check it out. This will set up automatically as a project in Eclipse.
...
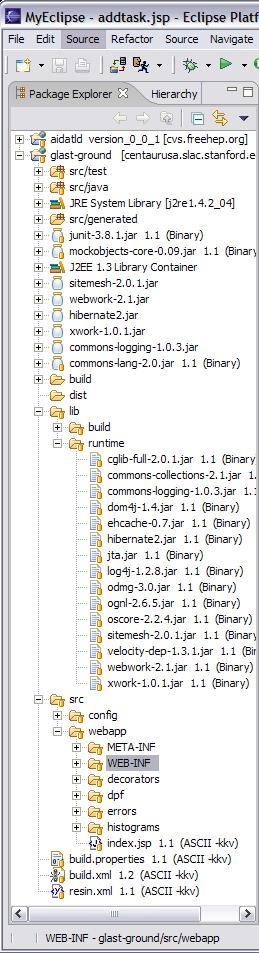
Once you have checked out the project you should see something like this:
Access to Needed Jar Files
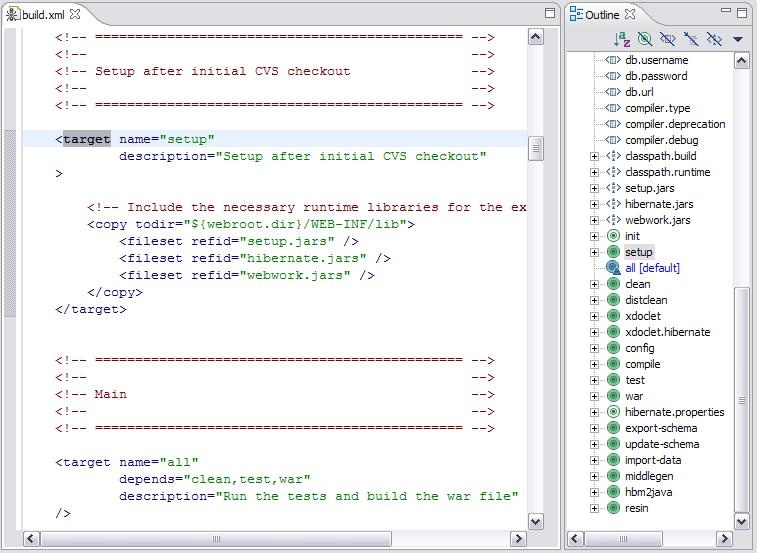
You need to make sure the appropriate jar files get into your class path. These are kept in the src/webapp/WEB-INF/lib directory as well as in the top directory. run the ant setup target to copy jar files to their appropriate home in classpath. Do this by right-clicking on setup in the Outline view and selecting Run->Ant Build.
These will leave you two jar files short.
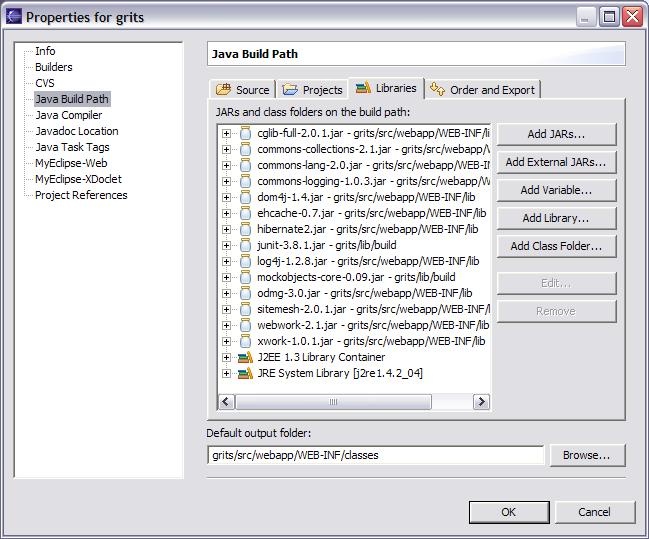
Add them to the Java build path by right-clicking on the grits project and selecting Properties, then Java Build Path. Add junit and mockobjects from lib/build.
 Question to Matt - why are these not in the proper places by default??
If you didn't get them in the right place, they are generally to be found in the lib/runtime directory and should be copied into the afore-mentioned lib directory.
Configuring to Build: Ant
Basically you'll want to tell Eclipse to use your workspace to build into. You get there by clicking on External Tools... option from the Run tool ![]() in the tool bar to see:
in the tool bar to see:
...
Now you can run the build by hitting the run button, which builds glast-ground by default. After you build your project, you should also recompile your JSPs, via a right-click on the project following MyEclipse->Recompile All JSPs.
J2EE server
We're using Tomcat 5 as the server. You can get it from http://jakarta.apache.org/tomcat/![]() . Install it so you can have a local server to test with. Set it to port 8080.
. Install it so you can have a local server to test with. Set it to port 8080.
...
Once it is started, you can deploy the project to the server via the toolbar button  .
.
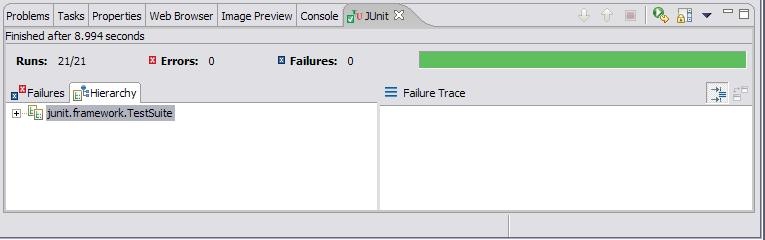
JUnit tests
You can run the JUnit tests from the run button  pulldown menu.
Matt: did you do anything to configure my MyEclips to see the JUnit tests?
Hopefully you'll see something like this in the JUnit tab in the bottom right of the IDE