Quick instruction guide
On a SLAC built windows device the vpn client is pre-installed, so you can just go on start menu -> launch Cisco Anyconnect Secure mobility client. Then ensure the connection string is "vpn.slac.stanford.edu" and click on connect. Enter your SLAC's windows credentials, enter the DUO prompt, then accept the banner and you are connected as indicated in the taskbar.
On personal computers, MACs or linux you will need to install the vpn client available at https://vpn.slac.stanford.edu/ . If you are using a mobile device the client to look for in the app store is "Cisco Anyconnect Secure Mobility Client".
1- 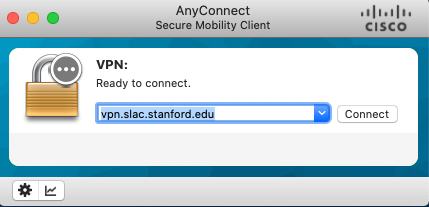 2-
2- 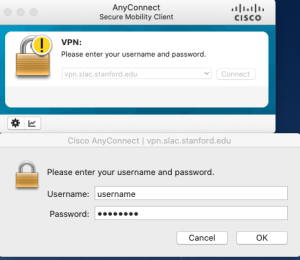 3-
3-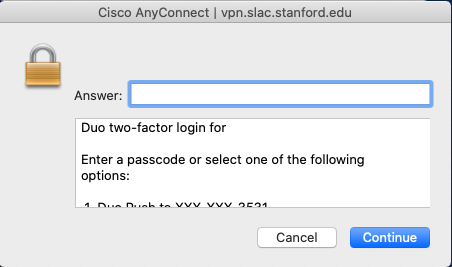
4- 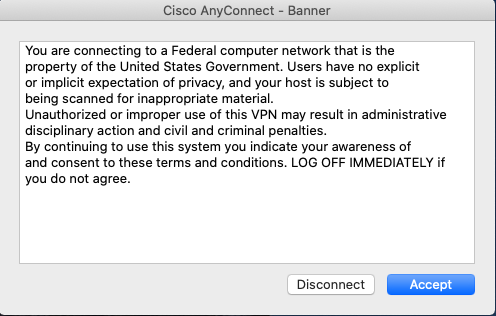 5-
5- 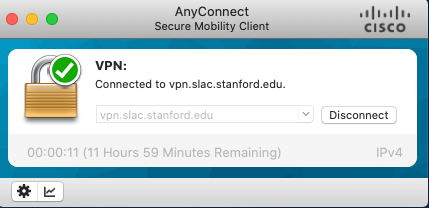
Table of Contents
- Introduction
- Requirements
- Connecting to the SLAC VPN Using Linux
- Connecting to the SLAC VPN Using Mac OS X
- Posture Assessment of Systems Entering SLAC VPNConnecting to the SLAC VPN Using Windows
- Frequently Asked Questions (FAQs)
- Troubleshooting
...
Introduction
This page documents the use of the SLAC VPN service.
Virtual Private Network (VPN) provides a secure connection between your computer and the resources available at your home institution. In the case of SLAC, we offer a VPN service that permits authorized users to gain visibility of SLAC network resources from outside of SLAC. This includes the SLAC Visitor Wireless network.This page documents the use of the SLAC VPN service
Assistance with installation and usage of this system is available. Contact our IT helpdesk via the details below.
Requirements
- You must have a valid SLAC Windows account
- Your account must be given SLAC VPN account access, and you must agree to the usage policies outlined
- The following operating systems are currently supported (see Frequently Asked Questions page for additional options):
- Windows XP SP3
- Windows Vista
- Windows 7 SP1
- Mac OSX Snow Leopard
- Linux
Security
The SLAC VPN connects you directly to the SLAC network. All of your network traffic is sent across an encrypted link, including Internet traffic. You should adhere to the same SLAC computing policies that you do when using computers on-site. Remember to disconnect from the VPN before leaving any computer unattended. An inactivity timeout, currently set at 20 minutes, will automatically log out inactive sessions, and all sessions will be disconnected after 8 hours regardless of whether they are in use. Please contact Account Servics at account-services@slac.stanford.edu if you require an exception to these limits.
Connecting to the SLAC VPN Using Linux
These instructions are hosted on a separate page. Please visit:
Connecting to SLAC's VPN Using Linux
Connecting to the SLAC VPN Using Mac OS X
These instructions are hosted on a separate page. Please visit:
Connecting to SLAC's VPN Using Mac OS X
Connecting to the SLAC VPN Using Windows
Open a Web Browser to our VPN Gateway
In order to connect to the SLAC VPN, you must have the AnyConnect software installed. By going to the following webpage, we can check to make sure you have the correct software installed and configured (and up to date), and provide an automated install if it is not.
- Goto:
https://vpn.slac.stanford.edu - Please note the http*s*
Your web browser should come up with the following series of screens
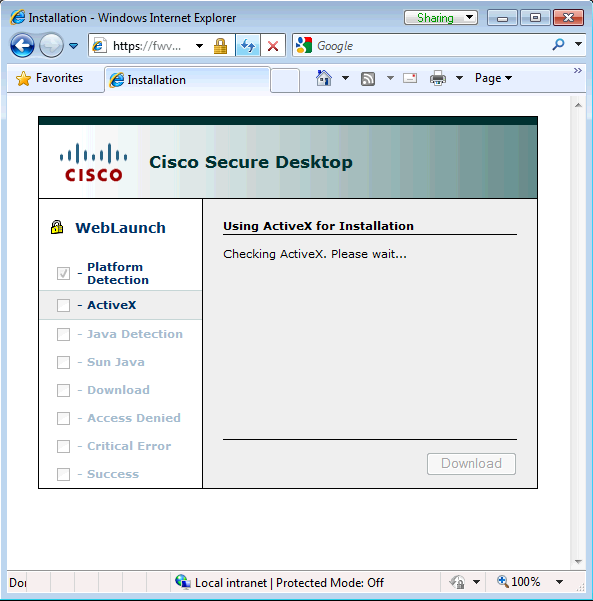
Allow Cisco Secure Desktop to Check Your System
The web page will instantiate a java applet so that it may check your system for the presence of the AnyConnect software.
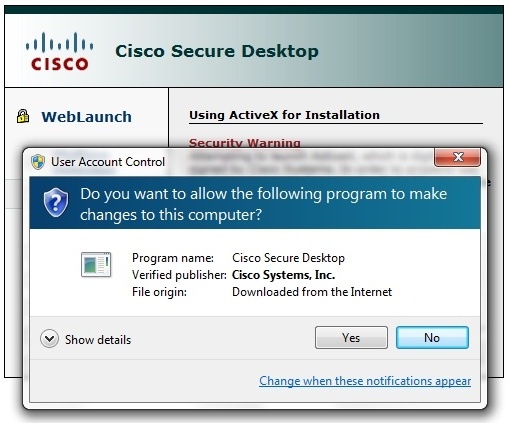
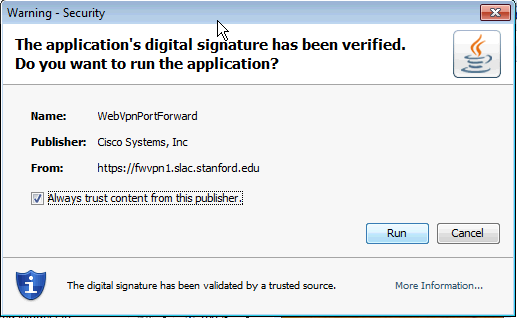
This may bring up a dialog box which will prompt you to run the application or not.
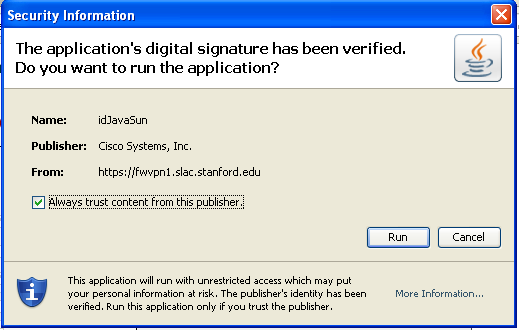
- If you do not wish to see this dialog again in the future, select 'Always trust content from this publisher'
- Click on 'Run' to allow the applet to scan your system
Log In
The following web page will be presented upon the initial system scan:
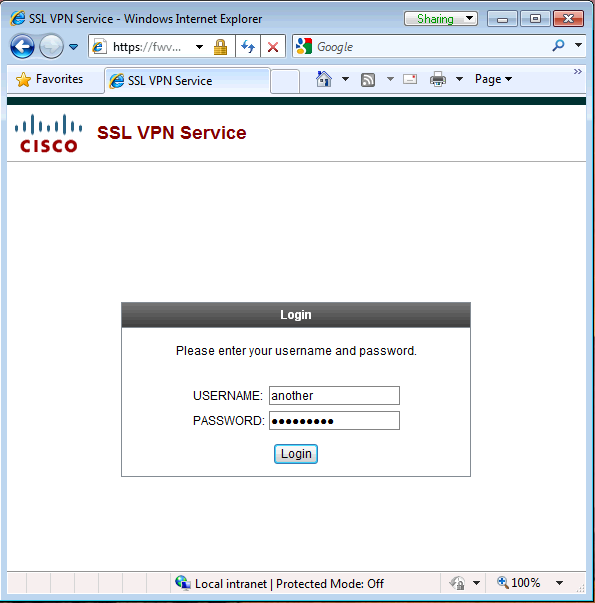
- Enter your provided VPN credentials.
- For an account, goto SLAC VPN Accounts
Agree to the Banner
Upon successful login, a banner will be shown on the webpage.
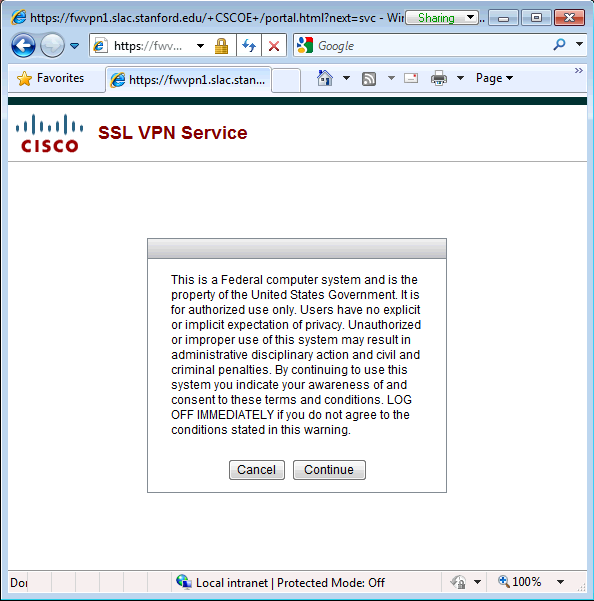
- Click Continue
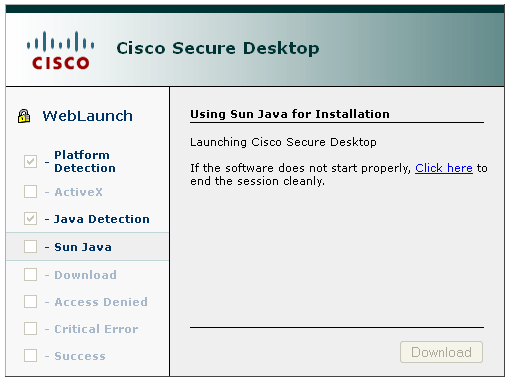
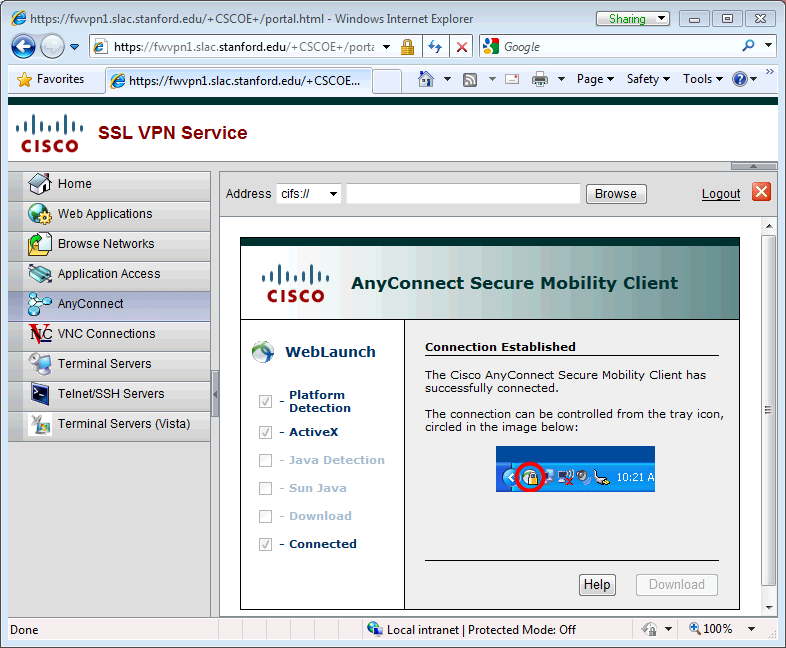
Initiate the AnyConnect Client
A webpage that offers various methods to access the SLAC VPN services will be presented.
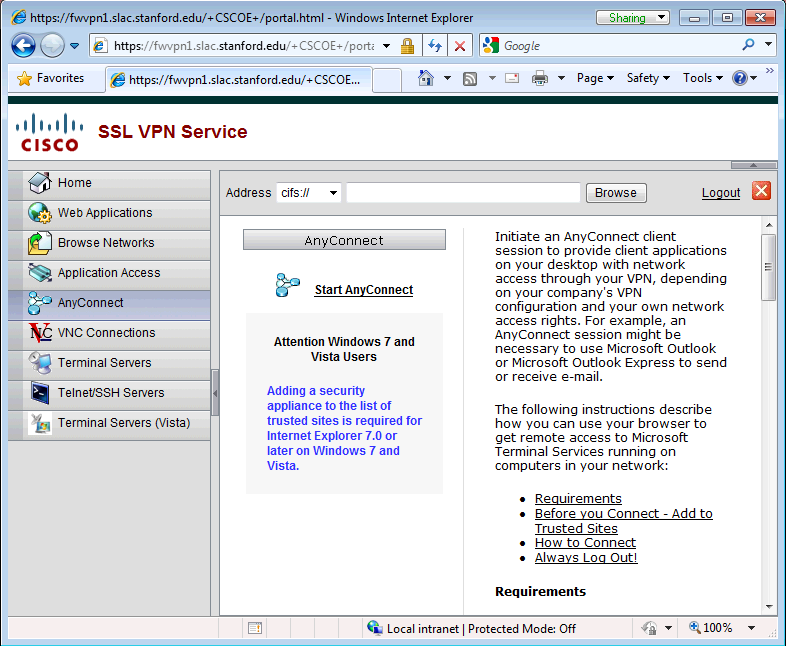
- Click on 'Start AnyConnect'
Install the AnyConnect Software (if required)
If you have problems installing the AnyConnect Client, please refer to the Troubleshooting section of this document.
If necessary (either because it is your first time accessing SLAC's VPN, or if there is a new version of the AnyConnect client), the web page will present that the AnyConnect software needs to be installed.
- If you do not wish to see this dialog again in the future, select 'Always trust content from this publish'
- Click on 'Run' to install the AnyConnect Client onto your system.
Editing the hostname within the VPN client.
- Manual installation does not automatically fill in the server list. If the hostname does not appear in the VPN client, i.e. it appears as:
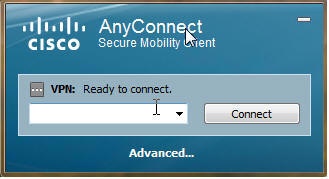
then you can manually enter one of the following hostnames and successfully connect to update the list: Number
Hostname
Description
1
fwvpn1.slac.stanford.edu
load-balanced main hostname
2
fwvpn2.slac.stanford.edu
load-balanced secondary hostname
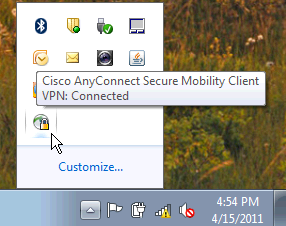
You have connected to SLAC's VPN Service
Upon successful VPN negotiation, you should get the following popup from AnyConnect showing that you have connected to SLAC's VPN service
- you may close this webpage.
Disconnecting from the SLAC VPN
The AnyConnect client exists as a tray icon; you can get to it from the System tray next to the clock in the bottom right of your screen.

- .
- You must be enrolled in two-factor authentication (visit https://www-internal.slac.stanford.edu/twostep/ from a computer on the SLAC network).
- You must have SLAC supported operating system to get successful connection on SLAC Network. Please refer to the following KB articles:
We officially support Windows, Mac OS and Linux but VPN is available on several other platforms (android, ipads etc.).
Posture Assessment of Systems Entering SLAC VPN
- What is changing and why?
As an open laboratory, SLAC makes every effort to enable access to tools and systems needed for research purposes without compromising the security and integrity of our other information and systems. The security of the SLAC network, however, must be protected from the risk posed by the number and variety of devices that use it. Consequently, effective March 19, 2018, devices being used to log into the SLAC virtual private network (VPN) will be checked to ensure they do not pose a security risk to SLAC.
- What’s the impact?
If you use a SLAC-owned, centrally managed device to connect to VPN, you will most likely be granted access with no issues. If your SLAC-owned device is denied access, contact the IT Service Desk (see contact info below) for assistance.
If you use a personally owned device, and that device meets the minimum requirements for using the VPN, then you will be allowed in. If, however, your device does not meet the requirements for OS version, virus control, and other security measures, you will be denied access to the VPN. You are responsible for updating your personally owned device.
If you use a device provided by an institution other than SLAC or Stanford, contact that institution for assistance.
If you are denied access, the following options are available:
- Update the device software so that it is compliant (see Minimum System Requirements below).
- Use Citrix as an alternative method for gaining access to the SLAC systems you need. To request Citrix access, in Service Now, go to the Service Catalog, then select Accounts & Access > Citrix Account Request.
- If you are using a personal or other non-SLAC-owned device, use a SLAC-owned, centrally managed device instead.
- If the device is SLAC-owned, contact the IT Service Desk (see contact info below).
- Minimum System Requirements
The minimum requirements are:
- Antivirus with current signatures (<15 days old)
- A current OS version, such as:
- Windows 10
- macOS 10.11 and up
- Android 10 and up
- iOS 13 and up
- Specific Linux versions are being confirmed and will be updated here when available.
- Resources
If you are a SLAC employee and need antivirus software for your home computer, free software provided by SLAC can be downloaded from the Cyber Security Resources page.
- IT Service Desk Contact Information
Phone: (650) 926-4357; Extension: x4357 (xHELP)
Service Now: Submit a help request
Security
The SLAC VPN connects you directly to the SLAC network. All of your network traffic is sent across an encrypted link, including Internet traffic. You should adhere to the same SLAC computing policies that you do when using computers on-site. Remember to disconnect from the VPN before leaving any computer unattended.
Detailed steps to download the VPN client
The vpn clients is available upon authentication at the webpage https://vpn.slac.stanford.edu/ . Log in and the system will detect which version is suitable for your systems.
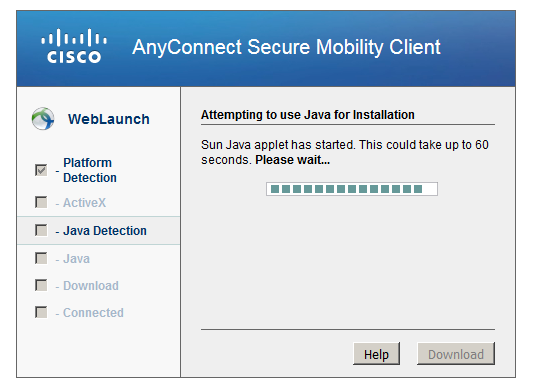
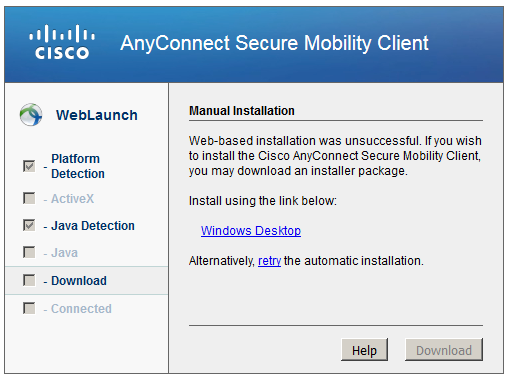
The Java installation usually fails, but then it defaults to the manual installation. Download the VPN client by clicking on the link provided. Install it as administrator:
- On linux you need to execute the file that you downloaded as root with the command "sh vpnsetup.sh" (you can also use sudo from your regular account with the command "sudo sh vpnsetup.sh".
- On windows you need to do a right click and "Run as administrator"
- On mac you will need "to allow access" when running it
The first time you connect, you will have to manually enter the connection hostname, please set it as vpn.slac.stanford.edu
What to Do if You Have Problems
Please have a look to the FAQ SLAC VPN Frequently Asked Questions (FAQ) and SLAC ServiceNow KB Article for Posture Assessment.
If necessary, manual download of the client install packages can be done via links here: Cisco AnyConnect Installation Packages
For further help, please contact our IT helpdesk.
Other Notes
4/5/2016: Two-factor authentication is now deployed on SLAC VPN gateways, if you are already enrolled you will be asked for 2nd factor (push, token, etc.)
1/11/2018: Posture assessment is deployed on SLAC VPN gateways, for FAQs please visit: https://slacprod.servicenowservices.com/kb_view.do?sysparm_article=KB0010903
...