Purpose
- Goal
- The goal of this training module is to provide a detailed procedure on how to safely and efficiently bake an RGA cart. When a RGA cart doesn't meet the clean qualification requirement, baking is the 1st step to requalifying. The procedure will also include how to use a baking controller for ramping up and down in temperature.
- Capabilities Include list capabilities and/or skills that are being developed
- Vacuum skills
- Designing skills
- Baking skills
- Goal
Subject Matter Experts - May help provide instruction and guidance for this Training Module
- Brady Robertson
Resource List
- RGA Cart Maintenance and Operation Document (List of RGA cart Components)
Amanda's doc: RGA Cart Maintenance and Operation (After baking is complete)
Begin Training Content
Step1:
Clear the area for baking preparation and process. Baking temperatures can reach up to 250°C, therefore it is important to have a clear area for minimal supervision during long bakes.
Step 2:
Check that your system is under vacuum before baking. The small molecules stuck onto the walls and bouncing around your system will need an exit path after being excited by the ramping increase of heat. Baking without being under vacuum will both absorbs and remove any molecules from the wall of your chamber.
Step 3:
Remove and power off all electronics that cannot withstand baking temperatures. Any components attached or near the chamber should be checked for its bake out temperature. When deciding what temp to bake a system you must first consider that 150°C is for water and 250°C is for hydrocarbons. Common components to check for are shown bellow.
GCC | Cold Cathode Gauge |
CCG series 500 is used on most of our RGA carts and its bake out temperature is 250°C (After magnets are removed). The CCG should look like the image bellow after the magnets and electronics are removed.


Link to manual: https://www.mksinst.com/mam/celum/celum_assets/resources/GP-218905-500Gauge-DS.pdf
Valve | Gate Valve |
VAT Gate Valves have bake out temperatures of up to 250°C.

Link: https://www.vatvalve.com/series/ultra-high-vacuum-gate-valve
GPI | Pirani Gauge |
Most pirani gauges have a low bake out temperature range of about 150°C, therefore making heater tape placement very important when baking.

link: https://www.idealvac.com/files/brochures/GP_275_Gauges_1.pdf
RGA | Residual Gas Analyzer |
An RGA device has a temperature bake out of about 250°C with and extender or electronics. For more about and RGA go to link:Theory (Brady Robertson)


Link: https://www.mksinst.com/mam/celum/celum_assets/resources/MicroVision2ds.pdf
Step3:
Prepare all the components needed for the bake.
| List of Components |
|---|
| Tinfoil ( a lot) |
| Thermalcouples |
| Gloves |
| Heater tape |
| Temperature PID controller (prefrence) |
| Variac Temp controller (prefrenence) |
Step4:
Add thermal couples to your chamber and keep them in place using small aluminum strips spot welded onto the chamber. Where to place the thermal couples is up to you, but placing them where you believe the hottest area will be is sufficient. Type K thermocouples, which are made up of two metals Chromel and Alumel, is what we typical use as temperature sensors.
Link for Info regarding thermocouples: https://www.thermoworks.com/why_use_thermocouples

Step 5:
Apply a thin layer of aluminum foil to the chamber and on top of thermal couples. Do not cover electronics or handles with aluminum and avoid areas that do not have high bakeout temperatures such as, turbos and roughing pumps. Applying a thin layer of aluminum helps spread the heat provided by the heater tape, since aluminum is a good conductor of heat. If the heater tape is applied directly to a steel chamber you can potentially have hot spots because steel is not a good conductor of heat.
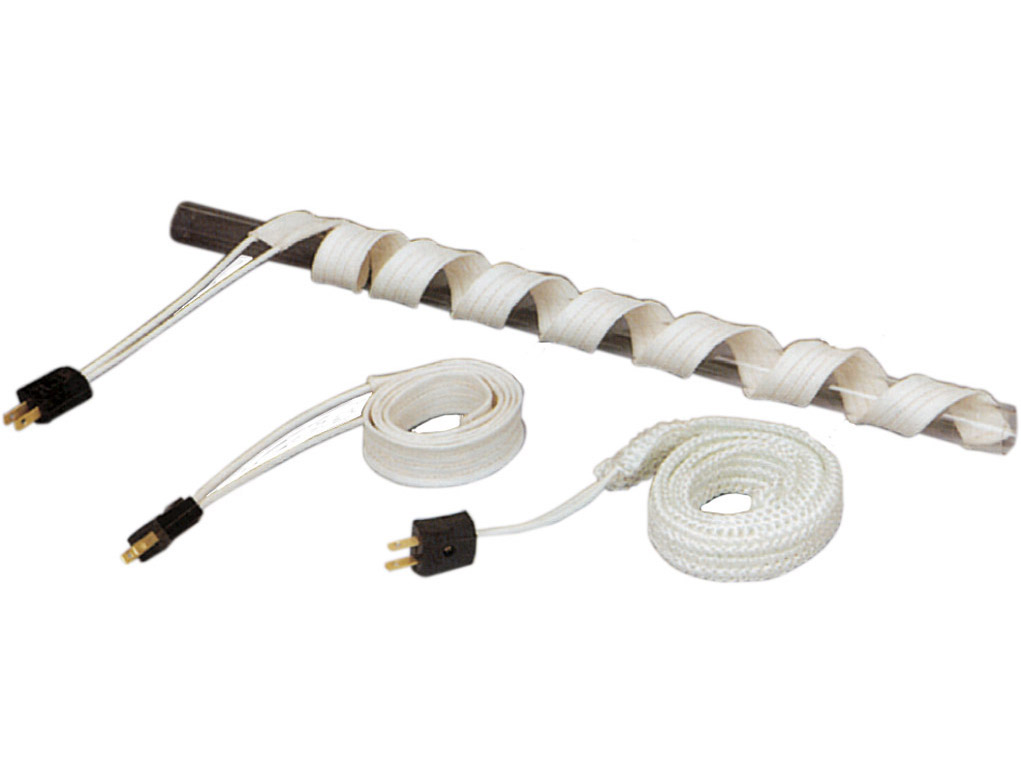
Step 6:
Start wrapping your chamber with heater tape in a uniform distribution as shown in the picture bellow. ** Remember not to overlap heater tape** this can cause over heating and damage to the material. Put gloves on when handling the heater tape because most contain fiber glass that can irritate your skin. Furthermore, be sure to leave sufficient space at the end of the tape for connecting to the PID controller.
Step 7:
Start wrapping your system with tinfoil try to reach all nooks and crannies for minimal heat escape. For this process using aluminum from the recycle trash bin is okay. Also, adding multiple layers of tinfoil helps the chamber reach high temperatures and keeps the top layer less hot. keeping the top layer cool keeps people safe from touching the system and burning themselves. An example of a good tinfoil wrap is shown bellow.

Step 8:
Connect your heater tape to the PID controller and start heating. A PID controller helps ramp the heat of your system at a steady pace.
Step 9:
Lastly cover your chamber with a heat warning sign to aware others of the activity.

Step 10:
When the bake is complete ramp the temperature of your system down to normal temp. When ramp is complete remove tinfoil/heater tape and start adding electronics back.

bakeout supplies in B758 (B757?)